1. The xGenConnect should be located away from
damp areas (e.g. bathrooms, kitchens), away from
sources of heat, dust or interference (e.g. air
conditioners, washing machines, dryers,
refrigerators) and away from external walls.
Due to safety reasons it is not allowed to wall-
mount the device higher that 2 meters from the
floor.
2. The metal enclosure should be installed with the
door opening from the top to bottom.
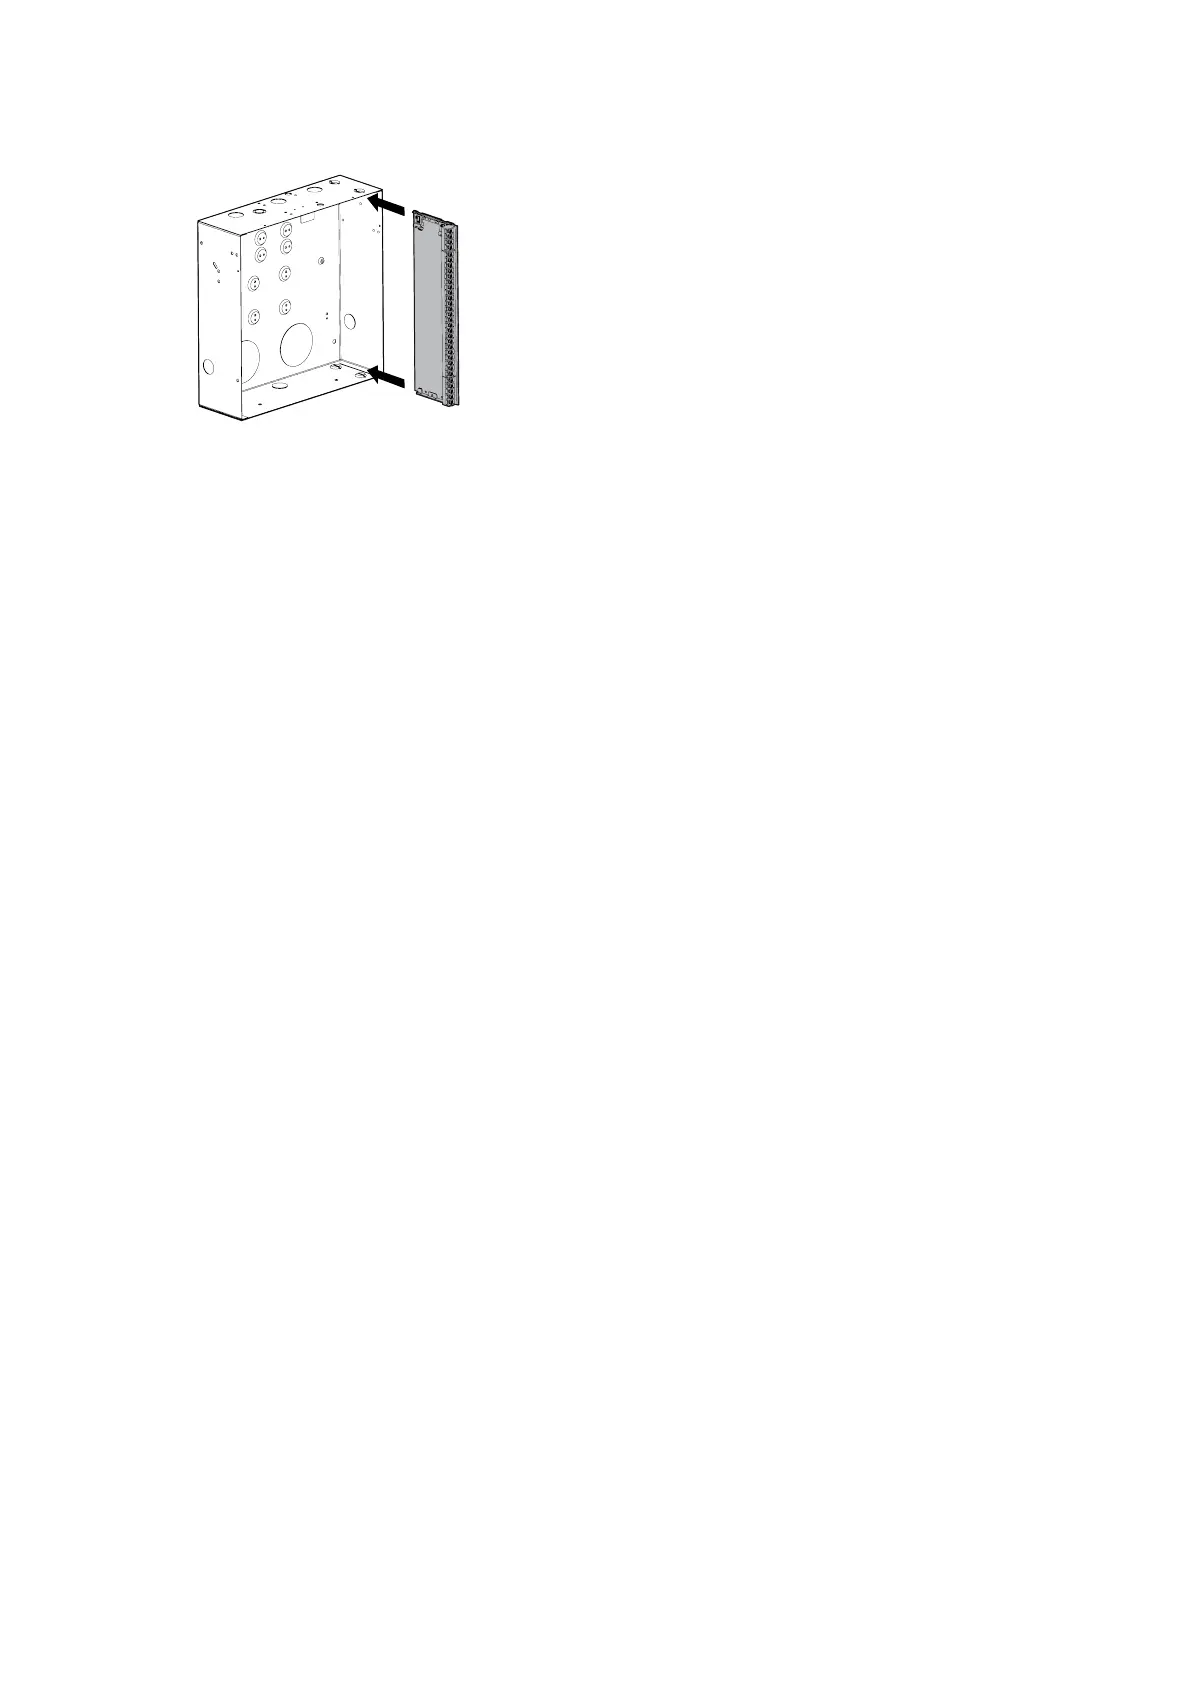
3. Guides are cut into the enclosure to hold the
panel, two on the top and two on the bottom. Two
plastic brackets are pre-installed on the
xGenConnect. Slide the panel into the guides as
shown in the diagram. The terminal strip should
face towards you once installed.
4. A plastic strap is provided to allow the door to
form a temporary surface to hold light parts.
5. When installing permanent, fixed wiring, insert an
easily accessible, dedicated all-pole circuit
breaker in the power distribution network.

 Loading...