15
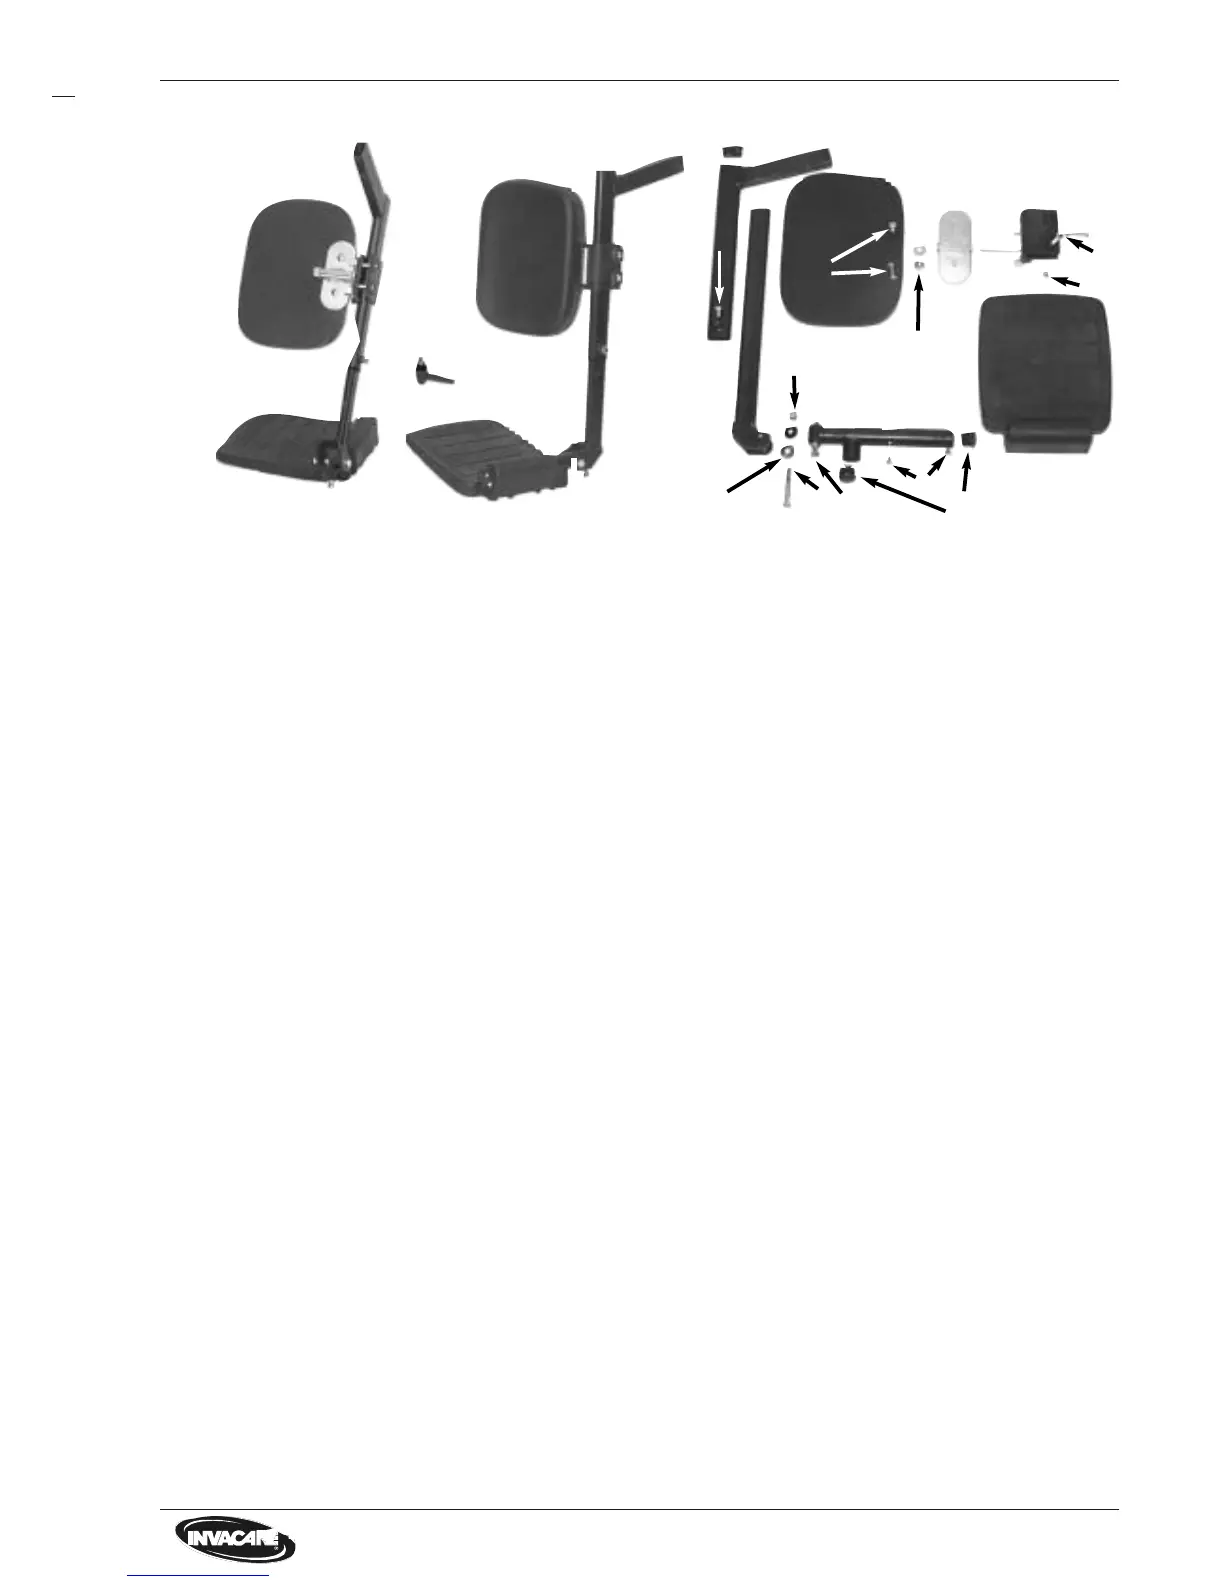
7.2 Legrests
Legrests compl. Legrest
Parts
1 Legrest, top 2 Insertion tube 3 Footplate mount
4 Footplate 5 Calfsupport holder 6 Calfsupport
7 Calf pad mount 8 Calfsupport pivot 9 2 Plastic discs 17x6,5
10 Clamping lever M6x10 11 Hexagon head screw M6x10 12 Fillister-head screw M6x16
13 Countersunk screw M5x25 14 Nut M5 (self locking) 15 Screw M6x45
16 Nut M6 17 Nut M8 18 Disc 8,4
19 Fillister-head self-tapping screw 20 Hat nut M6 21 Slide SL 18
22 Slide F30x15 23 Clamping sleeve 5x20 (Not shown, belongs to 7 and 8.)
2
2
1
2
3
4
4
4
5
6
6
6
1
2
7
8
9
22
11
20
15,16
21
19
12
17
18
13
14
10
• Screws loose?
• Calfsupport damaged?
• Footplate damaged?
• Footplate mount damaged?
• Welded joints or insertion tube defective?
• Welded joints or top legrest defective?
• Calfsupport pivot goes heavily, defective?
• Slides missing or damaged?
> Tighten screws.
> Replace calfsupport.
> Replace footplate.
> Replace footplate mount.
> Replace insertion tube.
> Replace top of legrest.
> Make pivot moving or replace.
> Replace slide.
Check Action
Complete disassembly:
• Bring seat system in service position and arrest.
• Release clamping lever (10) and draw off legrest from chassis.
• Release hexagon head screw und draw off top of legrest from insertion tube.
• Release fillister-head screwand draw off calfsupport.
• Release countersunk screws (13 and nuts (14) and remove calf pad mount(7).
• Remove nut (17) and disc (18)and remove calfsupport holder (5) from pivot (8).
• Remove clamping sleeve (23) and remove calfsupport pivot (8) from clip part (7).
• Remove tin screws (19) and draw off footplate (4) from footplate mount.
• Remove screw (15) with hatnut (20) and discs (9) and draw off footplate mount from insertion tube.
• Release slide (21/22) from footplate mount/top of legrest with a screwdriver.
Assembly
• Assembly is carried out in reverse order.
NOTE:
• The screw (15) with nut (16) serves for adjusting of footplate.
• Don´t tighten the screw (15) with hatnut (20) and nut (17) too strong.