32
6
5
7
1
3
2
4
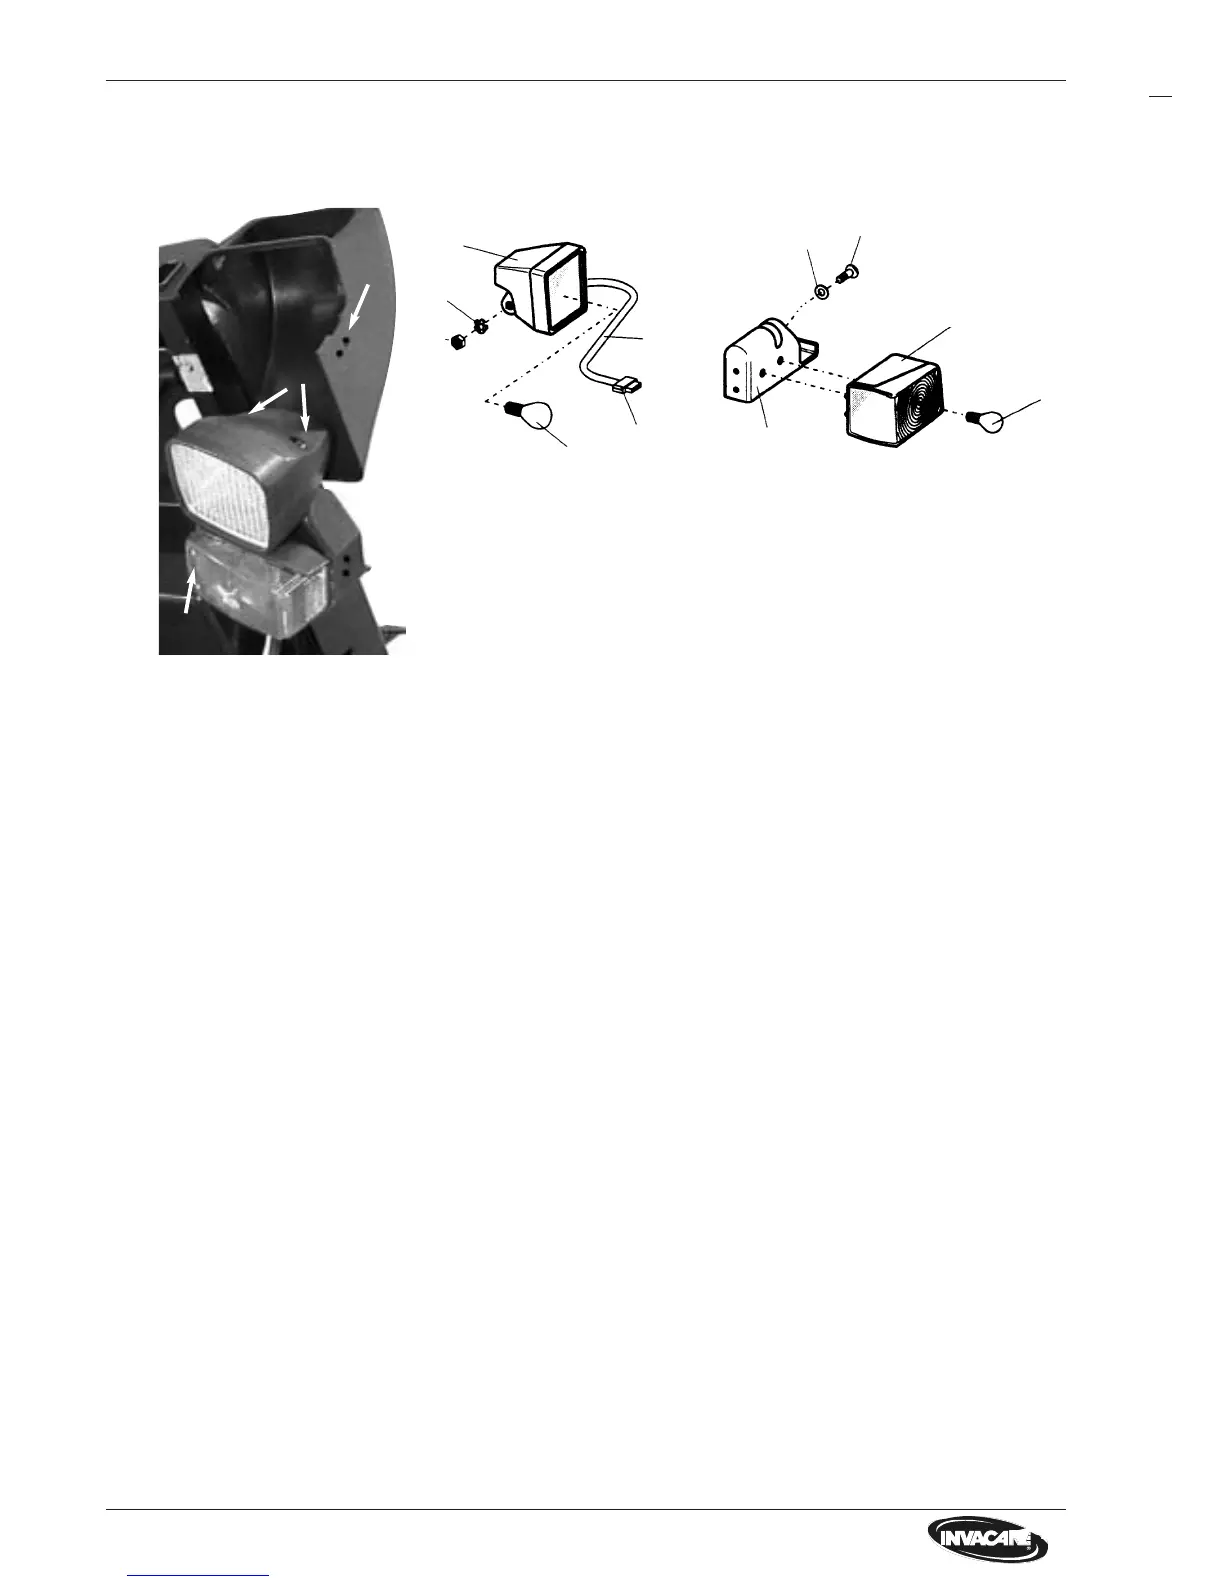
1 Seatshell 2 2 Plastic rivets
3 2 Cutting screws 4 2 Cutting screws
5 Lampholder front 6 Casing with headlights
7 Indicator compl.. 8 Bulb E10, 12V/2,4W
9 Bulb 12V/10W 10 Cable form with plug (15)
11 Screw M6x30 12 Disc 6,4
13 Nut M6 14 Disc 6,4
Front lighting
Front lighting, single parts
11.0 Checks and repair work at lighting system
11.1 Lighting system front
NOTE:
• Before controlling the lighting
system secure that batteries are
loaded.
• Switch on lights at remote for
control.
• Front lighting failured
completely?
• One indicator defective?
• One headlight defective?
> Replace light-/servo
module
> Replace bulb.
> Replace bulb.
Check Action
Replace indicator lamp
• Release cutting screws (4) and take off indicator cap.
• Remove indicator bulb out of bayonet socket and replace.
Replace headlight bulb
• Bring seat system in service position and arrest.
• Remove plastic rivets (2) with a screwdriver and let lighting system fall down out of seatshell.
• Release cutting screws (3) and take off upper part of casing (6).
• Take out headlight of bottom part of casing, pull out socket and replace bulb.
Complete disassembly of lighting unit
• Take lighting unit out of seatshell and remove lamp. See above.
• Release plug (15) from connector row (at back of chassis) and remove cable binder.
• Remove lighting unit completely out of seatshell.
• Remove screw (11) with nut (13) and discs (12, 14) and take off headlight casing (6) from lampholder (5).
• Open indicator, remove lamp and mirror, solder off cable and screw off indicator casing from lampholder (5).
Assembly
• Assembly is carried out in reverse order.
NOTE:
• Note connecting order.
6
14
8
13
15
10
5
9
7
11
12