SECTION 6—FRONT RIGGINGS
TDX™ Wheelchairs 72 Part No 1114809
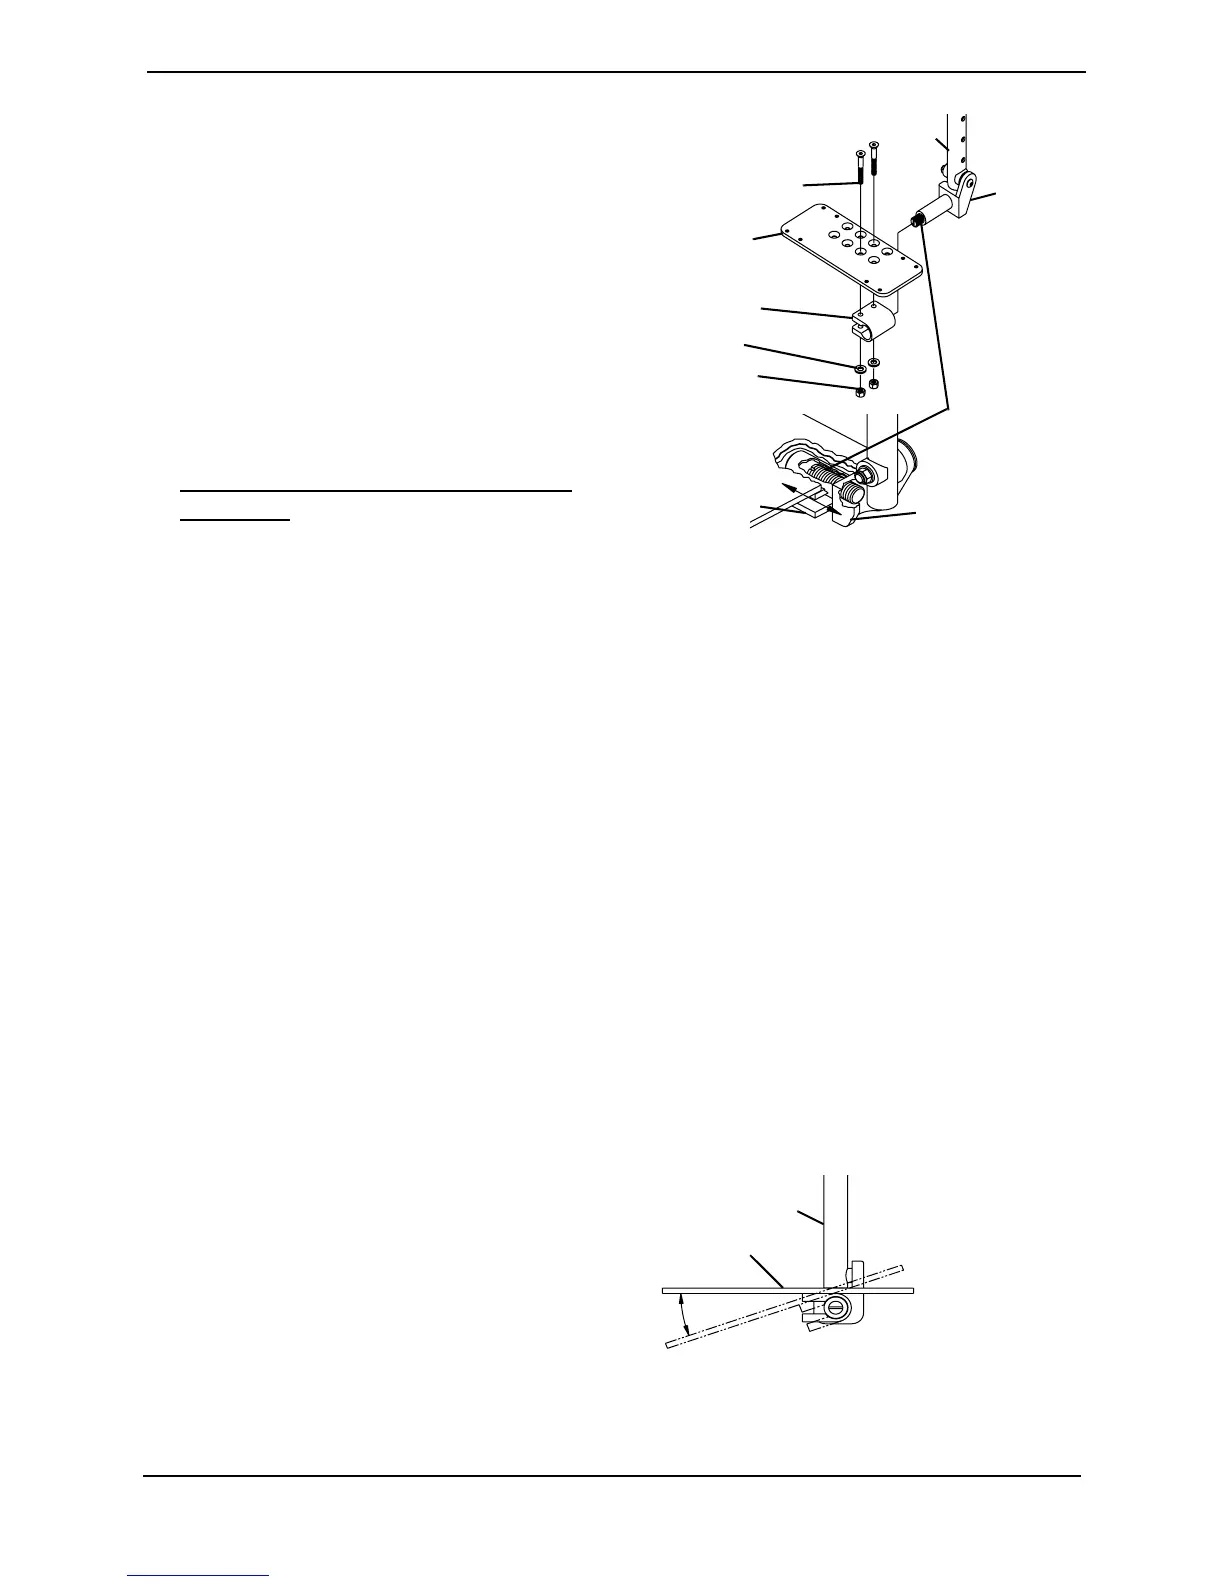
Installing Adjustable Angle
Flip-up Footplates
NOTE: For this procedure, refer to
FIGURE 6.9.
1. Slide the half clamp over the footplate
hinge.
2. Hand tighten the two flat screws that
secure the footplate to the half clamp.
3. Adjust the footplates to the necessary
angle and depth for the user. Refer to
Adjusting Adjustable Angle Flip-Up
Footplates on page 72.
FIGURE 6.9 Installing Adjustable Angle
Flip-up Footplates
Adjusting Adjustable Angle Flip-Up Footplates
Depth Adjustment
NOTE: For this procedure, refer to FIGURE 6.9.
1. Remove the two flat screws, washers and locknuts that secure footplate to the half
clamp.
NOTE: Observe the angle of the footplate for reinstallation.
2. Move footplate to one of four mounting positions.
NOTE: If desired depth is still not obtained, rotate the half clamp on the footplate hinge 180°.
3. Retighten the two flat screws, washers and locknuts.
NOTE: The settings for positioning the footplates on the half-clamps may vary for each footplate.
Angle Adjustment
NOTE: For this procedure, refer to FIGURE 6.9 and FIGURE 6.10.
1. Loosen, but DO NOT remove, the two
flat screws, washer and locknuts that
secure the footplate to the footplate
hinge (FIGURE 6.9).
2. Position the footplate to the necessary
angle to accommodate the user
(FIGURE 6.10).
3. Retighten the two flat screws, washers
and locknuts.
FIGURE 6.10 Angle Adjustment
Nylon
Adjustment
Screw
Footplat
Hinge
90° Footrest Support
Flat Screw
Footplate
Half Clamp
Washer
Locknut
Half Clamp
Footplate Hinge
Side View of
Footplate and
Footrest
Support
Footrest Support
Footplate





 To Next Page