SECTION 6—FRONT RIGGINGS
Part No 1114809 73 TDX™ Wheelchairs
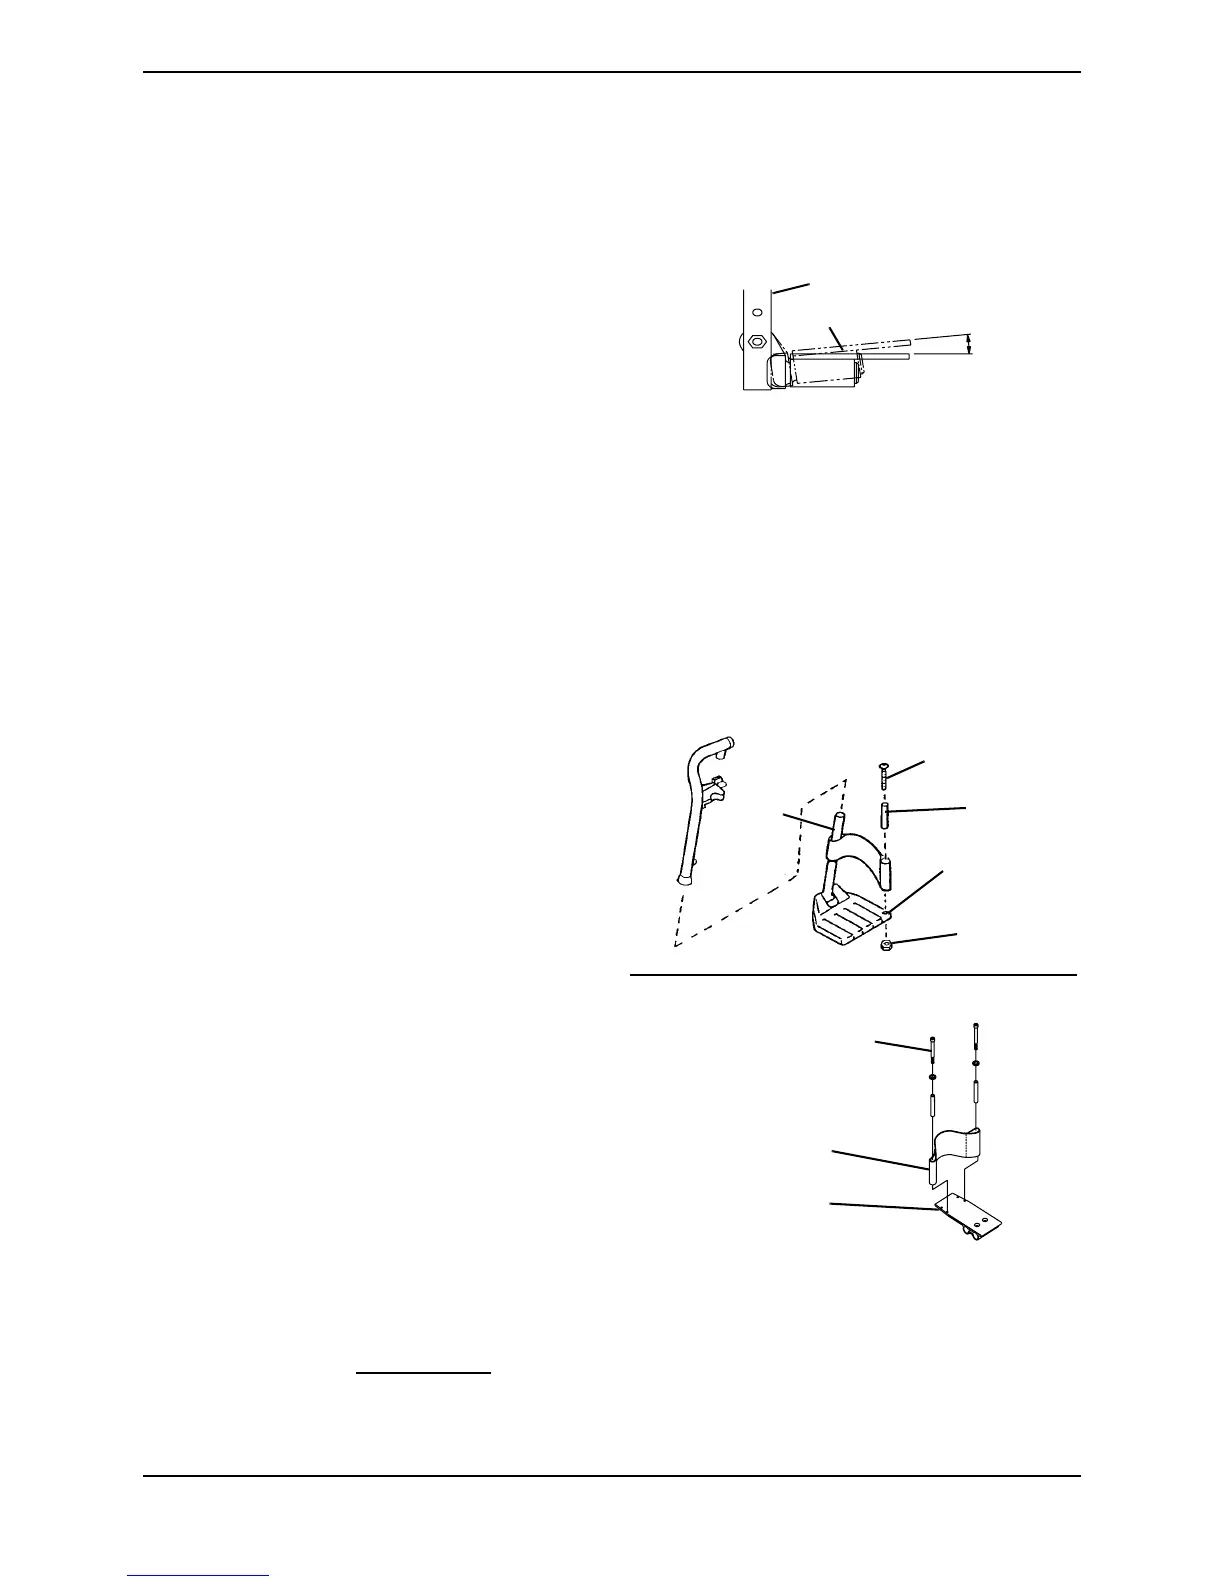
Perpendicular and/or Inversion/Eversion Adjustment
NOTE: For this procedure, refer to FIGURE 6.9 on page 72 and FIGURE 6.11.
NOTE: It is not necessary to remove the
footplate to perform this adjustment.
1. Insert a flathead screwdriver through
the half clamp on the footplate
(FIGURE 6.9).
2. Slowly turn nylon adjustment screw in
or out until footplate is perpendicular
to the footrest assembly or the desired
inversion or eversion is obtained
(FIGURE 6.11).
FIGURE 6.11 Perpendicular and/or
Inversion/Eversion Adjustment
Composite/Articulating Footplate Heel Loop
Replacement
NOTE: For this procedure, refer to FIGURE 6.12.
Disassembly
Composite
1. Remove the mounting screw and coved
washer that secures the lower half of
the footrest to the swingaway footrest
assembly.
2. Remove the lower footrest assembly.
3. Remove the mounting screw and
locknut that secure the heel loop to the
footrest.
4. Slide heel strap over cane of footrest
assembly.
Articulating
1. Remove the two mounting screws that
secure the heel loop to the articulating
footplate.
Assembly
1. Replace heel strap/loop.
2. Reverse steps in Disassembly to
assemble.
FIGURE 6.12 Composite/Articulating
Footplate Heel Loop Replacement
NOTE: When securing heel loop to the footrest assembly, tighten mounting screw until the spacer
is secure.
Front View of Footplate and Footrest Support
Footrest Support
Footplate
Composite
Articulating
Mounting Screw
Spacer
Composite
Footplate
Locknut
Mounting Screw
Heel Loop
Articulating
Footplate
Cane of
Footrest
Assembly










 To Next Page