Do you have a question about the iTronics ITB-100HD and is the answer not in the manual?
Defines the product's role as a supplementary device and limits manufacturer liability for recorded data.
Records FULL HD (1921x1080) at 24fps with a 144-degree diagonal field of view.
Records driving speed and coordinates, displaying them on a PC map.
Auto parking mode records on shock; Super Capacitor ensures safe recording during power loss.
Built-in impact sensor detects collision/sudden brake, marking data as event files.
Records audio, can be turned off for privacy; data is playable via iPASS BLACK PC player.
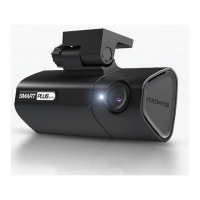
Features a compact, contemporary design and luxury SF coating; supports live video output.
Do not operate while driving; do not disassemble, repair, or modify the product.
Avoid solvents for cleaning; use only genuine parts; ensure stable 12-24V power source.
Avoid long-term placement inside vehicles, especially in extreme temperatures, to prevent damage.
Remove window obstructions and clean the camera lens regularly for optimal recording quality.
Ensure correct camera angle on re-installation and perform routine position checks.
Recording quality varies with lighting; product may cease operation if severely damaged or disconnected.
Check SD card for operation; avoid removing power or card during recording to prevent data loss.
Store card in a hard case for transport; use manufacturer-recommended SD cards for best performance.
SD cards have limited lifetime; back up important data to other storage devices regularly.
GPS reception may take 5-30 minutes; unstable signals do not affect basic recording functions.
Ensure GPS receiver is exposed through windshield, avoiding tinted areas or backward tilt.
Avoid using products that generate electromagnetic waves, as they can interfere with GPS reception.
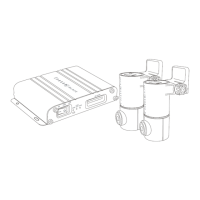
Lists the main unit, mounting cradle, adhesive tape, SD memory card, and SD card reader.
Includes power cable, user manual, cable holder, and optional video out cable.
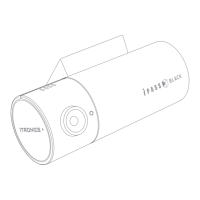
Identifies camera lens, parking mode LED, power LED, and MIC hole.
Details SD memory card slot, power/video output ports, and MIC on/off button.
Clean windshield; attach mounting cradle to the product using the connecting knob.
Adhere cradle to windshield, aligning camera lens; insert SD memory card into the product.
Align camera lens, connect power cable, and arrange cables with holders for completion.
Identify a fuse that provides power even when the vehicle engine is off using a testing device.
Connect UPC to the fuse; connect the negative end to a metal part of the vehicle.
Verify operation after engine start; manage SD card carefully when using UPC.
Rotate the fixing knob counterclockwise until loose, then detach the main unit from the cradle.
POWER LED shows power status and GPS connection; blinks until GPS is successfully connected.
Recording begins after 30 seconds with beep sounds; video and audio are stored on the SD card.
Impact sensor triggers LED blinks and saves data as an event file automatically.
Process last data for 5-10 seconds before turning off; do not remove SD card until beep sound.
Requires power connection; automatically activates after 5 minutes of vehicle inactivity.
Records only when shock or motion is detected, saving files as 'pmr_date.avi'.
Automatically exits parking mode and returns to normal recording upon detecting shock or motion.
Weak shocks/motion may not trigger recording; surrounding noises can sometimes initiate recording.
Insert SD card into reader, connect reader to PC's USB port.
Locate and double-click the 'ITBPCPlayuerSetup.exe' installer file.
Follow on-screen prompts, click 'Next' and 'Finish', and check for the desktop shortcut icon.
Insert SD card into reader, connect to PC, and launch the iPASS BLACK PC player application.
The PC player loads files from the SD card, displaying them in the file list window.
Select the SD card, load files, and play them sequentially by date and time.
Sort files by status (All, Shock, Parking, Normal), name, or date for easier management.
View impact graphs (X, Y, Z axes), driving speed, and GPS status on the playback screen.
Utilize keyboard shortcuts for file selection, playback control, and navigating through recordings.
Select to view front camera footage only, both front and rear, or review mode.
Keys for navigating files, playing, pausing, controlling playback speed, and volume.
Controls for video brightness, Night Vision, image capture, and rotating images.
Displays recorded files with date, time, and status icons (N, E, P) for easy identification.
Actions include selecting SD card, reading/deleting files, copying, and saving event images.
Adjust recording quality, brightness, shock sensitivity, and speed display options.
Configure parking mode activation, shock sensitivity, and motion detection sensitivity.
Set shock-sensing alarm, choose file deletion method, and configure the time zone.
Automatically deletes the oldest files when SD card capacity is exceeded.
Set saving capacity ratios for Normal, Event (Driving/Parking) files.
Explains lump vs. sequential deletion based on changes to recording mode settings.
Recognize file types (rec, evt, pmr) and understand saving time capacity per file.
Files are saved as specific types (rec_date.avi, evt_date.avi, pmr_date.avi) on USB storage.
Download the new firmware from the provider's website and unzip the file.
Copy the firmware file (.bin) to the root directory of the SD memory card.
Insert SD card into product, turn on power; update starts automatically with beep sound.
Verify the installed firmware version using the PC Player software.
Connect SD card to PC, run PC Player software, and click the SD card icon.
Select the SD card, click the 'Format' button, and choose the desired format type.
Details Normal vs. Recovery format; cautions against using Windows Explorer for formatting.
Press and hold the Microphone On/Off button for about 5 seconds to start formatting.
Press the Microphone On/Off button briefly; LED color indicates status (Red=On, Green=Off).
Connect AV cable from the main unit's video output to a compatible navigation/monitor.
Check the live driving video, adjust camera angle, and confirm proper recording is in progress.
Details sensor type, coverage, compression, resolution, frame rates, and audio recording capabilities.
Lists GPS, power input, physical size, weight, and operating temperature range.
| Brand | iTronics |
|---|---|
| Model | ITB-100HD |
| Category | Dash Cameras |
| Language | English |