6-56 4181384 First Edition
HYDRAULICS
6
Disassembly and Assembly
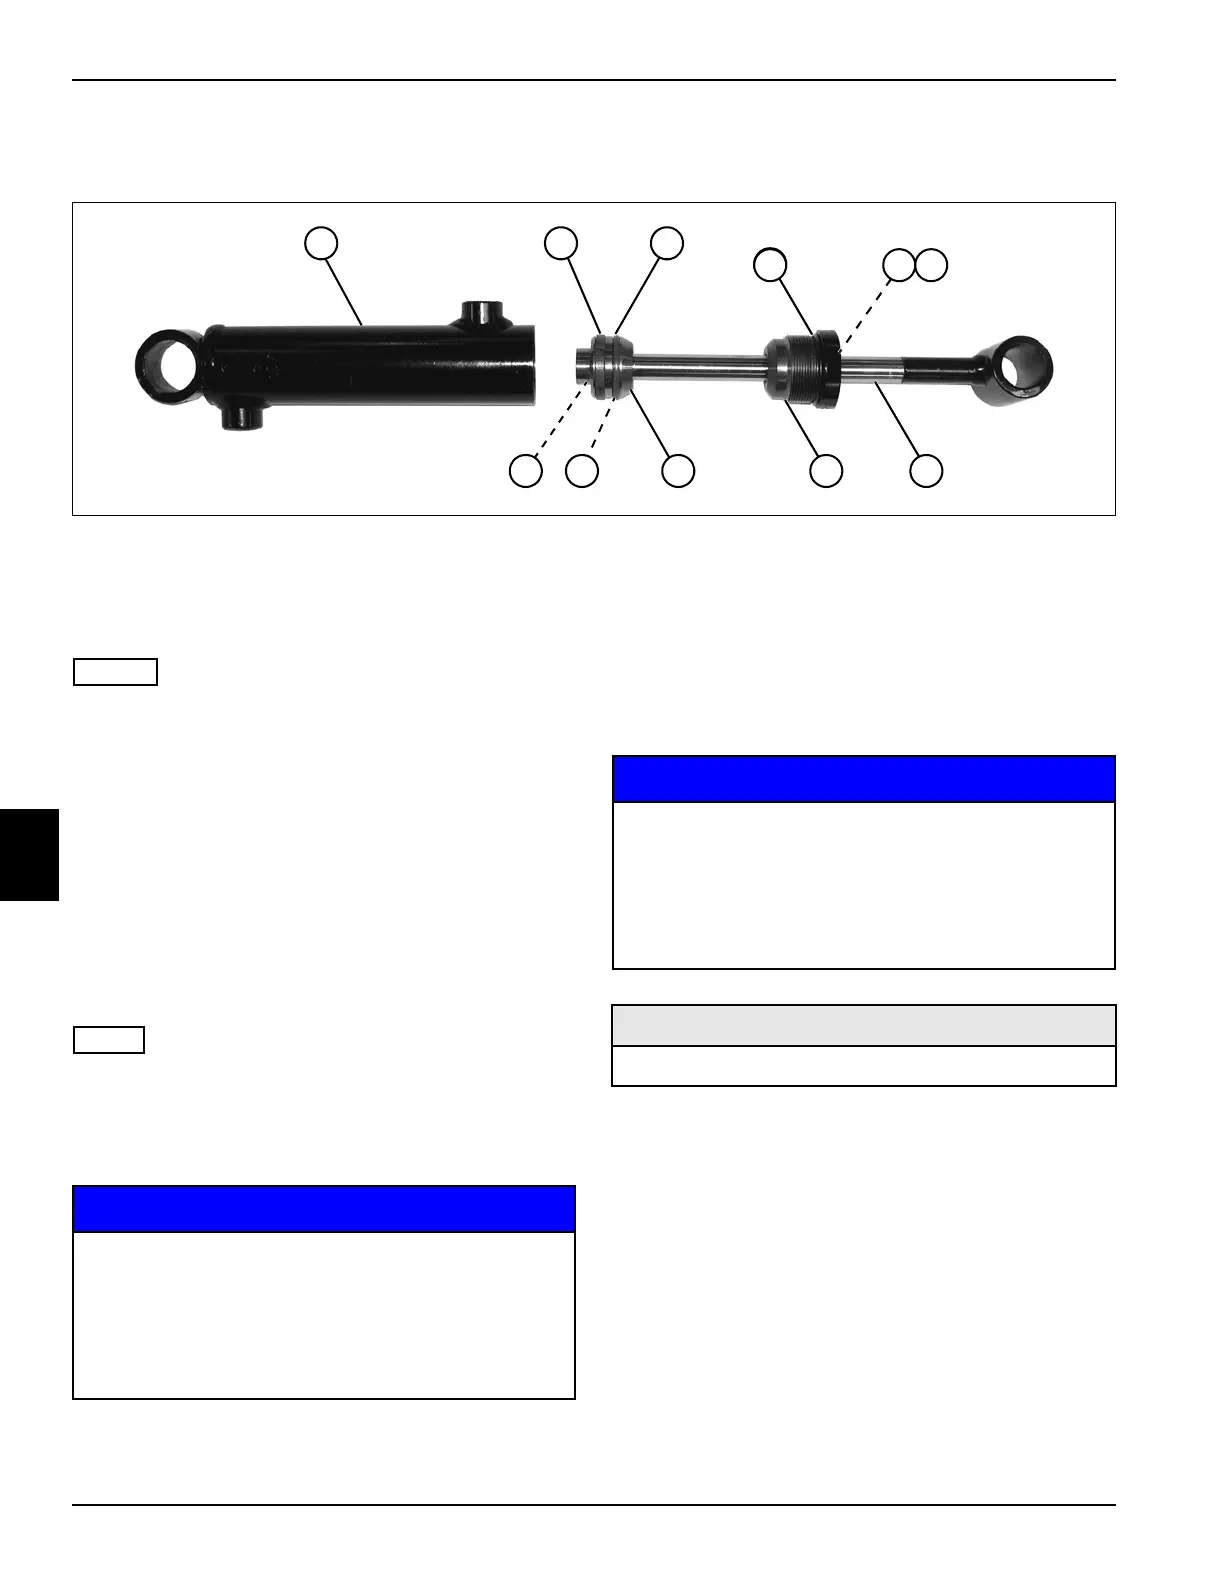
See Figure 6-53.
Figure 6-53
NOTES
• During repair of cylinder, use extreme care not to
damage the barrel, piston, rod, and sealing surfaces
of the cylinder.
• Seal kit accommodates more than one cylinder ram
design and may contain unused components. During
disassembly, retain and compare existing O-rings
and seals to seal kit components to ensure correct
O-rings and seals are used.
1. Drain oil from lift cylinder.
2. Disassemble the lift cylinder as shown.
3. Use a spanner wrench to remove rod guide assembly
(8) from barrel.
NOTE
Note orientation of rod end to barrel to ease assembly.
4. Pull rod assembly out of barrel.
5. Remove piston (9) from rod (7). Be careful not to
damage piston end when unscrewing from rod.
NOTICE
6. Clean all parts using clean solvent, and dry using
compressed air.
7. Inspect all parts for excessive wear, cracks, broken
parts and scoring of the cylinder barrel, piston, and
rod.
Assembly Notes
NOTICE
• Lubricate all parts, O-rings, seals, and wiper with
clean hydraulic oil before assembly.
• Assemble the lift cylinder by reversing the order of
disassembly.
1 Barrel 4 O-Ring 7 Rod 10 O-Ring
2 Piston Ring 5 Wiper Seal 8 Rod Guide 11 O-Ring
3 Seal 6 Rod Wiper 9 Piston
TN1318
1 2
4
6
3
8 7
4 5
91011
It is important that all components are absolutely
clean, as contamination can result in serious
damage and/or improper operation.
Never use shop towels or rags to dry parts after
cleaning, as lint may clog passages. Dry parts
using compressed air.
It is important that all components are absolutely
clean, as contamination can result in serious
damage and/or improper operation.
Never use shop towels or rags to dry parts after
cleaning, as lint may clog passages. Dry parts
using compressed air.
Required Materials
Seal Kit (Jacobsen P/N 002301010)