Page 14
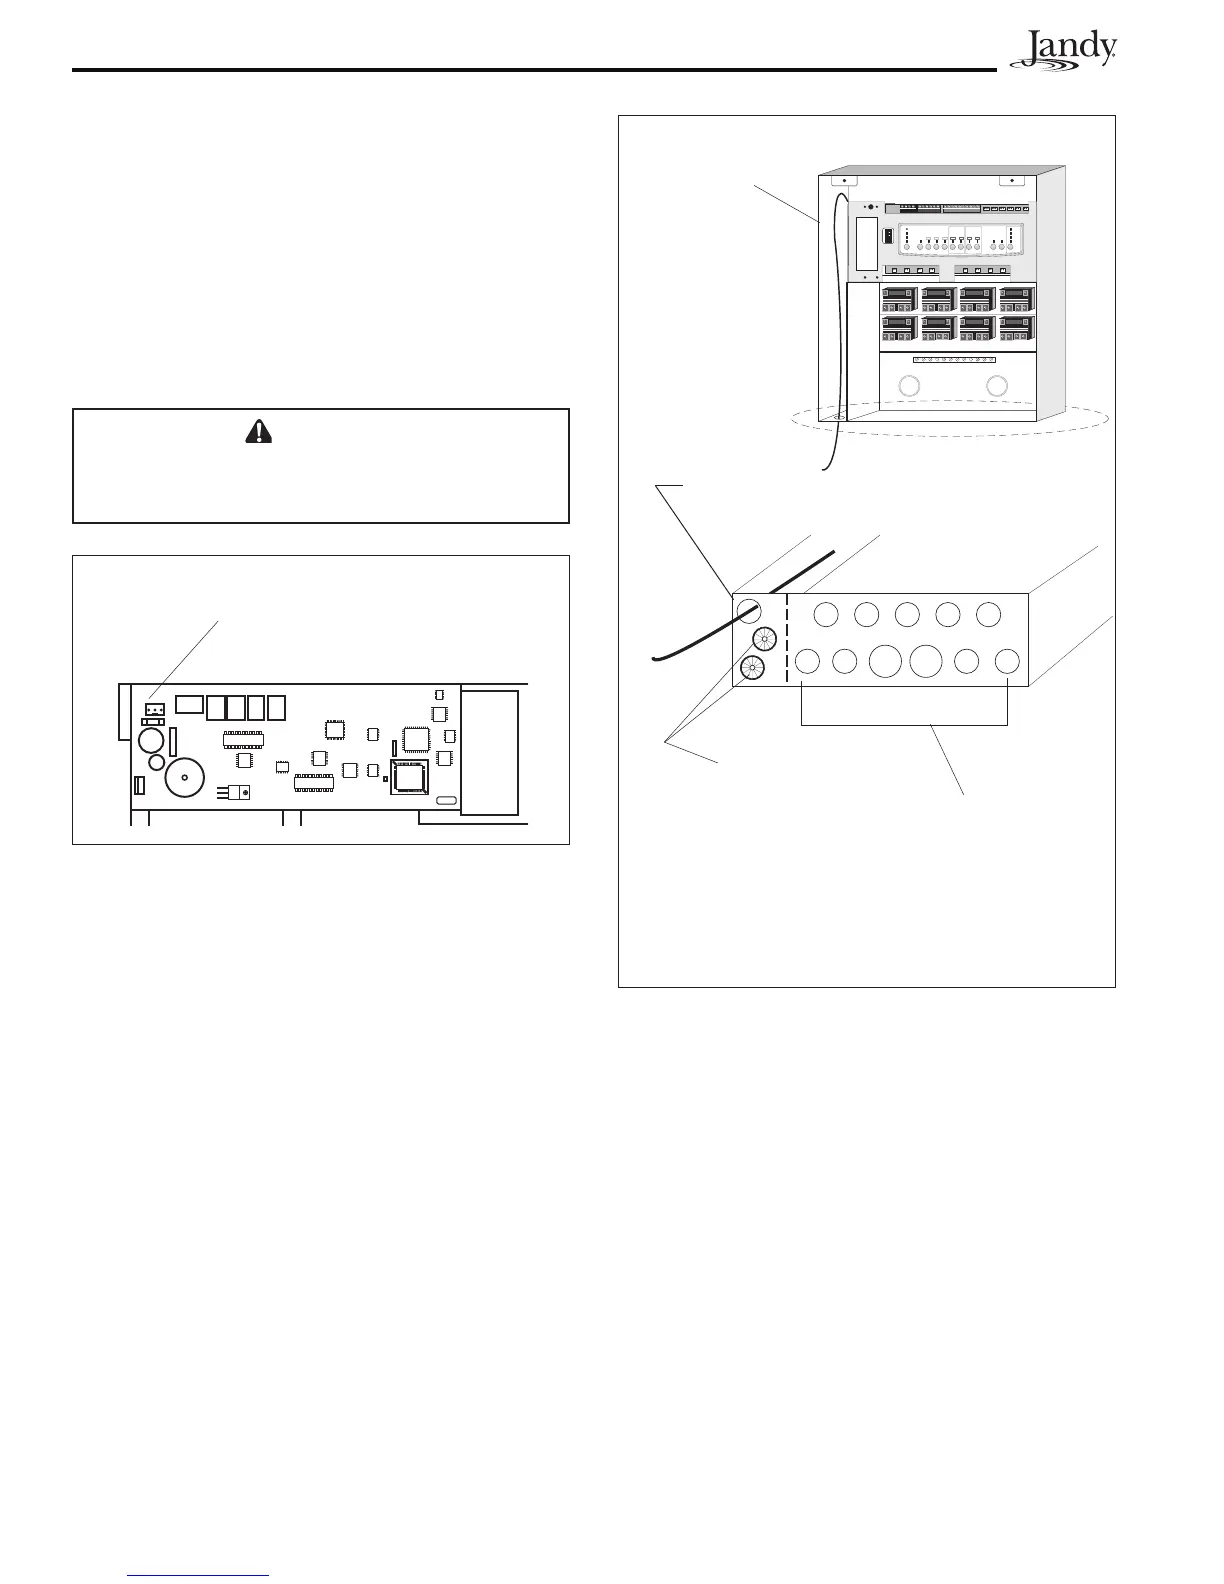
Figure 8. Control panel Cable to Power Center
PCB
Conduit Knockout for Low Voltage
Control Panel Wire
Heyco Fittings for
Low Voltage JVA
and Sensor Wires
Low Voltage
Raceway
High Voltage
Knockouts for
Conduit
(DO NOT run any Low
Voltage wires through
these knockouts)
3.3 LowVoltageWiring
Minimum wire size should be 22 AWG. If wire run
is more than 300 feet, larger wire should be used.
3.3.1 Bezel Connection
Plug the 24 VAC power plug from the transformer
into its 3-pin terminal on the back of the Power
Center PCB (see Figure 7). Mount the Bezel to
the Power Center using the screws provided. Keep
battery wires from pinching.
CAUTION
DO NOT INSTALL BATTERY
until ready to
power up system.
3.3.2 Control Panel Cable to Power Center
PCB
Make provision for the cable to be run between
the indoor Control Panel and the Power Center.
Never run high voltage and low voltage in the
same conduit. Pull cable through the knockout
with the Heyco fitting and into the low voltage
compartment. Strip back jacket 6". Strip each wire
a ¼" and connect to the red, 4-pin connector on
the Power Center PCB. A multiplex kit may be
required if there are more than two cables running
to a red, 4-pin connector. See Figure 8.
Figure 7. Power Center PCB (back view)
24 VAC Power Plug
Connection

 Loading...