Page 22
3.9.3 MultipleAquaLinkRSOneTouch
Control Panel Installation
The AquaLink RS allows each system to support
a maximum of 4 indoor control panels (see Figure
28). The control panels may be wired "in series"
starting from the first control panel (solid lines), or
wired "in parallel" from the AquaLink RS Power
Center (dotted lines), or any combination of the
two. In other words, any number of Indoor Control
Panels and/or Power Centers can be connected
by means of the red, 4-pin terminal bar in any
combination of "series" or "parallel" wiring.
NOTE Minimum wire size should be 22 AWG. If more
than one control panel is installed, or the length
of run is more than 300 feet, larger wire should
be used.
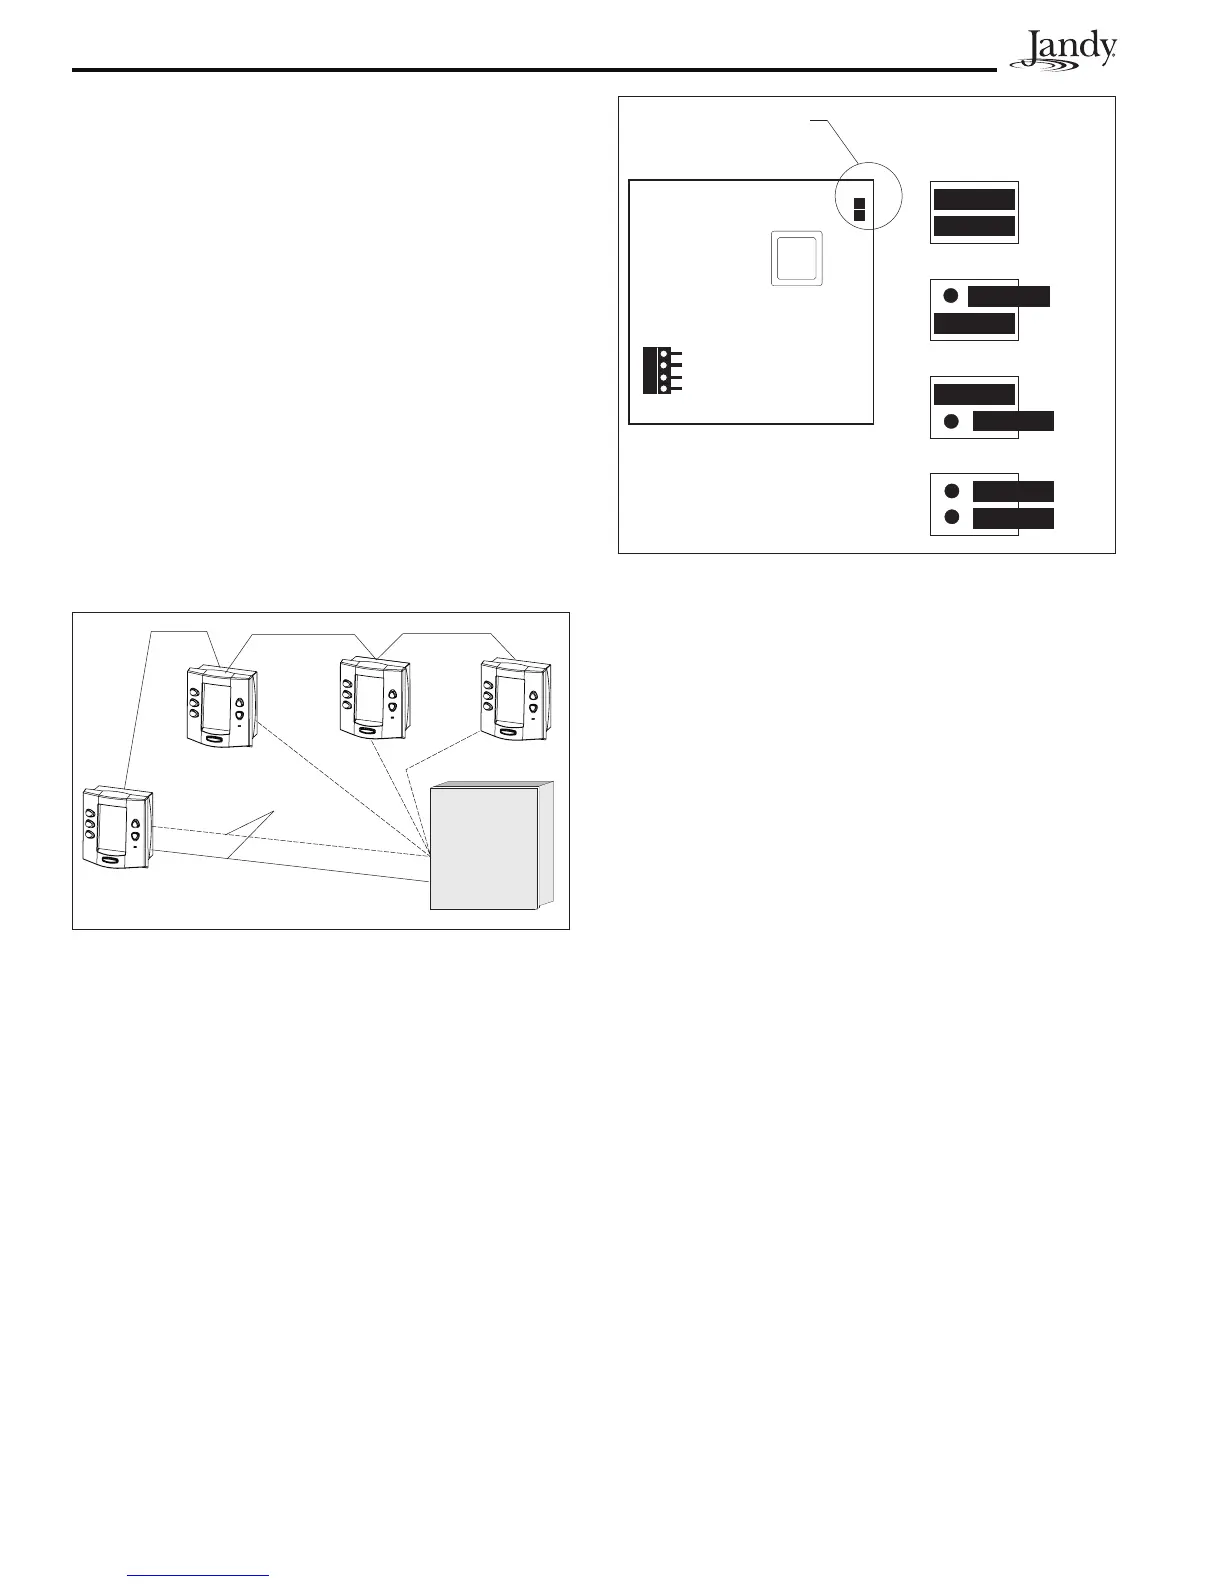
3.9.4 AquaLinkRSOneTouchControlPanel
Jumper Settings
Move these jumpers only when installing more
than one control panel on a system (see Figure 29).
The jumpers are used to give each control panel a
unique system address. When replacing an existing
control panel, change the jumper settings to match
those on the one being replaced.
NOTE If an AquaLink RS Personal Computer Interface
is installed, the AquaLink RS system will
recognize the interface as the fourth OneTouch
control panel.
3.10 Wireless OneTouch Control Panel
Installation
Installation Considerations. The transceivers
will transmit through walls and around corners.
Steel framing, aluminum siding, wrought iron,
cyclone fences, leaded glass, microwave ovens,
and other 2.4 GHz frequency items may inhibit/
prevent communication between the Wireless
AquaLink RS Control Panel and the Power Center.
The transceivers do not require line of sight to
communicate. To optimize communication, locate
transceivers to minimize interference. The Battery
Wireless AquaLink RS system requires OneTouch
Indoor PCB revision "E" or later and firmware
revision "B11" or later in order to work properly.
NOTE All new Wireless AquaLink RS indoor and
outdoor transceiver boards (PCB Assembly
7983 Rev B) use a C03 (or later) circuit chip
and are not compatible with the earlier
revision of the PCB that use a C02 (or earlier)
chip.
3.10.1 OutdoorTransceiverJ-boxInstallation
1. Turn off all power to the Power Center.
2. Mount the Outdoor Transceiver J-box at
least 6' above the ground and at least 8'
from an air blower (see Figure 30).
3. Open the door to the Power Center and
remove the dead panel.
Back of
OneTouch
PCB
Figure 29. Jumper Settings for Multiple OneTouch
Control Panels
Jumper
Location
W2
W1
4 3 2 1
W2
W1
First Controller
Third Controller
W2
W1
Second Controller
W2
W1
Fourth Controller
W2
W1
Figure 28. Installing Multiple OneTouch Control
Panels
22 AWG
Minimum

 Loading...