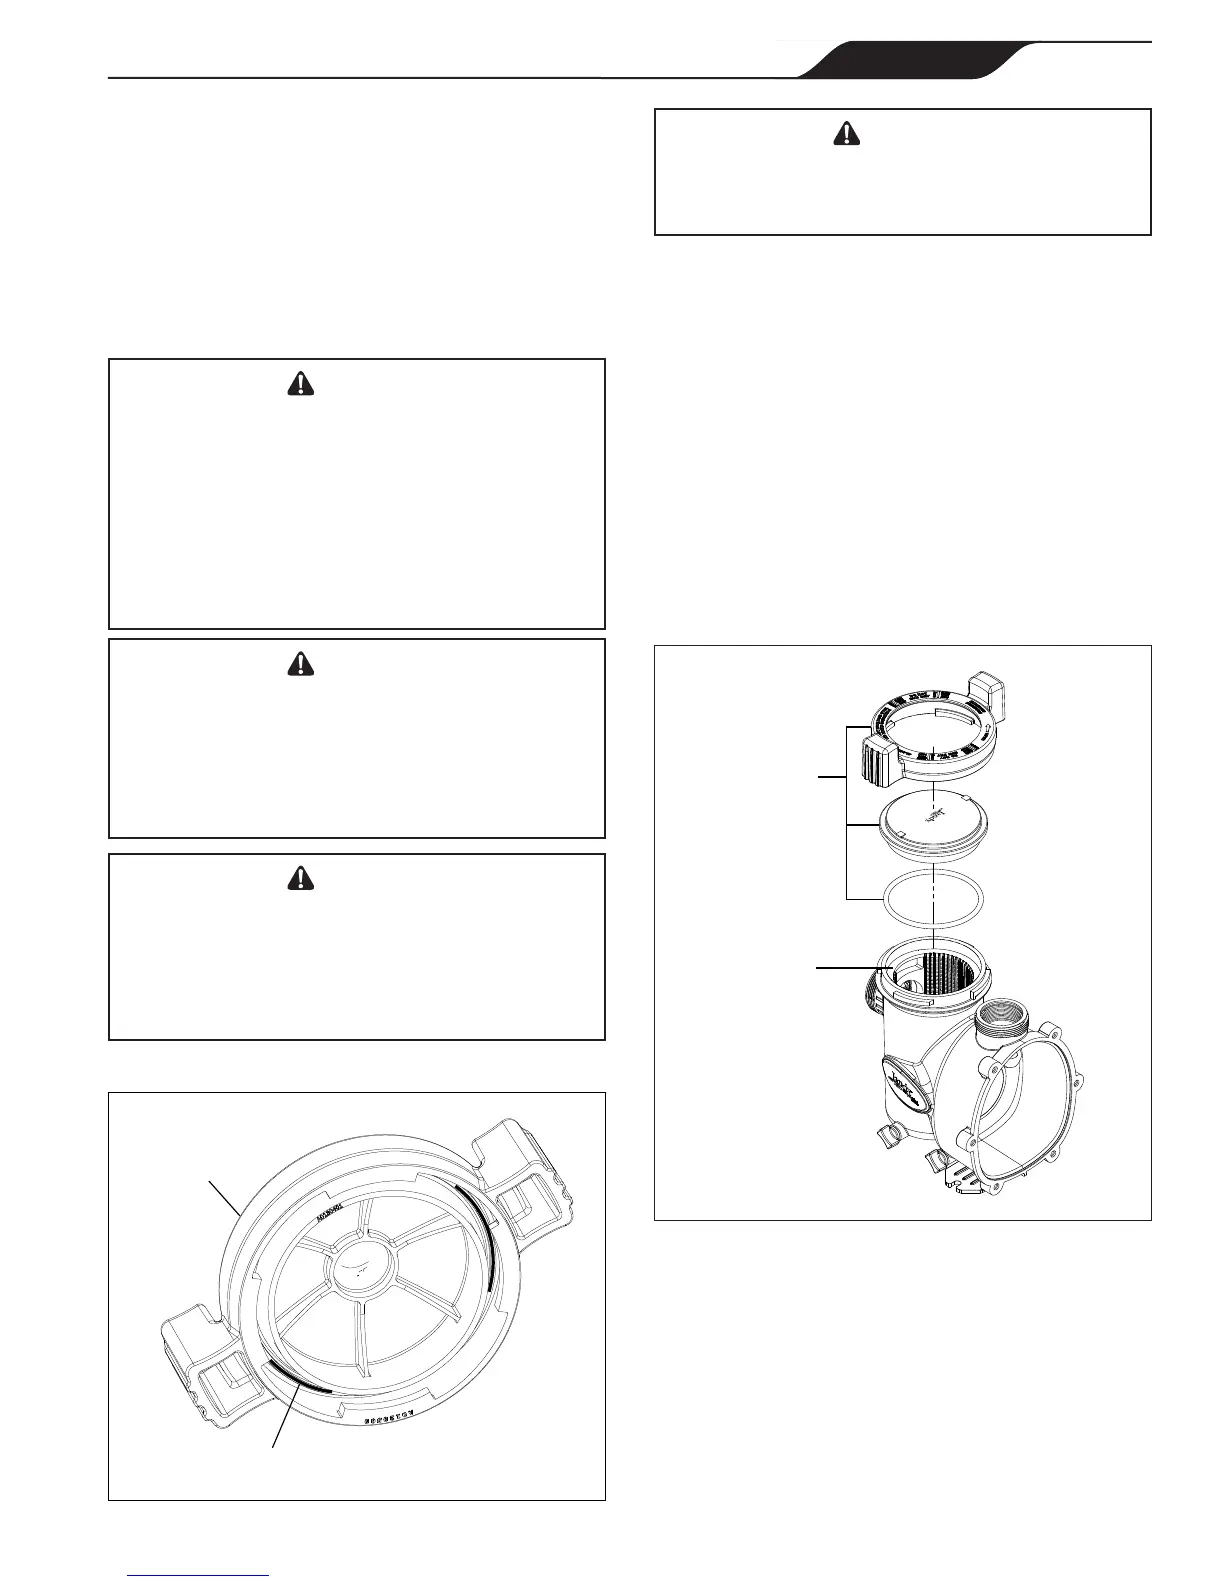
Lid with
Locking
Ring
and
Seal
Pump
Debris
Trap
Basket
(Inside
Pump)
Seal
Lid with
Locking
Ring
3. Make sure all necessary isolation valves are closed
to prevent pool water from reaching the pump.
4. Following the markings on the locking ring, turn
the ring counter-clockwise until the ‘START’
markings align with the ports. See Figures 6 and 7.
5. Carefully remove the lid with locking ring.
Whenpressuretestingasystemwithwater,air
isoftentrappedinthesystemduringthefilling
process.Thisairwillcompresswhenthesystem
ispressurized.Shouldthesystemfail,thistrapped
aircanpropeldebrisatahighspeedandcause
injury.Everyefforttoremovetrappedairmustbe
taken,includingopeningthebleedvalveonthe
filterandlooseningthepumpbasketlidwhilefilling
thepump.
Trappedairinthesystemcancausethefilter
lidtobeblownoff,whichcanresultindeath,
seriousinjury,orpropertydamage.Besureall
airisproperlypurgedoutofthesystembefore
operating.DONOTUSECOMPRESSEDAIRTO
PRESSURETESTORCHECKFORLEAKS.
Donotpressuretestabove35PSI.Pressure
testingmustbedonebyatrainedpool
professional.Circulationequipmentthatisnot
testedproperlymightfail,whichcouldresultin
severeinjuryorpropertydamage.
Whenpressuretestingthesystemwithwater,itis
veryimportanttomakesurethatthepumpbasket
lidiscompletelysecure.
1. Fill the system with water, using care to eliminate
trapped air.
2. Pressurize the system with water to no more than
35 PSI.
3. Close the valve to trap pressurized water in the
system.
4. Observe the system for leaks and/or pressure
decay.
5. If there are lid leaks, repeat this procedure. For
technical support, call 800.822.7933.
Page 13
Jandy
®
FloPro™ Variable-Speed Pump Series VS-FHP
|
Installation and Operation Manual
ENGLISH