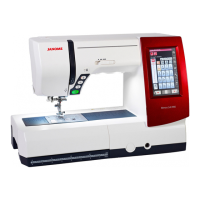
8
q
w
e
r
t
Machine Operating Buttons
q Start/stop button
Press this button to start or stop the machine.
The machine starts running slowly for the rst few
stitches, it then runs at the speed set by the speed control
slider. The machine runs slowly as long as this button is
pressed.
The button will turn red when the machine is running, and
green when it has been stopped.
Pressing and holding this button while sewing will slow
down the sewing speed and the machine will stop when
the button is released.
NOTES:
•Thestart/stopbuttoncannotbeusedwhenthefoot
control is connected to the machine.
•Youcanselectthedesiredstart-upspeedfrom
slow, normal or high (refer to page 79).
w Reverse button
When sewing stitch pattern U1, U4, U9, U10, Q1-Q3 or
BR1-5, the machine will sew in reverse as long as the
reverse button is pressed.
If stitch pattern U1, U4, U9, U10, Q1-Q3 or BR1-5, has
been selected and the foot control is not connected,
the machine will start sewing in reverse as long as the
reverse button is pressed.
If you press the reverse button when sewing any other
patterns, the machine will immediately sew locking
stitches and automatically stop.
e Auto-lock button
When sewing stitch pattern U1, U4, U9, U10, Q1-Q3 or
BR1-5, the machine will immediately sew locking stitches
and automatically stop when the auto-lock button is
pressed.
When sewing all other patterns, the machine will sew to
the end of the current pattern, sew locking stitches and
stop automatically.
The machine will trim the threads automatically after
locking the stitch when “Thread Cut after Auto-Lock”
option is turned on (refer to page 81).
r Needle up/down button
Press this button to bring the needle bar up or down.
The machine will stop with the needle in down position.
However, you can change the needle stop position in the
setting mode (refer to page 79).
NOTE:
The LED signal y is turned on when the down position
is selected and vice versa.
t Thread cutter button
Press this button when you nish sewing to trim the
threads. The needle bar automatically rises after trimming
the threads (refer to page 28).
NOTES:
•TheLEDsignalu blinks when the machine trims
threads.
•TheLEDsignalu turns on when “Thread Cut
after Auto-Lock” is ON in setting mode (refer to page
81).
•Usethethreadcutteronthefacecoverifthethread
is #30 or thicker.
u
y