85
operate. When the bedroom door is opened and the catch pieces connect,
the Slide 01 notication appears on the touchscreen display and the slide-
out can then be operated normally.
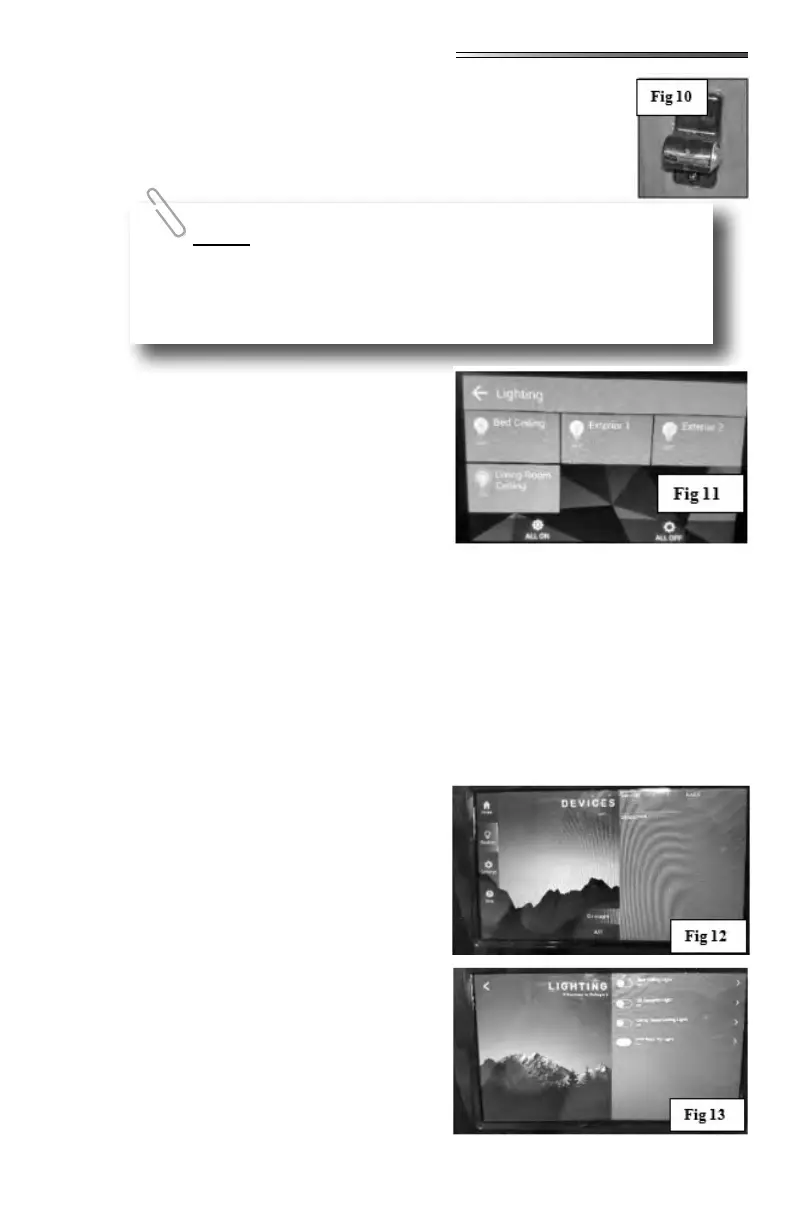
Select the LIGHTING
icon and the lighting control screen opens (
) allowing you to control lighting in your RV.
To operate, scroll through the list and nd the
light you want to control. Individual lighting con-
trols will appear on this screen. If the switch is
ON, the light bulb for each item will illuminate.
If the ALL ON switch is selected, all the lights
shown on the screen will turn ON. Likewise se-
lecting ALL OFF turns all the lights OFF.
All of the lights will light in steps to prevent a power surge.
The touchscreen looks completely dierent than the App screen ().
There are four selections on the left side of the screen: HOME, DEVICES, SETTINGS and
HELP. There are also 3 touch buttons on the screen for lighting:
. The
button will give you 4 lighting choices: Bed-
room ceiling light, Living room ceiling light or
outside security lights (DS/ODS). These lights
are individually selectable.
but-
tons will do just that. All lights will turn on, or
turn o depending on which switch is selected.
The DEVICES button will bring up
selections for slideouts, stabilizers, auto leveling
or lighting ( ). Pressing the LIGHTING
button brings up 4 choices for lights in the RV.
These are the same lighting selections found on
the HOME screen ().
This same safety feature applies to the slide-out switch on the wall
or on the Command Center switch panel. The bedroom door must be open
and the catch pieces connected for the bedroom slide to work.