·17·
5 Installation
5.1 Prepare Installation Tools
Please refers to “2.1 Prepare Installation Tools”.
5.2 Installation Direction and spacing dimension
Please refers to “2.2 Installation Direction and spacing dimension”.
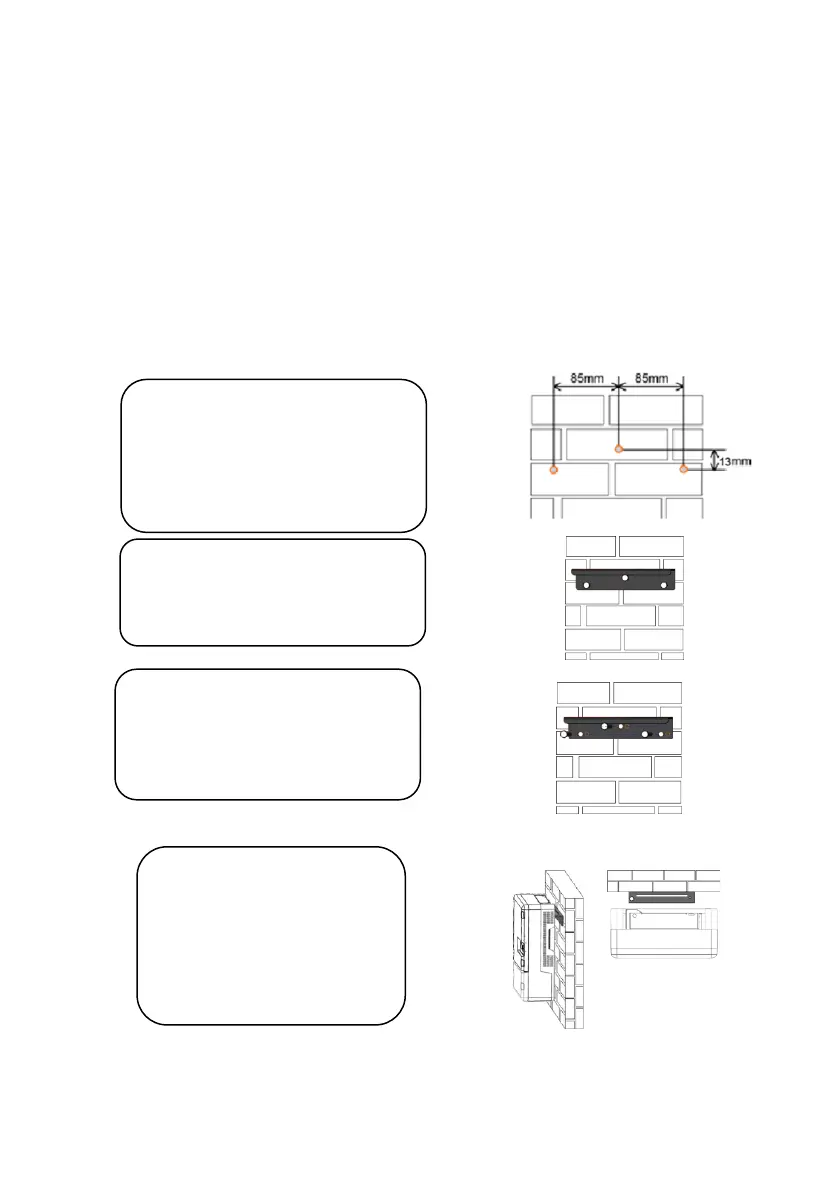
5.3 Installation of Inverter
Step1:
Drill holes in the selected
installation position according to
the size and shape of installation
bracket.
Step2:
Fix installation bracket in the
located holes with bolts.
Step3:
Tighten the bolts, make the bolts
cling to the wall.
Step4:
Hang firmly inverter onto
the installation bracket,
then lock the hole.