·27·
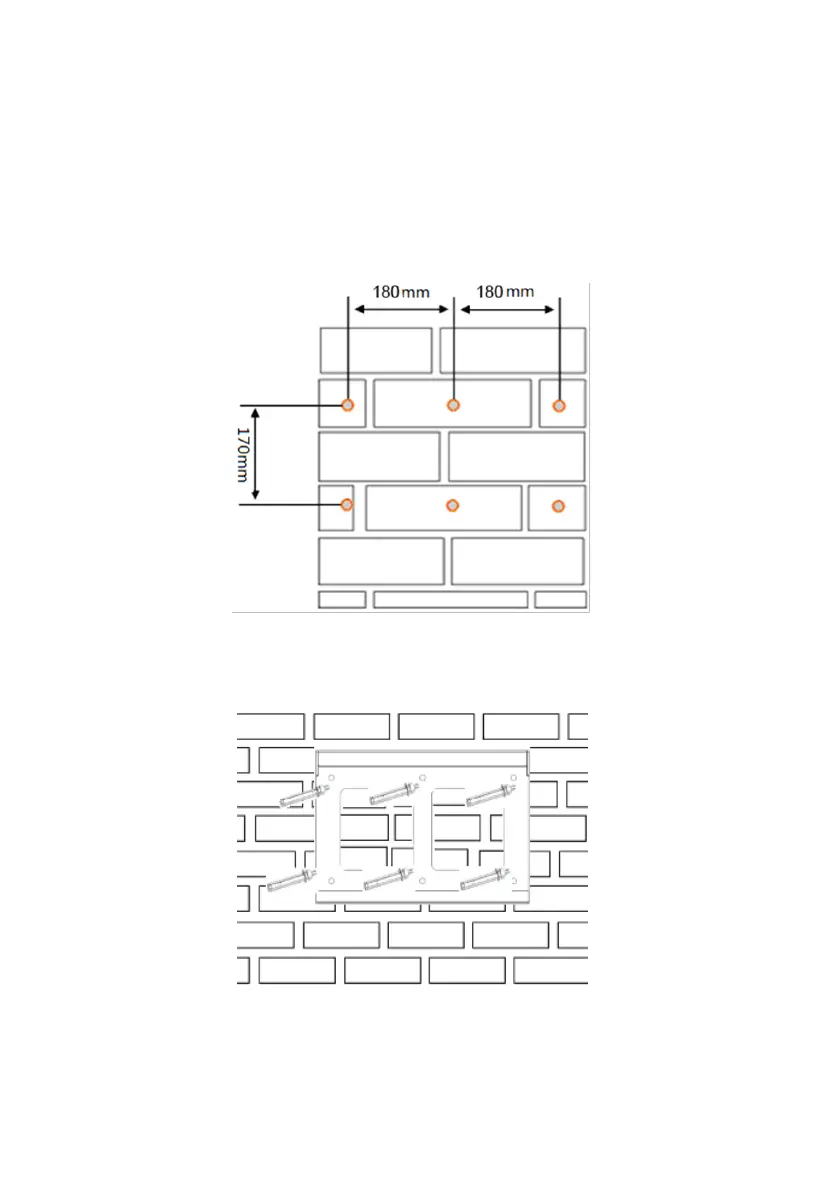
Step 1: Select an appropriate hole on the wall according to the size of the
inverter. It is recommended to drill holes with a diameter of 8+1/-0mm, a depth
of 60+5/-0mm, a spacing between left and right holes of 180mm, and a
spacing between upper and lower holes of 170mm, and then drive the
expansion bolt into the hole
Figure 5-3 Bitmap of the JNPxH mounting hole
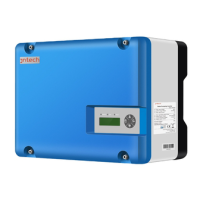
Step 2: Use expansion bolts to fix the mounting sheet metal to the wall. Lock
the expansion bolt until the expansion bolt is attached to the wall.
Figure 5-4 Installation of expansion bolts
Step 3: Hang the mounting lug on the back of the inverter onto the mounting
sheet metal until the inverter is firmly installed on the panel, then release the
inverter.11 Appendix B