140
POWERHEAD
ASSEMBLY
IMPORTANT: Replace connecting rod assem-
bly if proper cap and rod alignment cannot be
achieved.
Tighten the screws in stages to a final torque of 60
to 70 in. lbs. (7.0 to 7.5 N·m).
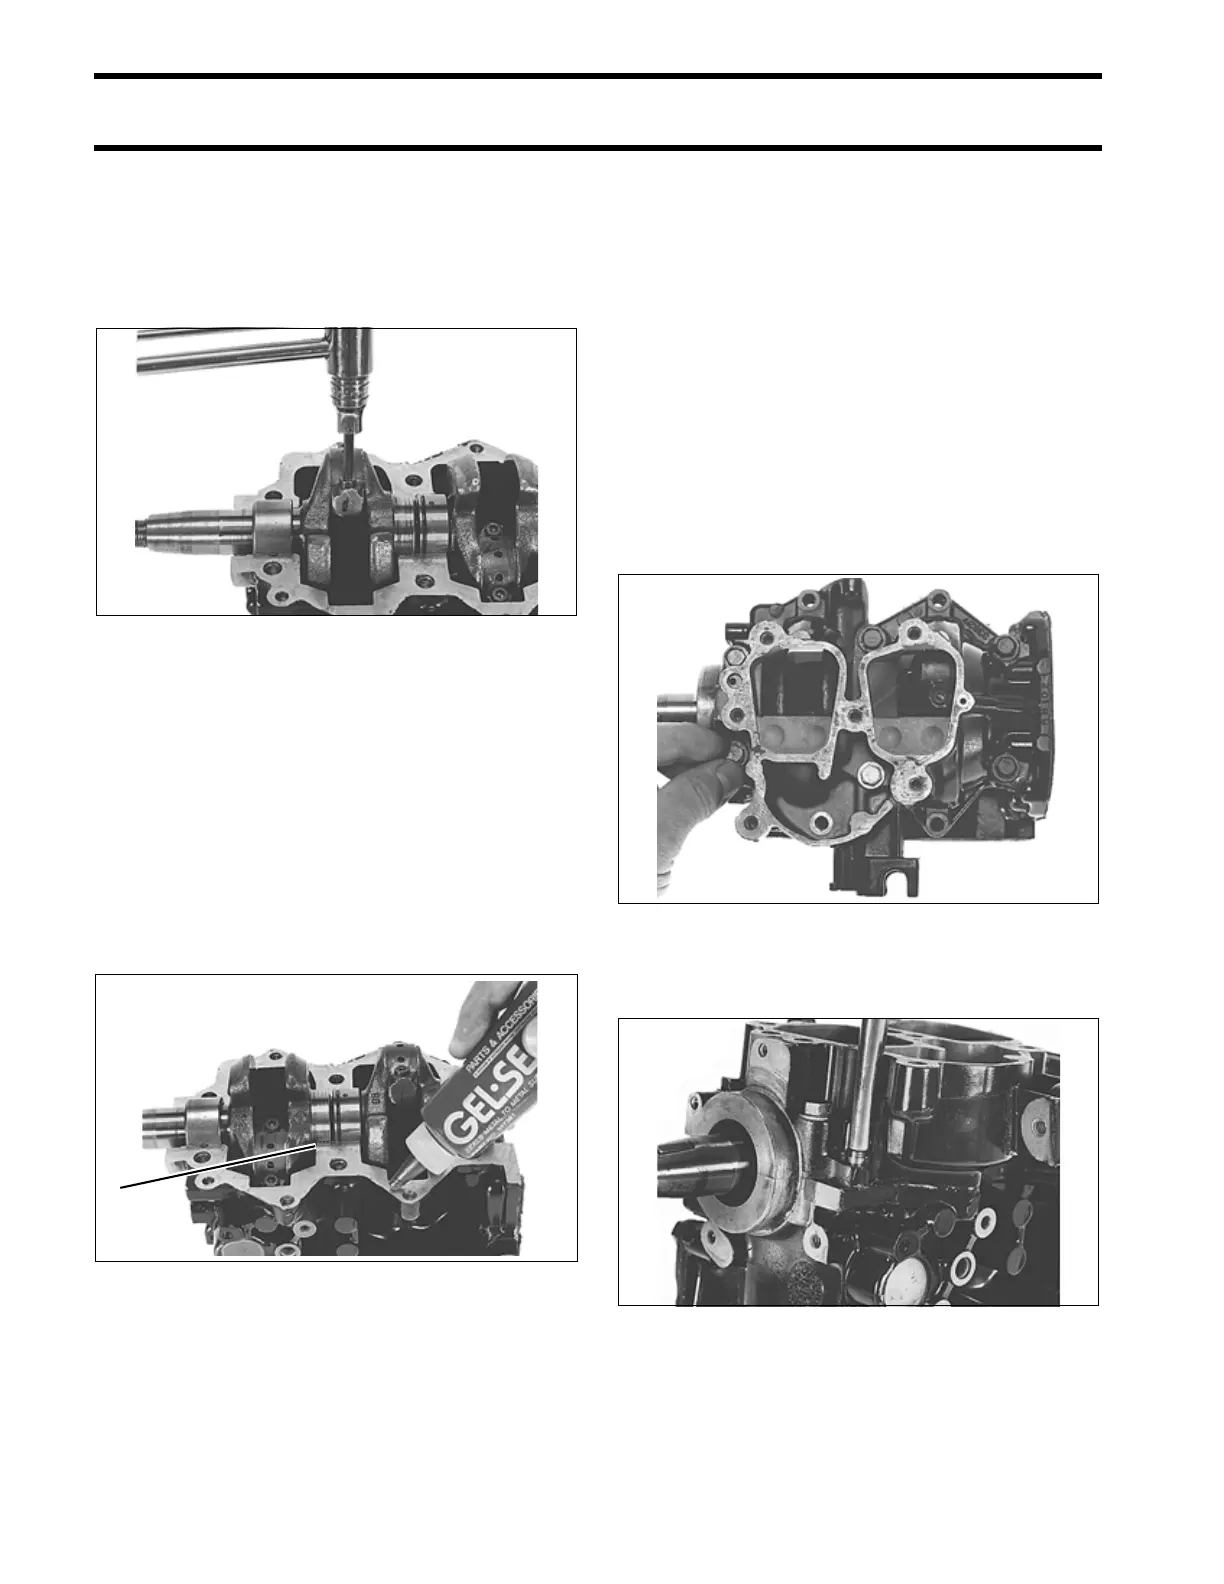
Thoroughly clean and degrease the mating
flanges of the crankcase and cylinder block with a
non-petroleum based solvent, such as isopropyl
alcohol or acetone, and let air dry.
Apply Locquic Primer to the mating flange of the
crankcase and let air dry.
Use a small brush to dab a thin, even coat of Gel-
Seal II sealant to the cylinder block mating flange.
The application must not come within 1/4 in. (6.4
mm) of the labyrinth seals and bearings.
IMPORTANT: Gel-Seal II has a shelf life of at
least one year when stored at room temperature.
Test the Gel-Seal II or replace it if the age of the
tube can not be determined. Using old Gel-Seal II
could cause crankcase air leaks.
IMPORTANT: If Locquic Primer is used, crank-
case halves must be assembled and tightened
within ten minutes after the Gel-Seal II has been
applied.
Lower the crankcase into place.
Lightly coat threads of the six main bearing
screws with Gel-Seal II. Install the screws finger
tight.
When the crankcase is seated, install and firmly
seat the crankcase taper pin.
Using a soft face mallet, lightly tap bottom of the
crankshaft to seat the lower main bearing.
32452
1. Labyrinth seal (grooves) 32451
1
32450
32378