141
POWERHEAD
ASSEMBLY
7
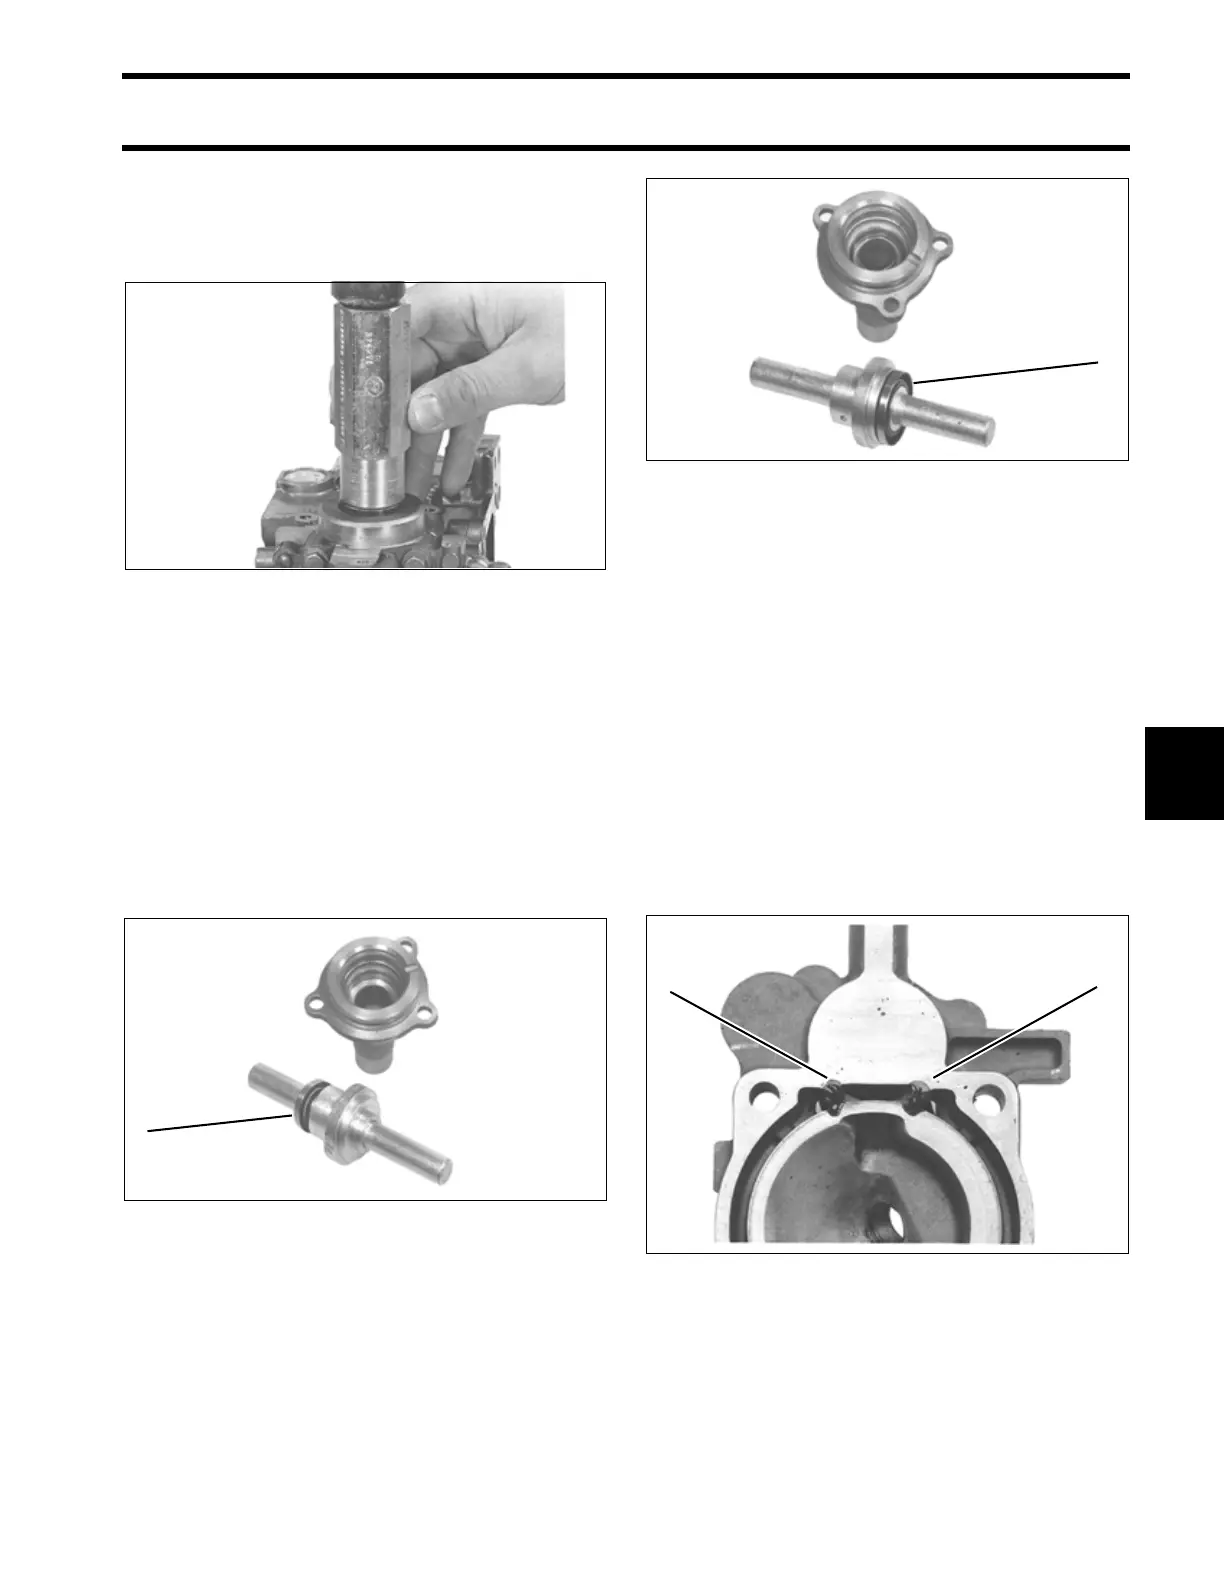
Apply Gasket Sealing Compound to metal case of
a new upper main bearing seal. Install seal using
Seal Installer, P/N 326271, with lip of seal facing
crankcase assembly.
Apply Gasket Sealing Compound to metal cases
of two new crankcase head seals. Place the small
diameter seal on Crankcase Head Seal Installer,
P/N 433391, with lip of the seal facing large diam-
eter of the tool. Install the seal until tool contacts
the head. Use the opposite side of the tool to
install the large diameter seal. Lip of this seal
must face away from large diameter of the tool.
When installed, both seal lips will face toward
each other. Apply approximately 3 cc of Moly
Lube between the seals.
Oil and place a new O-ring on the crankcase
head. Install the crankcase head. Apply Gasket
Sealing Compound to threads of crankcase head
screws. Install the screws finger tight.
Tighten the six main bearing screws in stages to a
final torque of 144 to 168 in. lbs. (16 to 19 N·m).
Begin with the center screws and work outward in
a spiral pattern. Tighten the smaller crankcase
screws to a torque of 60 to 84 in. lbs. (7 to 9 N·m).
Tighten the crankcase head screws to 60 to 84 in.
lbs. (7 to 9 N·m).
Apply Permatex No. 2 to the two ribs in the cylin-
der head next to thermostat water passage.
COB1152A
1. Seal (small diameter) COA6229
1
1. Seal (large diameter) COA6230
1. Ribs 38609
1
11