88
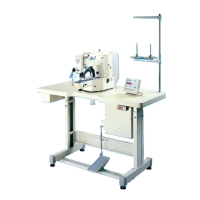
(4) Adjusting the button clamp support
Loosen setscrew
, and place the button to be used in
between the button clamps. Then determine the longi-
tudinal position of the button hole and the slot of button
clamp base
by moving button clamp support, front
and rear
back and forth. Then securely tighten the
setscrew. At this time, if the clearance between button
clamp support, front
and rear
is a little smaller (ap-
prox. 0.5mm) than the outside diameter of the button to
be placed, the button is securely clamped.
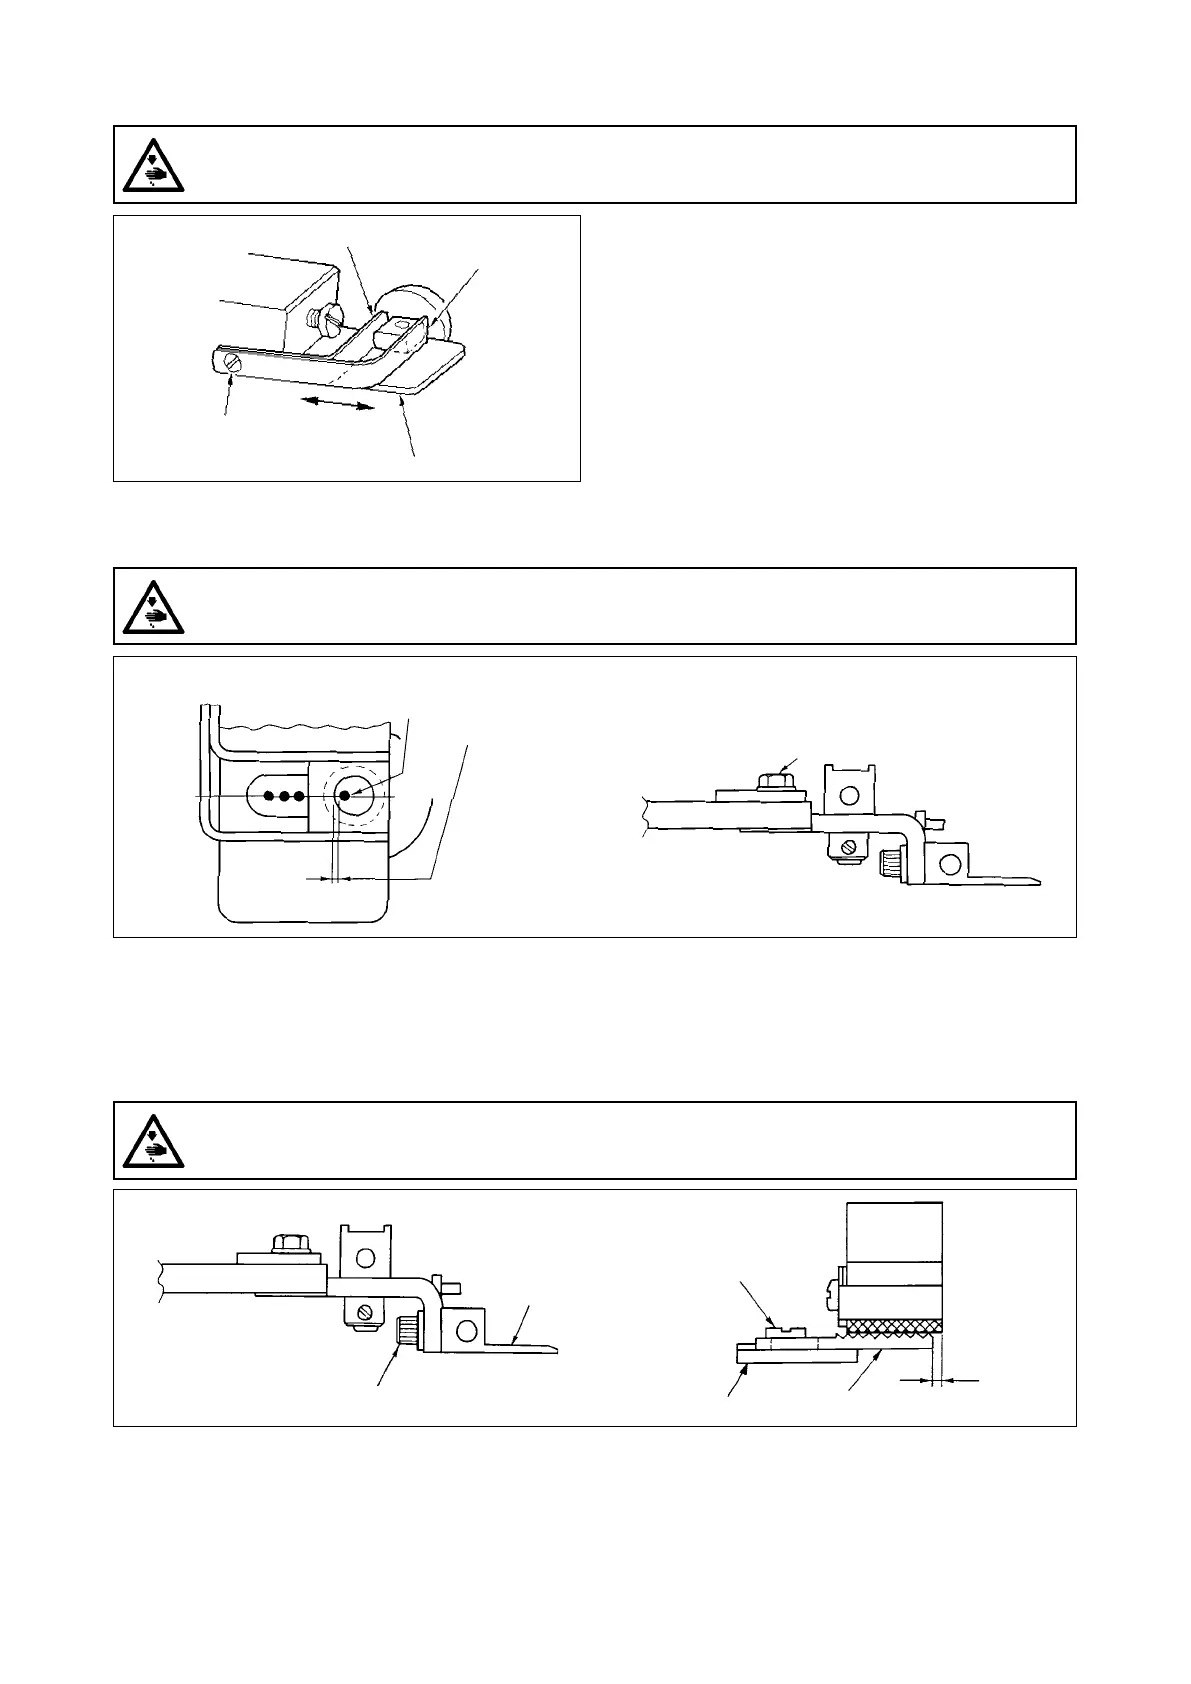
(5) Checking the needle entry point
When checking the shape of the sewing pattern, t the second stitch of the needle entry to the button
hole, and tighten screw
. (Refer to the item of checking the shape of the sewing pattern in the instruc-
tion manual for the LK-1900B
"I.5-4. Checking the contour of a sewing pattern" p.20
.)
(6) Adjusting the button clamp base and the feed plate
X
0.5mm
1)
As for the attaching height of button clamp base
, adjust the vertical position so that the bottom face of the button
clamp base and the top face (knurl face) of feed plate A
can equally press the material. Then tighten setscrew
.
2) Adjust the position X (protrusion of the material), position of feed plate A
against button clamp base
,
according to the thickness of the material using setscrew
. The standard adjustment value is 0.5 mm.
WARNING :
Turn OFF the power before starting the work so as to prevent accidents caused by abrupt start of the
sewing machine.
WARNING :
Turn OFF the power before starting the work so as to prevent accidents caused by abrupt start of the
sewing machine.
Second
stitch
Allow the needle to come as near as
the left side of the button hole without
striking the button hole.
WARNING :
Turn OFF the power before starting the work so as to prevent accidents caused by abrupt start of the
sewing machine.

 Loading...