–
10
–
❸
○
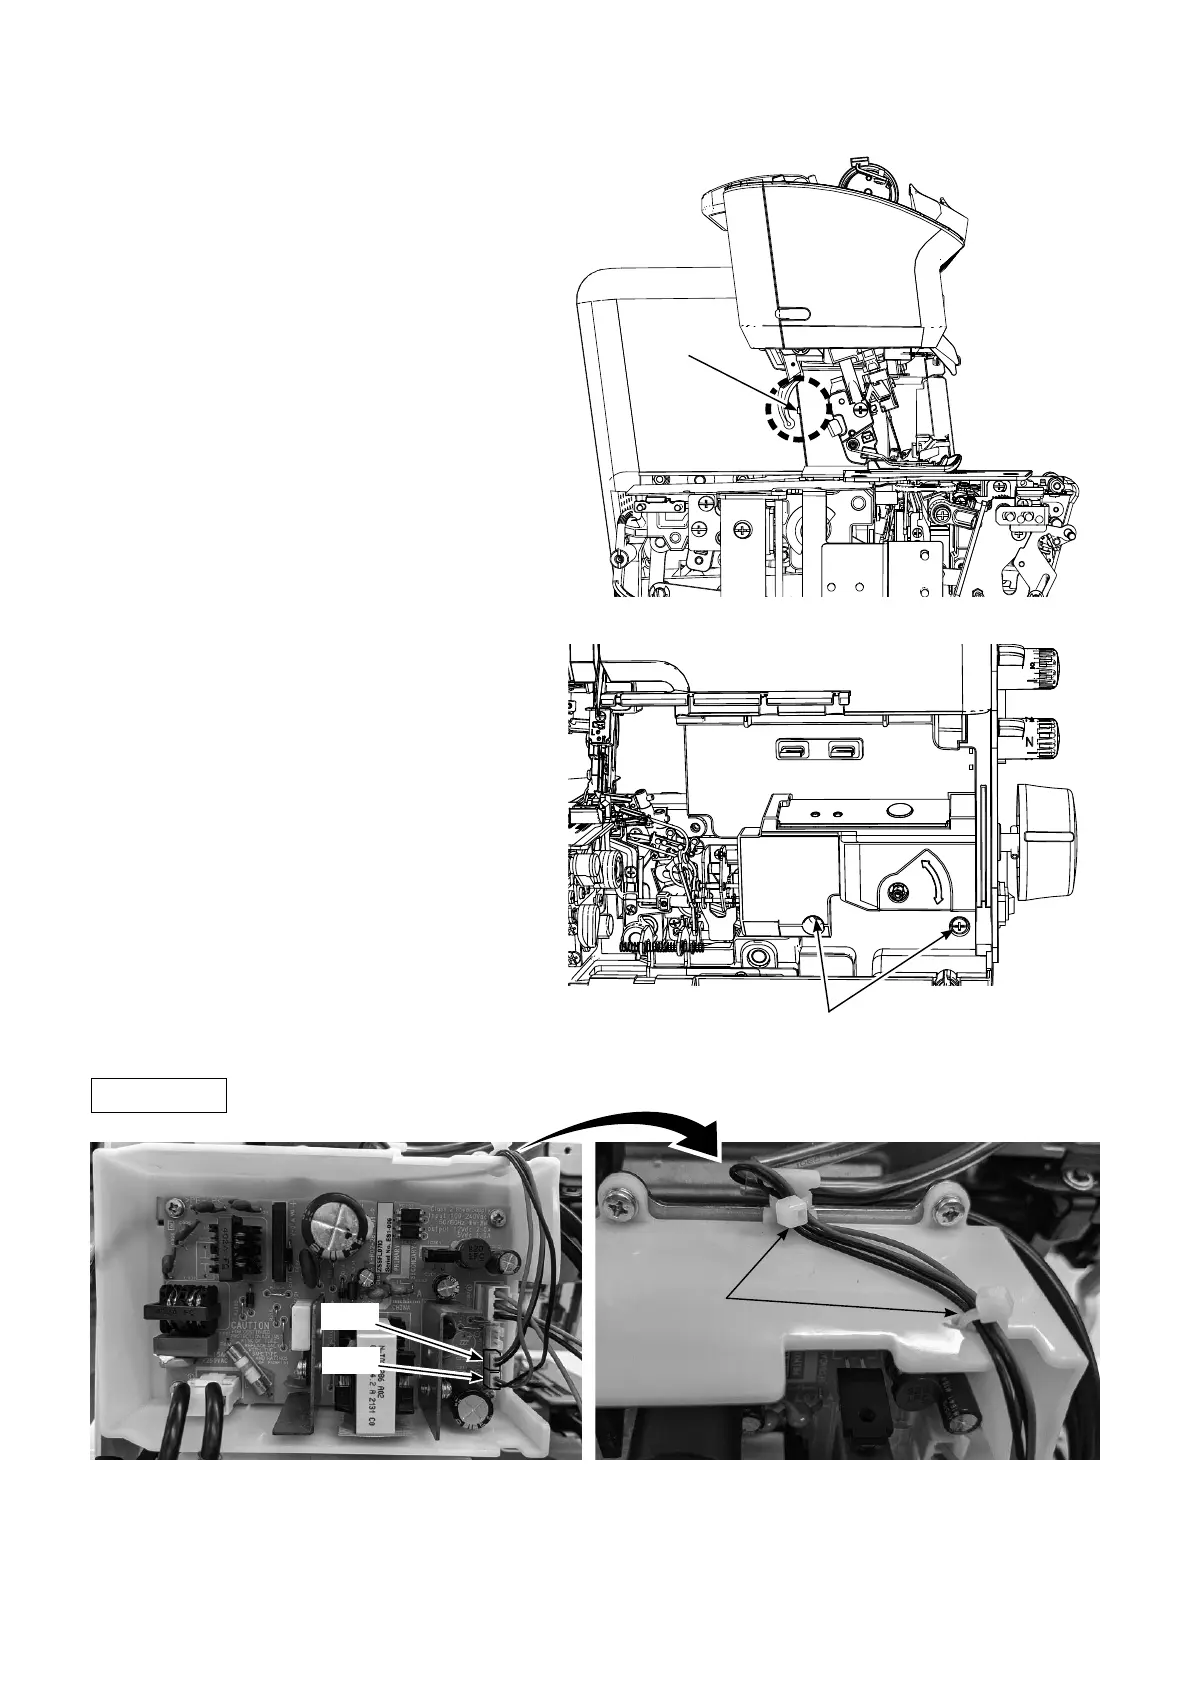
Insert a at-blade screwdriver into the
groove in the pocket portion, and turn it
by prying forward to disengage the rear
cover from the claw.
○
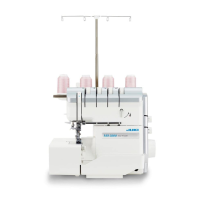
Remove two screws
❸
from the front
face of the sewing machine, and remove
the front cover and rear cover.
○
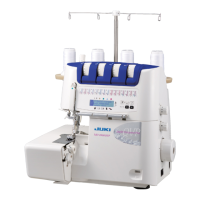
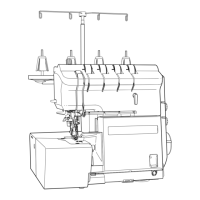
Remove the CN3 and CN4 connectors
from the power PCB on the rear face of
the sewing machine. Then, remove the
cable clip bands at two locations.
Cable clip
band
CN3
CN4
Rear face
Claws