–
4
–
❸
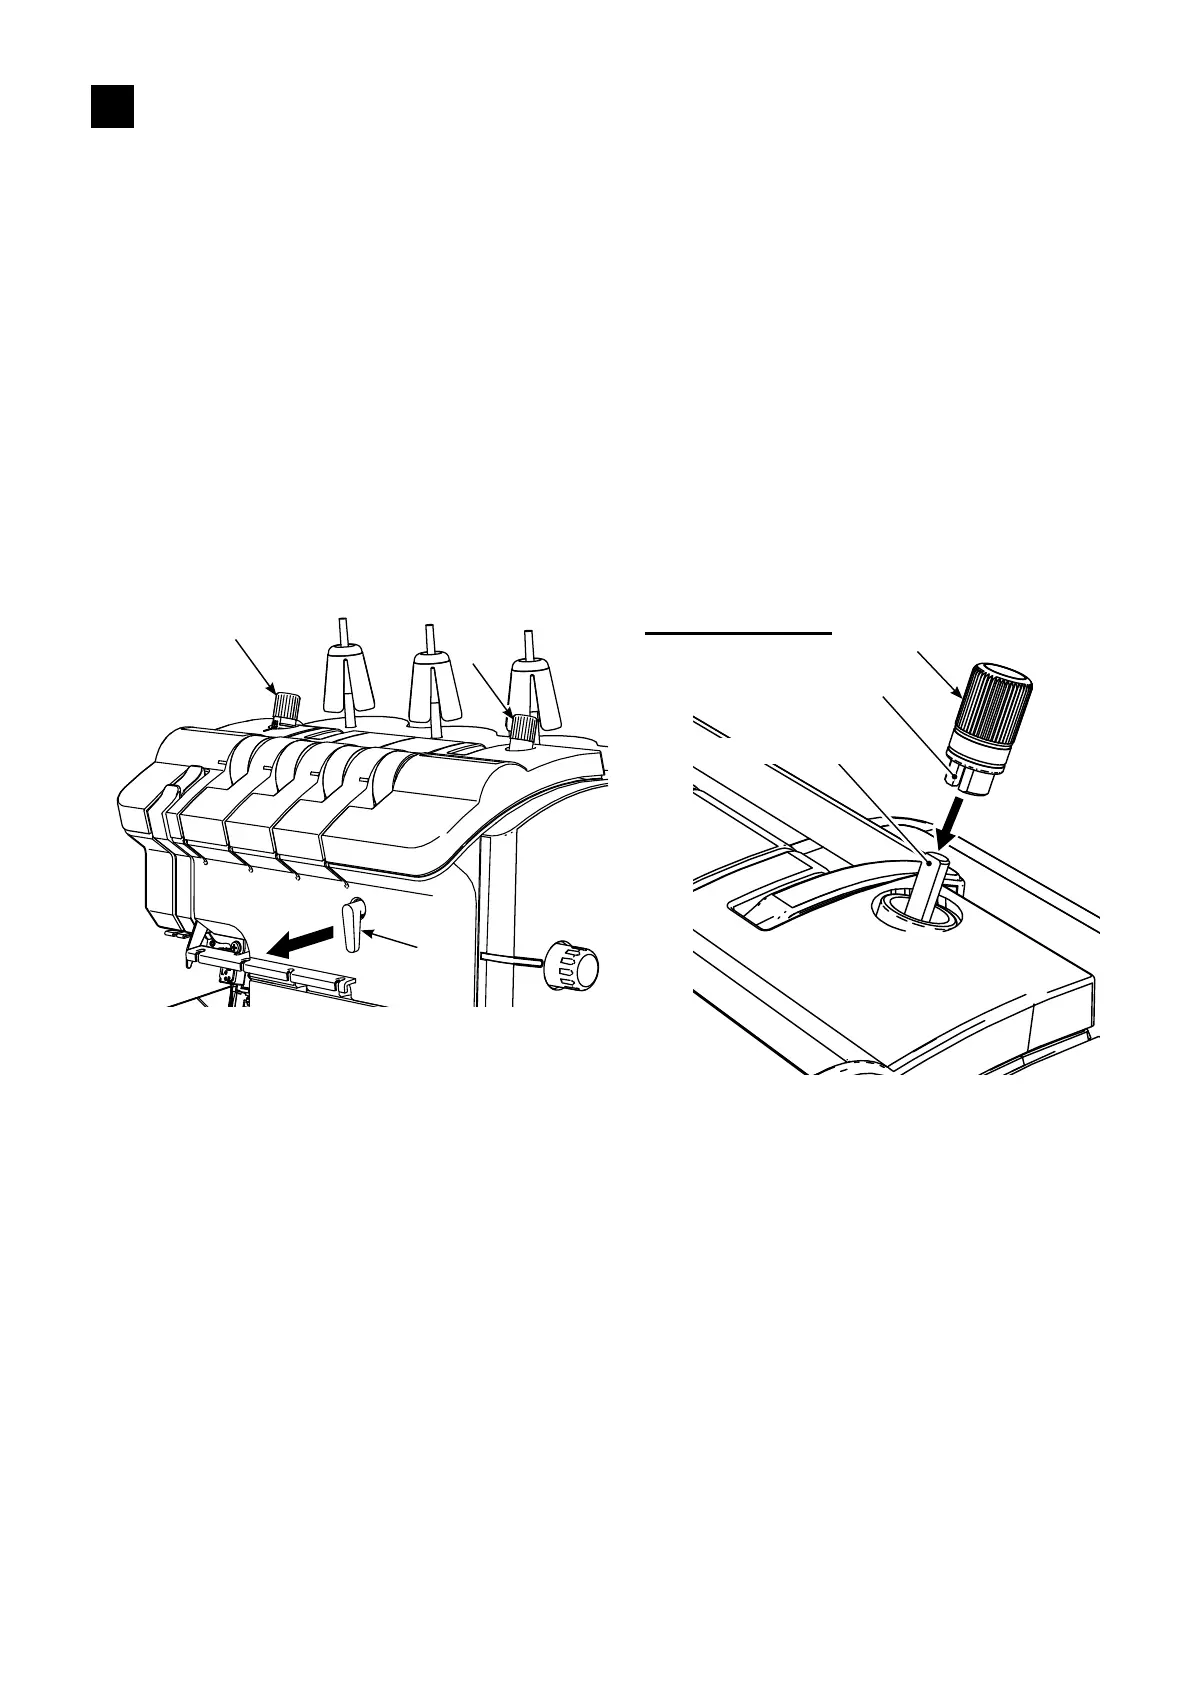
1. Removing the top cover
○
Remove roll hemming thread tension lever
❶
by pulling it out toward you.
○
Loosen presser foot pressure regulator knob
❷
and remove it.
○
Turn micro lifter knob
❸
to move it downward until it will go no further. Then, pull it upward until it comes
o.
(When assembling the aforementioned parts, install presser foot pressure regulator knob
❷
by turning it
after you have installed the top cover. For the micro lifter knob
❸
, adjust rstly so that the at portion of
the shaft faces in the same direction as the at portion of presser foot pressure regulator knob
❷
. Then,
t micro lifter knob
❸
over the shaft until it will go no further.)
❶
❷
❸
Flat portion of the knob
Flat portion of the shaft
When assembling
3
STANDARD ADJUSTMENT / DISASSEMBLY AND ASSEMBLY
Assembly should be carried out in the reverse order of the disassembly procedure.



 To Next Page