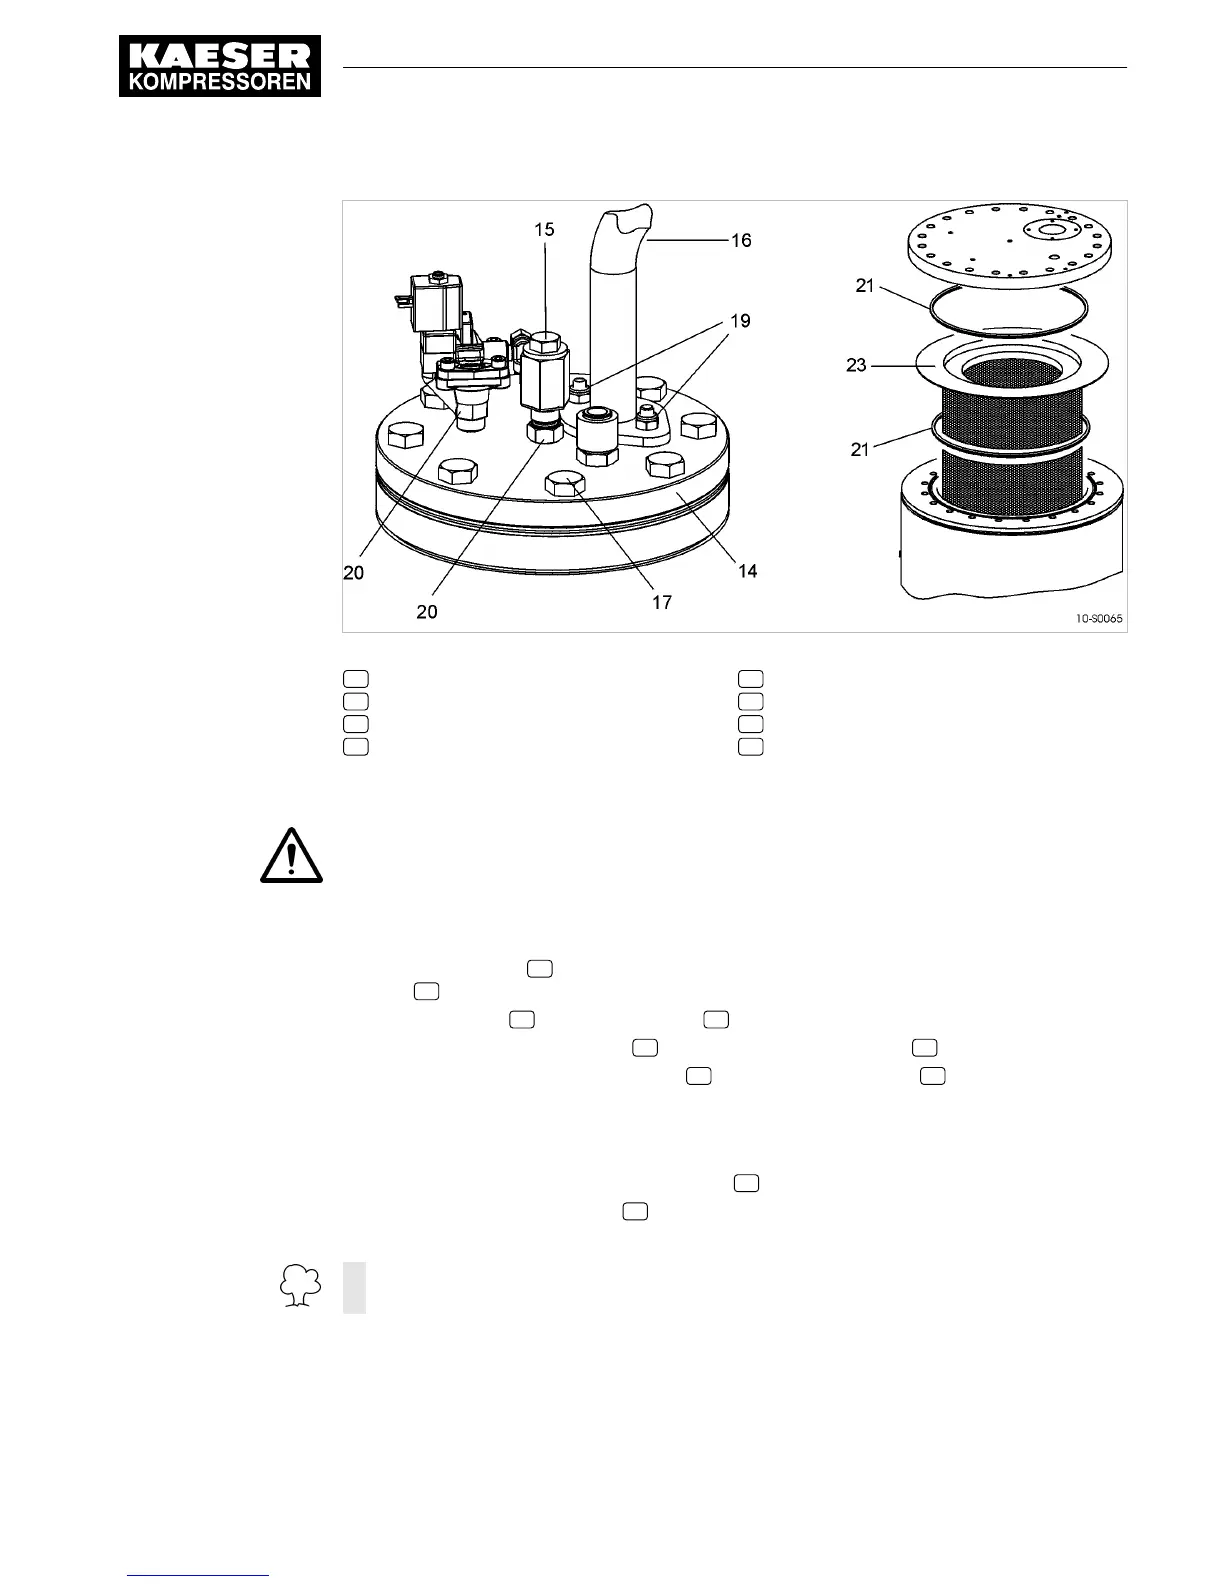
Fig. 30 Changing the oil separator cartridge
14 Cover
15 Dirt trap
16 Air pipe
17 Fixing screw
19 Self-locking nut
20 Screw fitting
21 Gasket
23 Oil separator cartridge
Changing the oil separator cartridge
1. WARNING!
Compressed air!
Compressed air and devices under pressure can injure or cause death if the contained energy
is released suddenly.
➤ De-pressurise all pressurised components and enclosures.
2. Unscrew the fitting 20 and carefully put the parts to one side, then pull out the copper pipe at
item 15 .
3. Unscrew the nut 19 and turn the air pipe 16 to one side.
4. Remove the cover fixing screws 17 and carefully remove the cover 14 .
5. Take out the old oil separator cartridge 23 together with the gaskets 21 and dispose of ac‐
cording to environmental protection regulations.
6. Clean all sealing faces.
7. Insert the new oil separator cartridge with gaskets and screw down the cover.
8. Renew the O-ring and strainer in the dirt trap 15 .
9. Attach the air pipe to the cover 14 with a new, self-locking nut.
10. Replace and tighten all fittings.
➤ Dispose of parts and materials contaminated with oil in accordance with environmental
protection regulations.
Starting the machine and carrying out a trial run
1. Close all access doors; replace and secure all removable panels.
2. Open the user's shut-off valve between the machine and the air distribution network.
10 Maintenance
10.17 Changing the oil separator cartridge
9_5717 20 E
Service Manual Screw Compressor
ASK T SIGMA CONTROL BASIC
79
 Loading...