3.3 Drive axle
Visually examine the axle
Use the correct tools to make work safe and to provide accurate
results. Make sure the following tools are available:
•
Dial indicator
•
Tire blocks
•
Jack
•
Safety stands
•
Pry bar
•
Torque wrench
1 Visually examine for signs of oil or grease leaks and debris in/
around the breather. Repair if necessary.
2 Make sure that all fasteners are tightened to the specified tor‐
que. Use a torque wrench to examine the torque in a tighten‐
ing direction. As soon as the fastener starts to move, record
the torque. Correct if necessary. Replace any worn or dam‐
aged fasteners.
3 Examine the parts of the axle for wear and damage. Look for
bent or cracked parts.
4 Replace all worn or damaged parts.
5 Make sure that there is no looseness at the pivot points. Make
sure that the pivot points are lubricated.
6 Make sure that all the parts move freely through the complete
turning radius.
7 Examine the tires for wear patterns that indicate suspension
damage or misalignment.
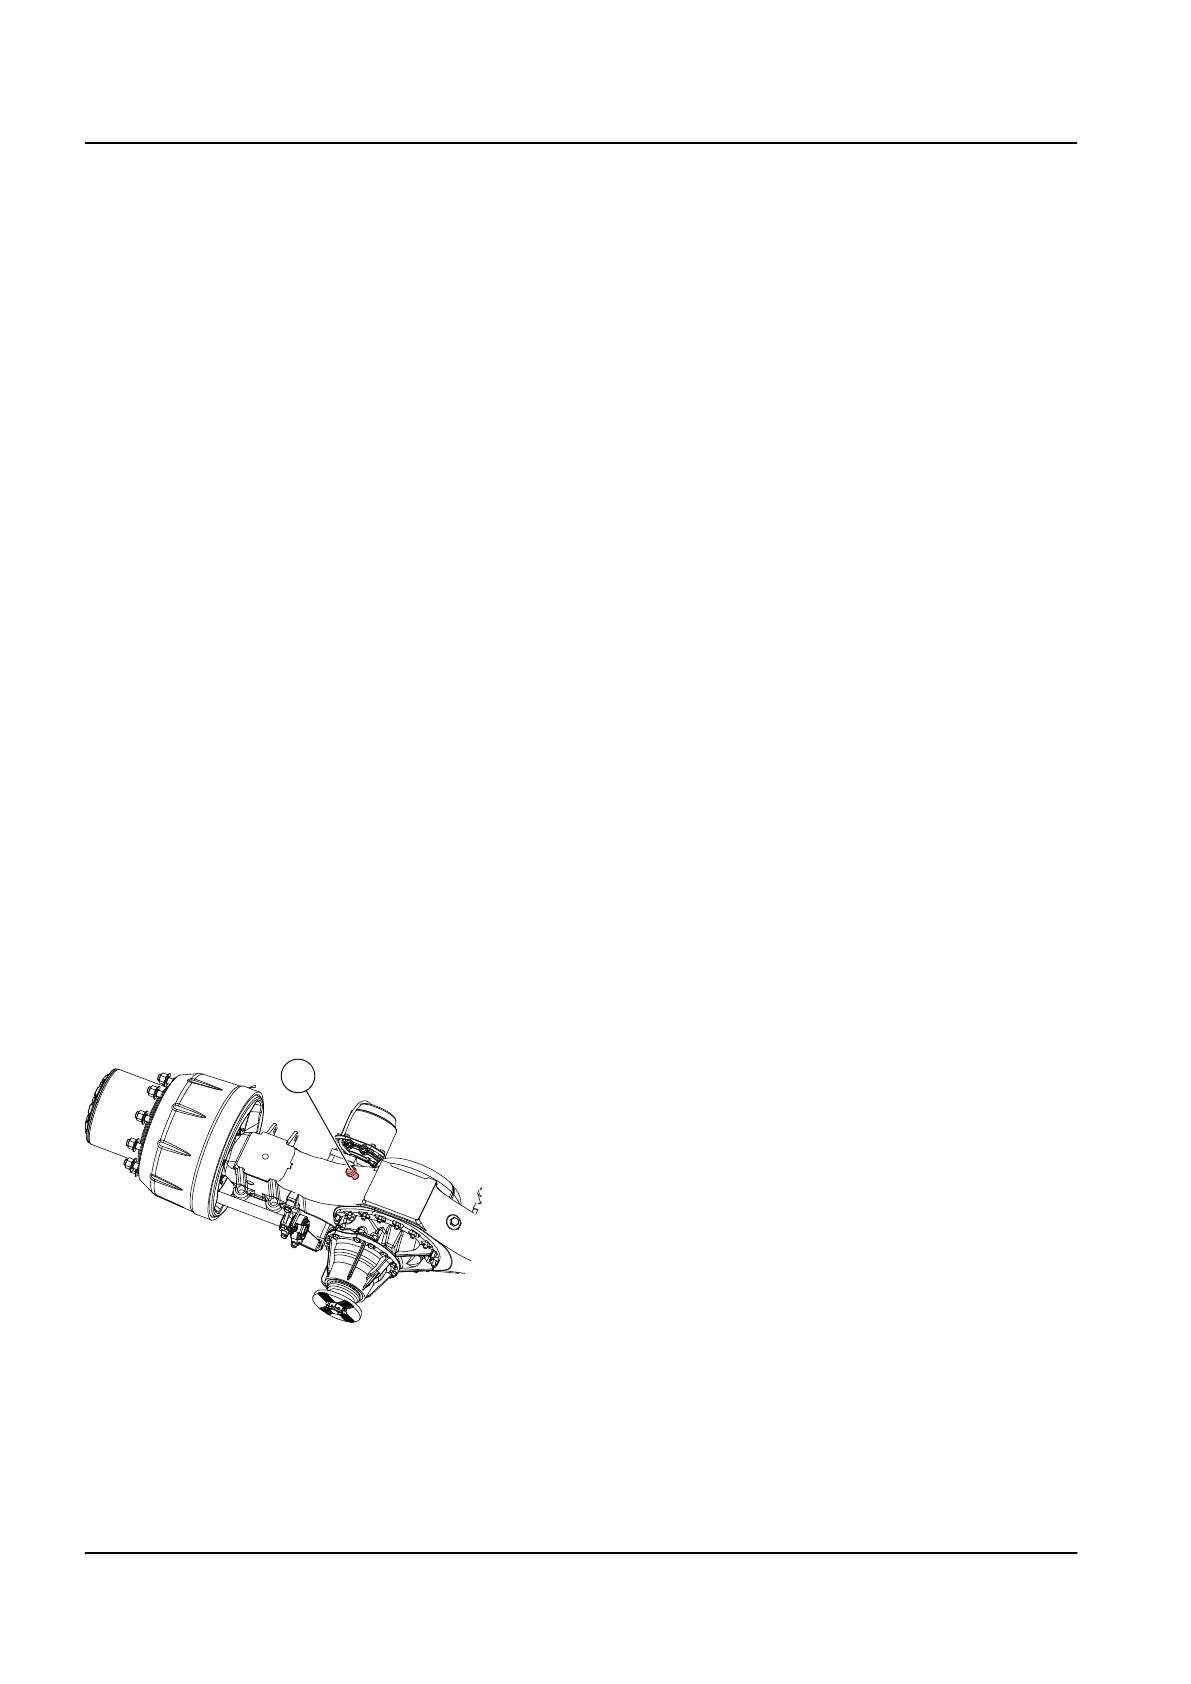
Examine the breather
The examination of the axle casing breather is done during the oil
level examination or oil change. The breather is installed in the axle
casing next to the drive gear.
1 Blow compressed air carefully through the oil filler and inspec‐
tion hole. Examine to ensure that air escapes through the
breather (A).
2 Clean the breather as necessary.
NOTE
Do not blow the air with high pressure. Do not blow the air from the
breather towards the axle casing.
4 3 Driveline / axle – 3.3 Drive axle
TL2 Maintenance Manual
591 003 Default