EN
762.885 Z05 2012 coolcept_fleX, coolcept³_fleX 17
Data transmitted via a public network are not protected from being accessed
by third parties.
Data transmission via a public network may cause additional costs.
►
Obtain information on costs possibly involved prior to the use of a public
network.
►
Use a public network at your own risk.
• Lay the cables such that the connection cannot come loose accidentally.
• Ensure that the fire safety measures of the building are not impaired when routing ca-
bles for the device.
• Make sure that no inflammable gases are present.
• Observe all applicable installation regulations and standards, national laws and connec-
tion values specified by the regional power supply company.
• Observe the connection ratings specified on the type plate.
• Do not connect the DC cables to ground potential.
The DC inputs and the AC output are nor galvanically isolated from each other.
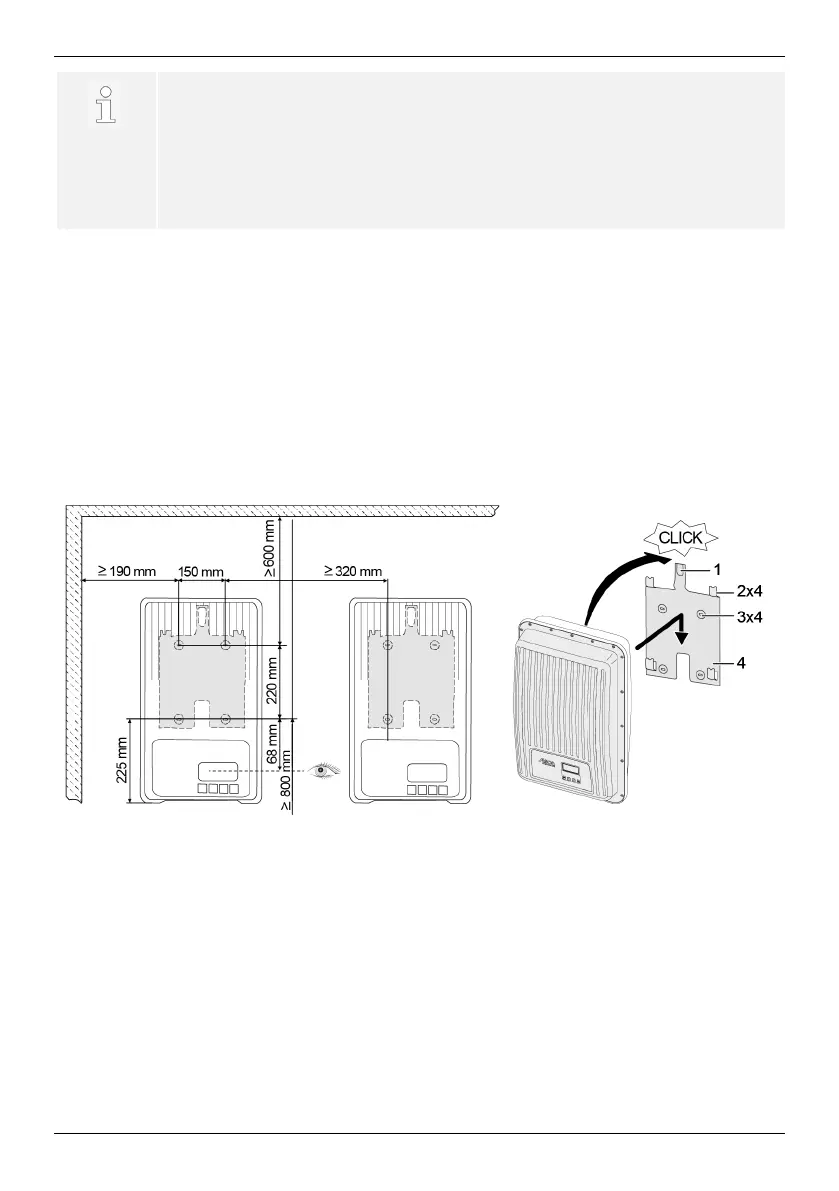
5.2 Mounting the inverter
1. Fasten the mounting plate (4) to the mounting surface with 4 screws (3). The locking
plate (1) points upwards.
2. Place inverter on the mounting plate.
3. Hook the 4 locating pins on the back of the inverter into the retaining tabs (2) of the
mounting plate.
4. Press inverter against the mounting plate. The detent on the back of the inverter en-
gages audibly in the locking plate (1).