GB - 14
Control circuit
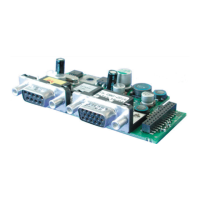
2.1.5 Control terminal strip X2A
The control terminal strip is designed as a double, plug-in terminal strip with push in cage
connection. It contains 32 pole. The following instructions must be observed at connection:
Prevent EMC malfunctions
• Use shielded / drilled cables
• Lay shield on one side of the inverter onto earth potential
• Lay control and power cable separately (about 10...20 cm apart); Lay
crossings in a right angle (in case it cannot be prevented)
2.1.5.1 Assembly of the PUSH-IN terminal strip
Assembly of connecting wires with wire-end ferrules
according to DIN46228/4
Assembly of connecting wires without wire-
end ferrules
Cross-section / AWG
Metal sleeve length
Stripping length
Cross-section / AWG
Stripping length
0.50 mm
2
/ 21 10 mm 12 mm 0.14…1.5 mm
2
/ 25…16 10 mm
0.75 mm
2
/ 19 12 mm 14 mm
Connecting wires rigidy and exible
1.00 mm
2
/ 18 12 mm 15 mm
• Press pusher by hand. Insert connecting wires into the respective hole, that no single wires can
be seen from the outside or bend outward.
A rst resistance must be overcome when inserting. Release the pusher.
• Check that the connecting wire is xed and can not be pulled-out. It is important to ensure that
the connecting wire and not the insulation is clamped. The connecting wire can also be inserted
without pressing the pusher in case of cross-sections upto 1.00 mm².
Front view Side view
1
2
3
4
5
6
7
8
9
10
11
12
13
14
15
16
17
18
a)
b)
a) Pusher
b) Connecting wire hole
A safe clamping can not be guaranteed when using shorter wire-end ferrules.
KEB generally recommends the use of wire-end ferrules in industrial environments.
 Loading...