1
Routine Maintenance
1-1
1.1 Introduction
The information in this section deals with routine type main-
tenance that can be performed by the operator. This informa-
tion is arranged as follows:
1.2 Line fuse replacement:
Explains how to replace a
blown line power fuse.
1.3 Current fuse replacement:
Explains how to replace a
blown current fuse.
1.4 Fan filter cleaning:
Explains how to remove and clean
the filter element for the cooling fan.
1.5 Firmware updates:
Recommends a course of action
for firmware updates provided by Keithley.
1.2 Line fuse replacement
WARNING
Disconnect the line cord at the rear pan-
el and remove all test leads connected to
the instrument (front and rear) before
replacing the line fuse.
The power line fuse is accessible from the rear panel, just be-
low the AC power receptacle (see Figure 1-1). Perform the
following steps to replace the line fuse:
1. Insert a bladed screwdriver into the slot of the fuse car-
rier.
2. While pushing in, turn the screwdriver counter-clock-
wise until the spring-loaded fuse carrier releases from
the fuse holder.
3. Pull out the fuse carrier and replace the fuse with the
type specified in Table 1-1.
CAUTION
To prevent instrument damage, use only
the fuse type specified in Table 1-1.
4. Re-install the fuse carrier.
NOTE
If the power line fuse continues to blow, a
circuit malfunction exists and must be cor-
rected. Refer to the troubleshooting sec-
tion of this manual for additional
information.
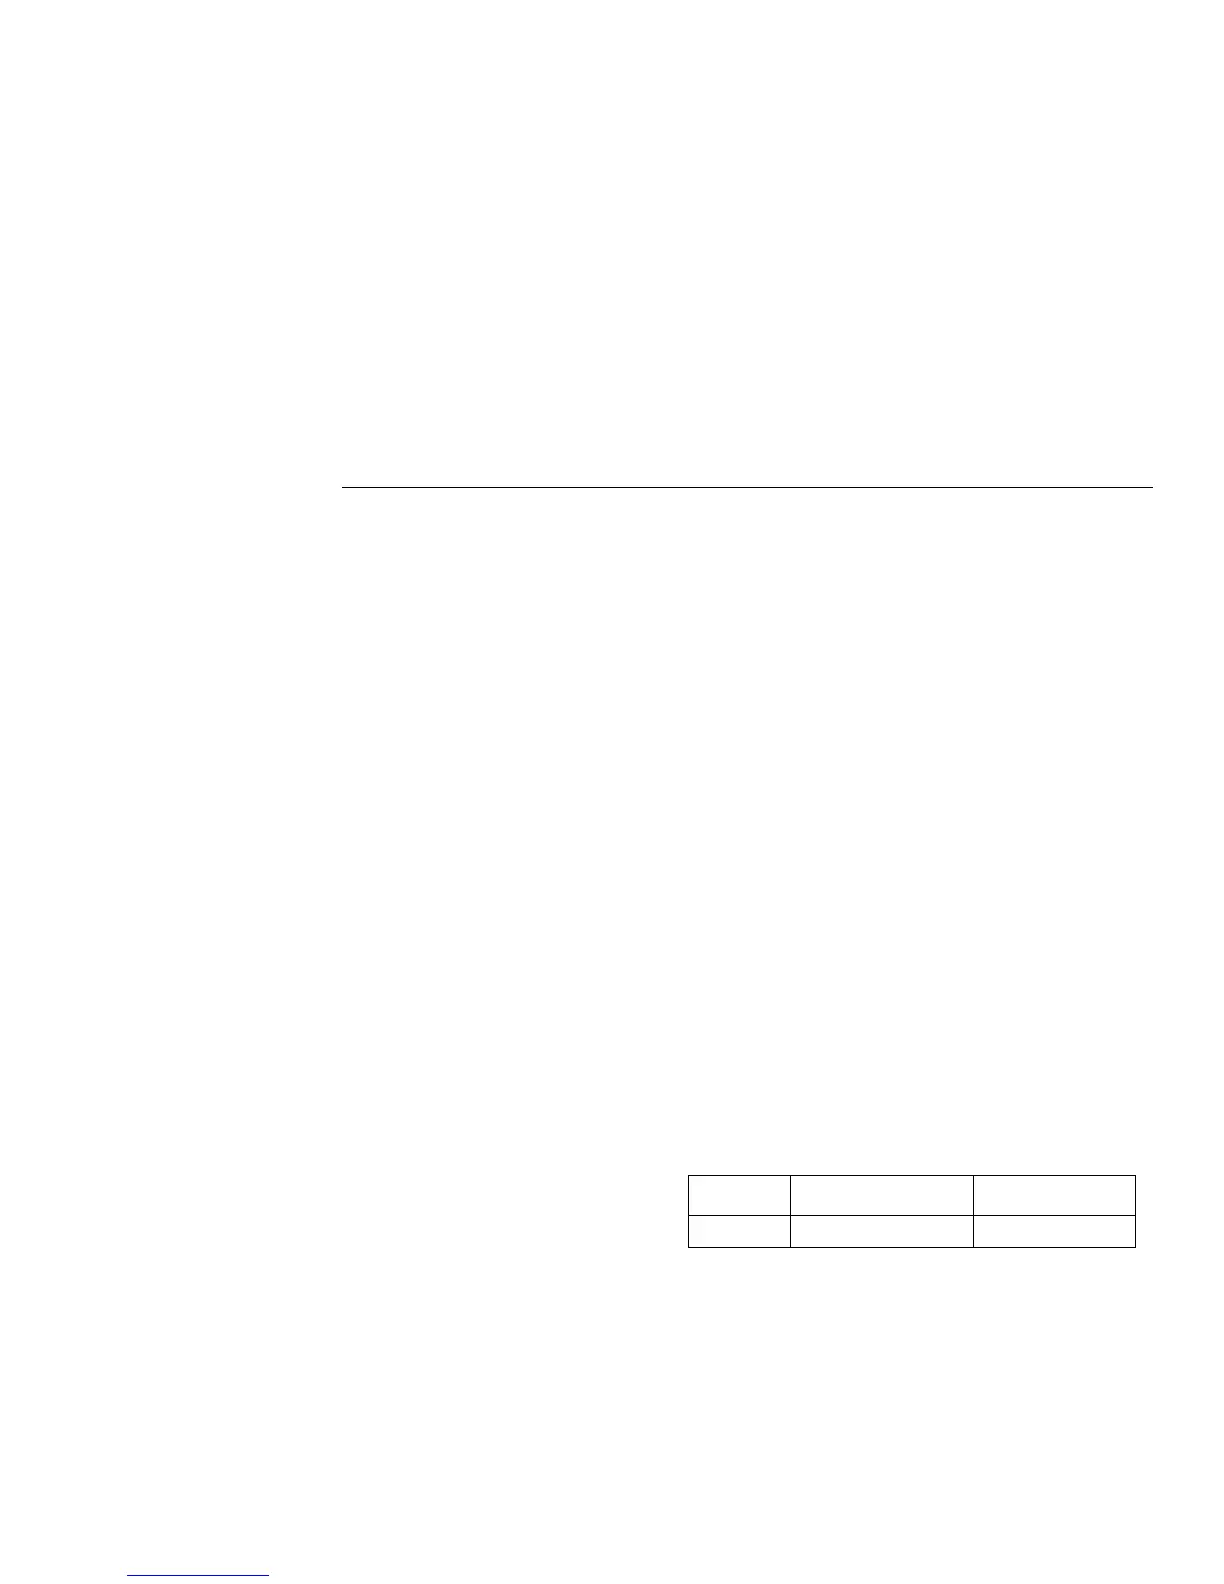
Table 1-1
Power line fuse
Size Rating Keithley Part No.
5
×
20mm 250V,
½
A, Slo-Blo FU-71

 Loading...


