Model 2750 Multimeter/Switch System Service Manual Calibration 2-21
Model 2750 Calibration
Unlocking manufacturing calibration
To unlock manufacturing calibration, press and hold in the OPEN key while turning on the
power.
Measuring function generator signal amplitude
The 3Hz function generator signal amplitude must be accurately measured using the digi-
tal multimeter listed in Table 2-13. Proceed as follows:
1. Connect the function generator output to the digital multimeter INPUT jacks. (See
Figure 2-5 for typical connections.)
2. Turn on the function generator and multimeter, and allow a two-hour warm-up
period before measuring.
3. Set the function generator to output a 1V RMS sine wave at 3Hz; measure and
record the signal amplitude.
Front panel manufacturing calibration
1. Install the shorted calibration extender board (see “Extender board preparation”
earlier in this section) in scanner card Slot 1, and select the rear inputs with the
INPUTS switch. Allow three minutes for thermal equilibrium.
2. Press in and hold the OPEN key while turning on the power.
3. Press SHIFT then TEST then display CALIB: TEST with the up or down range
key. Press ENTER, select RUN, then enter the appropriate calibration code
(default: 002750).
4. Select ALL at the CAL:RUN prompt.
5. Press ENTER to perform the first manufacturing calibration step.
6. Perform the entire front panel comprehensive calibration procedure discussed ear-
lier in this section. (See “Comprehensive calibration” earlier in this section.)
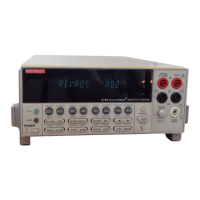
7. Connect the function generator to the Model 2750 front panel INPUT jacks as
shown in Figure 2-5. Select the front input jacks with the INPUTS switch.
 Loading...