Setting Up
58
User Interface Setup
You can setup user interface parameters.
1
Press the [MENU] button.
Popup menu appears.
2
Touch [SETUP].
SETUP screen appears.
3
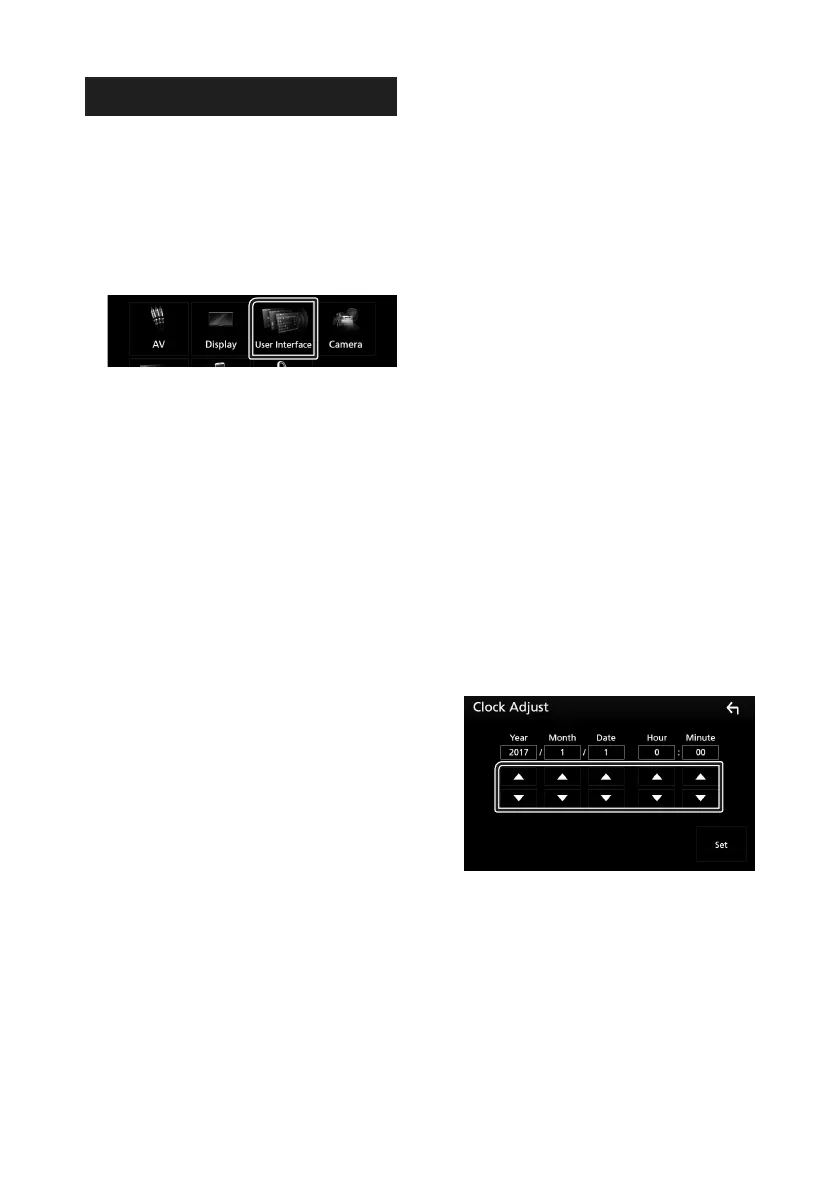
Touch [User Interface].
User Interface screen appears.
4
Set each item as follows.
■ Steering Remote Controller
Sets the desired function in the steering
remote controller. (Contact your KENWOOD
dealer for details.)
■ Beep
Turns the key touch tone on or off.
Default is “ON”.
■ Vehicle Adaptor Information*
1
Displays the vehicle information.
This function requires a commercial adaptor.
Consult your KENWOOD dealer for details.
■ Beep for Parking distance control*
1
Sets whether to generate a warning tone
when the onboard proximity sensor detects
a human or object.
Consult your KENWOOD dealer for details.
■ Parking Distance Display*
1
You can display information about obstacles
around the car.
ON: Always displays information.
Dyn. (Default): Displays information when
the sensor detects obstacles.
OFF: Cancels.
This function requires a commercial adaptor.
Consult your KENWOOD dealer for details.
■ Parking Distance Position*
1
Select where information about obstacles is
displayed on the screen (left or right).
“Left”/ “Right” (Default)
This function requires a commercial adaptor.
Consult your KENWOOD dealer for details.
■ Language Select
Selects a language.
■ Touch Panel Adjust
Adjust the sensing position of touch panel.
(P.59)
■ Clock
GPS-SYNC (Default): Synchronizes the clock
time with the GPS.
Manual: Sets the clock manually
■ Time Zone
Select the time zone.
■ Clock Adjust
If you select [Manual] for Clock, adjust the
date and time manually. (P.58)
• *1 This setting is available when a
commercial adaptor is connected.
Ñ Adjust the date and time
manually.
1
Touch [Time Zone] in the User Interface
screen.
2
Select the time zone.
3
Touch [Clock Adjust] in the User Interface
screen.
4
Adjust the date, then adjust the time.
5
Touch [Set].
 Loading...