5.1.5. Ticket printing setting
“Setting > Instrument” screen is displayed.
➢ Go to “Printing” with the keypad then press OK.
➢ Go to “Format” with the keypad then press OK.
➢ Select the ticket format: long or short with the keypad then press OK.
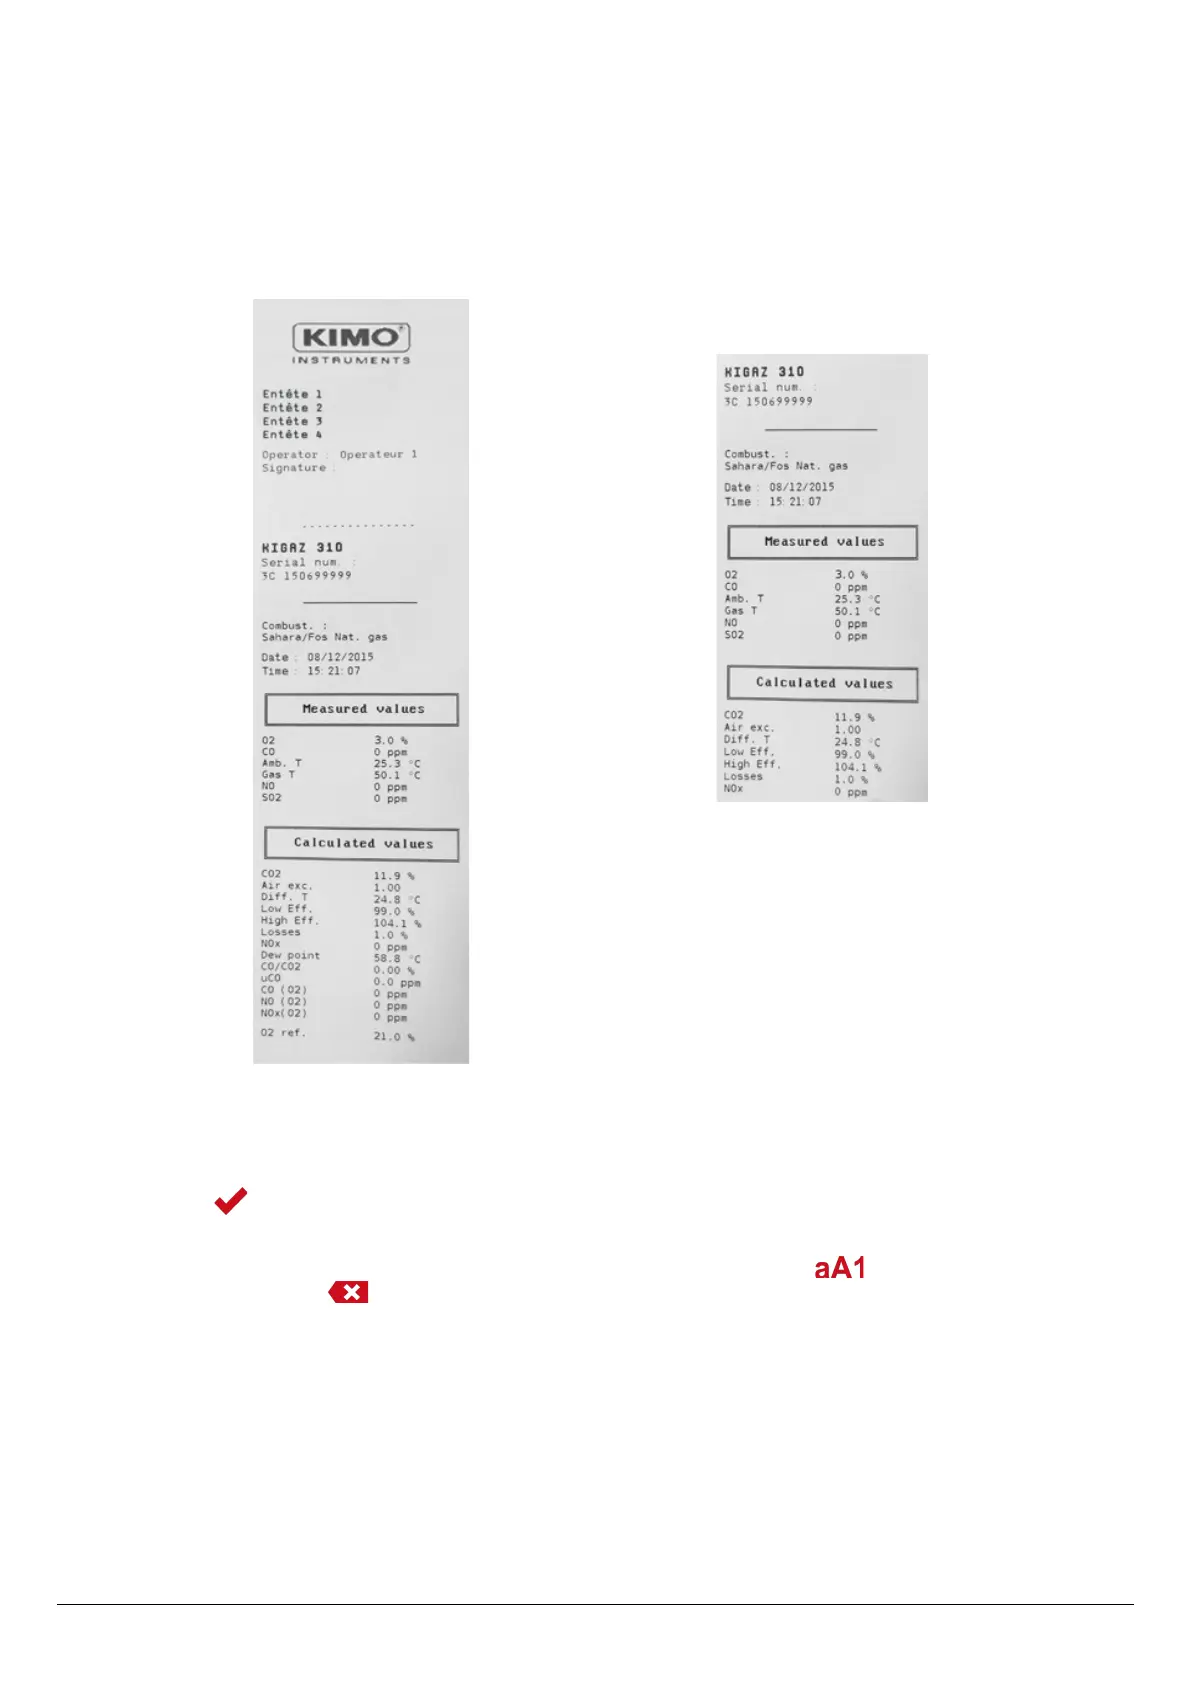
Long ticket format: prints the headers, the user name, the
selected customer and boiler, the type of device and its serial
number, the type of combustible, the inspection date and time
and the measurements results.
Short ticket format: prints only the device reference, the
type of combustible, the date and time and the
measurement results.
➢ Go to “Logo” then press OK to activate it: ON or deactivate it: OFF.
➢ Go to the first line of the “Header” then press OK.
The keyboard appears at the bottom of the screen.
➢ Select the letters with the keypad then press OK.
➢ Press the function key to validate the line.
The keyboard disappears.
➢ Press Esc to back to “Setting instrument” screen and validate modifications.
• To go from lower-case keyboard to upper-case keyboard then to numeric keyboard: press the function key.
• To erase a letter: press the function key.
5.1.6. Activate or deactivate the visual support
The visual support corresponds to help windows displayed met during a measurement procedure. It allows to communicate with application.
“Setting > Instrument” screen is displayed.
➢ Go to “Support” with the keypad.
➢ Go to “Visual support” line with the keypad.
➢ Press OK to activate it: ON or to deactivate it: OFF.
5.1.7. Activate the group function
Groups allow to gather measurements in a folder. To activate it:
“Setting > Instrument” screen is displayed.
Set the different parameters of the analyser 17