2-20
Flame Height Adjustment
Eachburneramehasbeenfactorysettothe
lowest position available to provide reliable and
constant reignition of the burner; however, each
burner can be adjusted.
To Adjust:
Theamecanbeadjustedusingtheadjustment
screws underneath the control knob.
A. Single valve
B. Dual valve
A
A
A
A
B
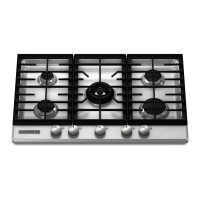
Adjustment for Single Valve
1. SettheburnerametoLO.
2. Remove the control knob.
3. Hold knob stem with a pair of pliers. Use a
3/32"(#0[2.0mm])atbladescrewdriver
to turn the screw located within the shaft
ofthecontrolknobstemuntiltheameis
the proper size.
A.
" (#0 [2.0 mm]) at blade screwdriver
(screwdriver shaft must be a minimum of
1
" (28.0 mm) long)
B. Control knob stem opening
C. Adjustment screw location
B
C
A
4. For LP gas conversion:
Completely tighten screw “C” to set the
minimumameheight.
For Natural gas conversion:
Tightenscrew“C”toreduceameheight.
Loosenscrewtoincreaseameheight.See
“Complete Burner Adjustment” section.
5. Replace the control knob.
6. Testtheamebyturningthecontrolfrom
LO to HI, checking the ame at each
setting.
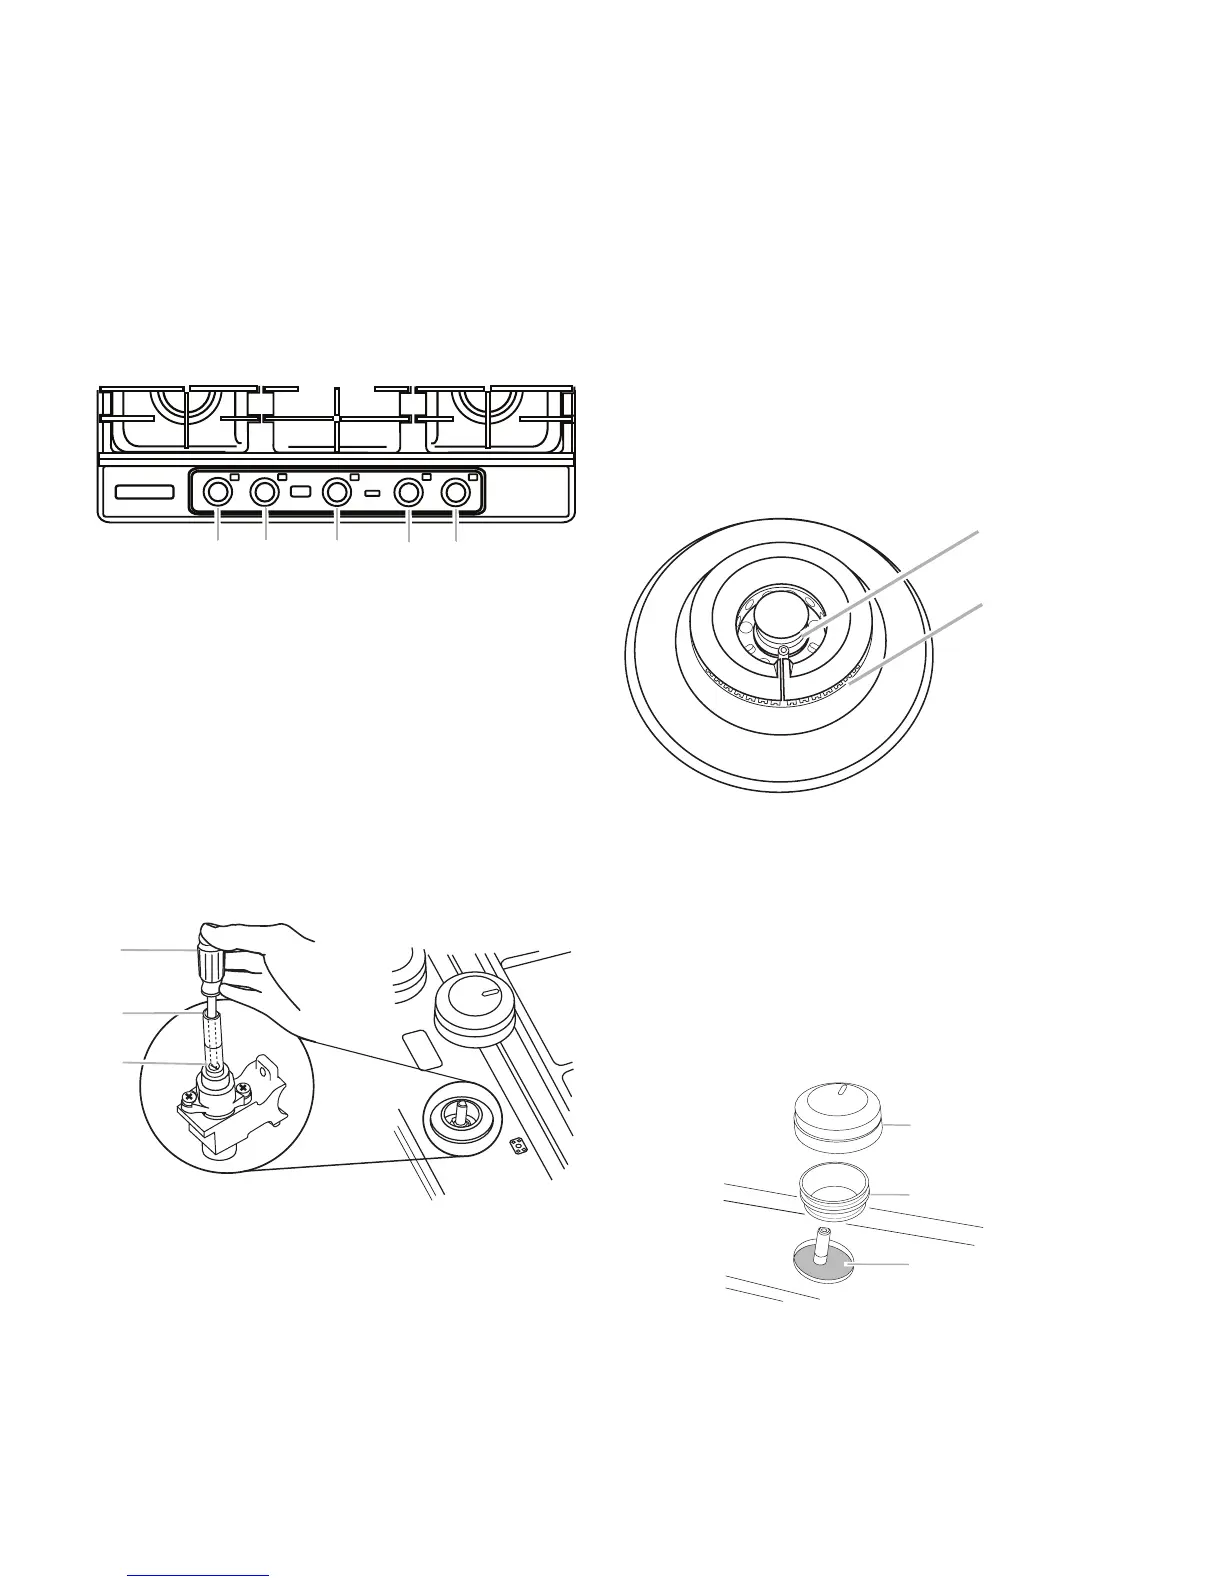
Adjustment for Dual Valve
To Adjust Inner Crown Flame:
1. SettheinnercrownametoLO.
A. Inner crown
B. Outer crown
2. Remove the control knob.
3. Remove the black rubber grommet.
4. Using needle-nose pliers, remove the gray
shield inside the burner valve opening.
A. Control knob
B. Black rubber grommet
C. Gray shield
M
e
d
A
B
C