7
1
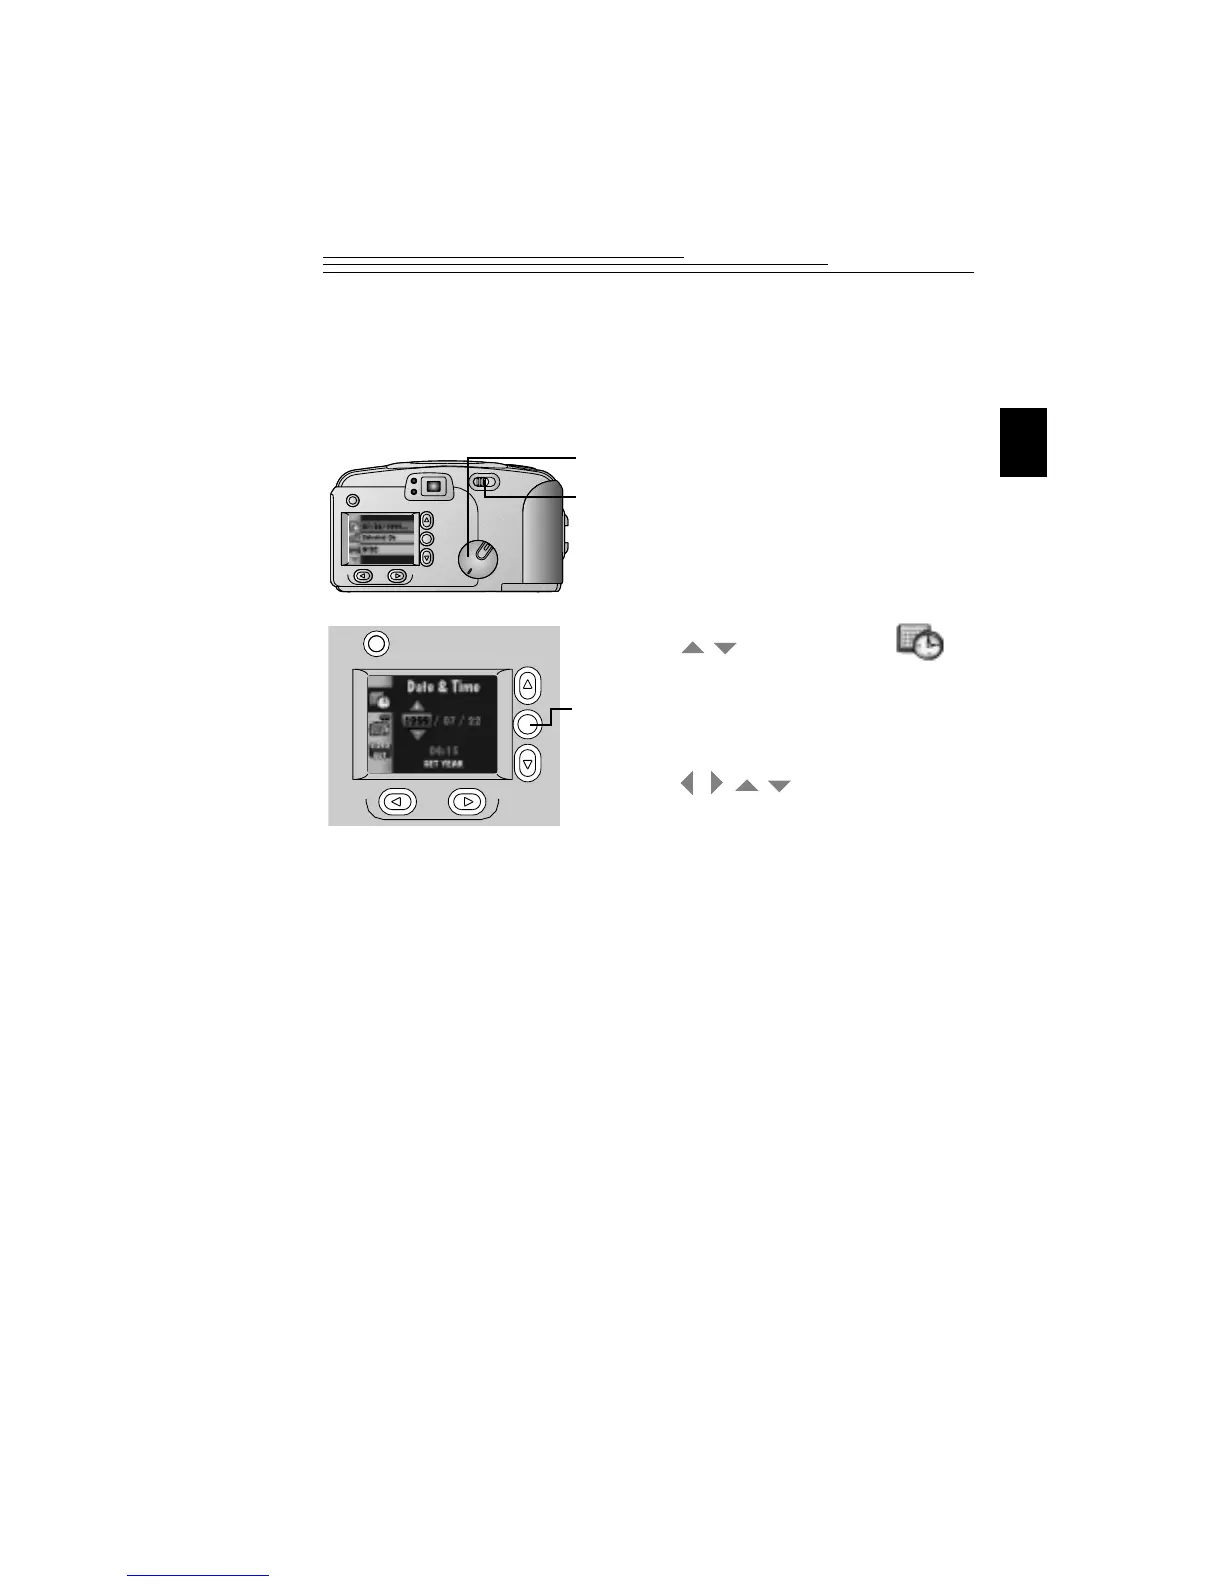
Setting the Clock on Your Camera
Your camera has a built-in clock that maintains the date and time in a
24-hour format. The camera clock needs to be set if you plan to use the
Date Stamp feature, which imprints the date on your picture. For
information on using the Date Stamp feature, see page 19.
1 Set the Mode dial to Camera Setup.
2 Slide the POWER switch to the right to
turn on the camera.
The main Camera Setup screen appears.
3 Press a button until the
icon is highlighted.
4 Press the DO-IT button.
The Date/Time screen appears.
5 Press a buttons to adjust
the date and time fields.
6 Press the DO-IT button.
The camera accepts the setting and returns to
the main Camera Setup screen.
If you remove the batteries from the
camera for an extended period of time,
or the batteries become exhausted, you
may need to reset the clock.
/
/
/