www.kodak.com/go/aiosupport 29
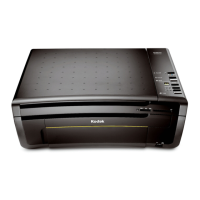
KODAK ESP 7 All-in-One Printer
Changing the printer connection type
You can change the way you connect to your printer at any time.
For Windows
USB to Wi-Fi
To convert the USB connection from a PC to a wireless network connection:
1. Disconnect the printer from the computer.
2. Use the Windows Control Panel to delete the printer from you computer.
3. Configure the wireless network from the printer front panel. See Configuring a
wireless network connection, page 22.
4. Press
Menu.
5. Press until
Network Settings is selected, and then press OK.
6. Select
View Network Configuration and confirm you have an IP address.
7. Run the KODAK Printer Network Setup Utility. This is located at
Start > All
Programs > Kodak >Kodak Printer Network Setup Utility
.
8. Select
Connect via Network - Wireless / Wi-Fi, then click Next to proceed. The
printer should be detected and driver installations begin. If you have more than
one printer connected to your network, select the printer and then click
Next.
9. After the driver installation completes, click
Done to proceed.
10. The printer will be named KODAK ESP 7-XXXX, where XXXX is a number unique
to your printer.
USB to Ethernet
To convert the USB connection from a PC to an Ethernet connection:
1. Disconnect the printer from the computer.
2. Use the Windows Control Panel to delete the printer from you computer.
3. Connect the printer to the network (LAN port on Router) with an Ethernet cable
4. Run the KODAK Printer Network Setup Utility. This is located at
Start > All
Programs > Kodak >Kodak Printer Network Setup Utility
.
5. Select
Connect via Network - Ethernet cable then click Next to proceed. The
printer should be detected and driver installations begin. If you have more than
one printer connected to your network, select the printer and then click
Next.
6. After the driver installation completes, click
Done to proceed.
7. The printer will be named KODAK ESP 7-XXXX, where XXXX is a number unique
to your printer.