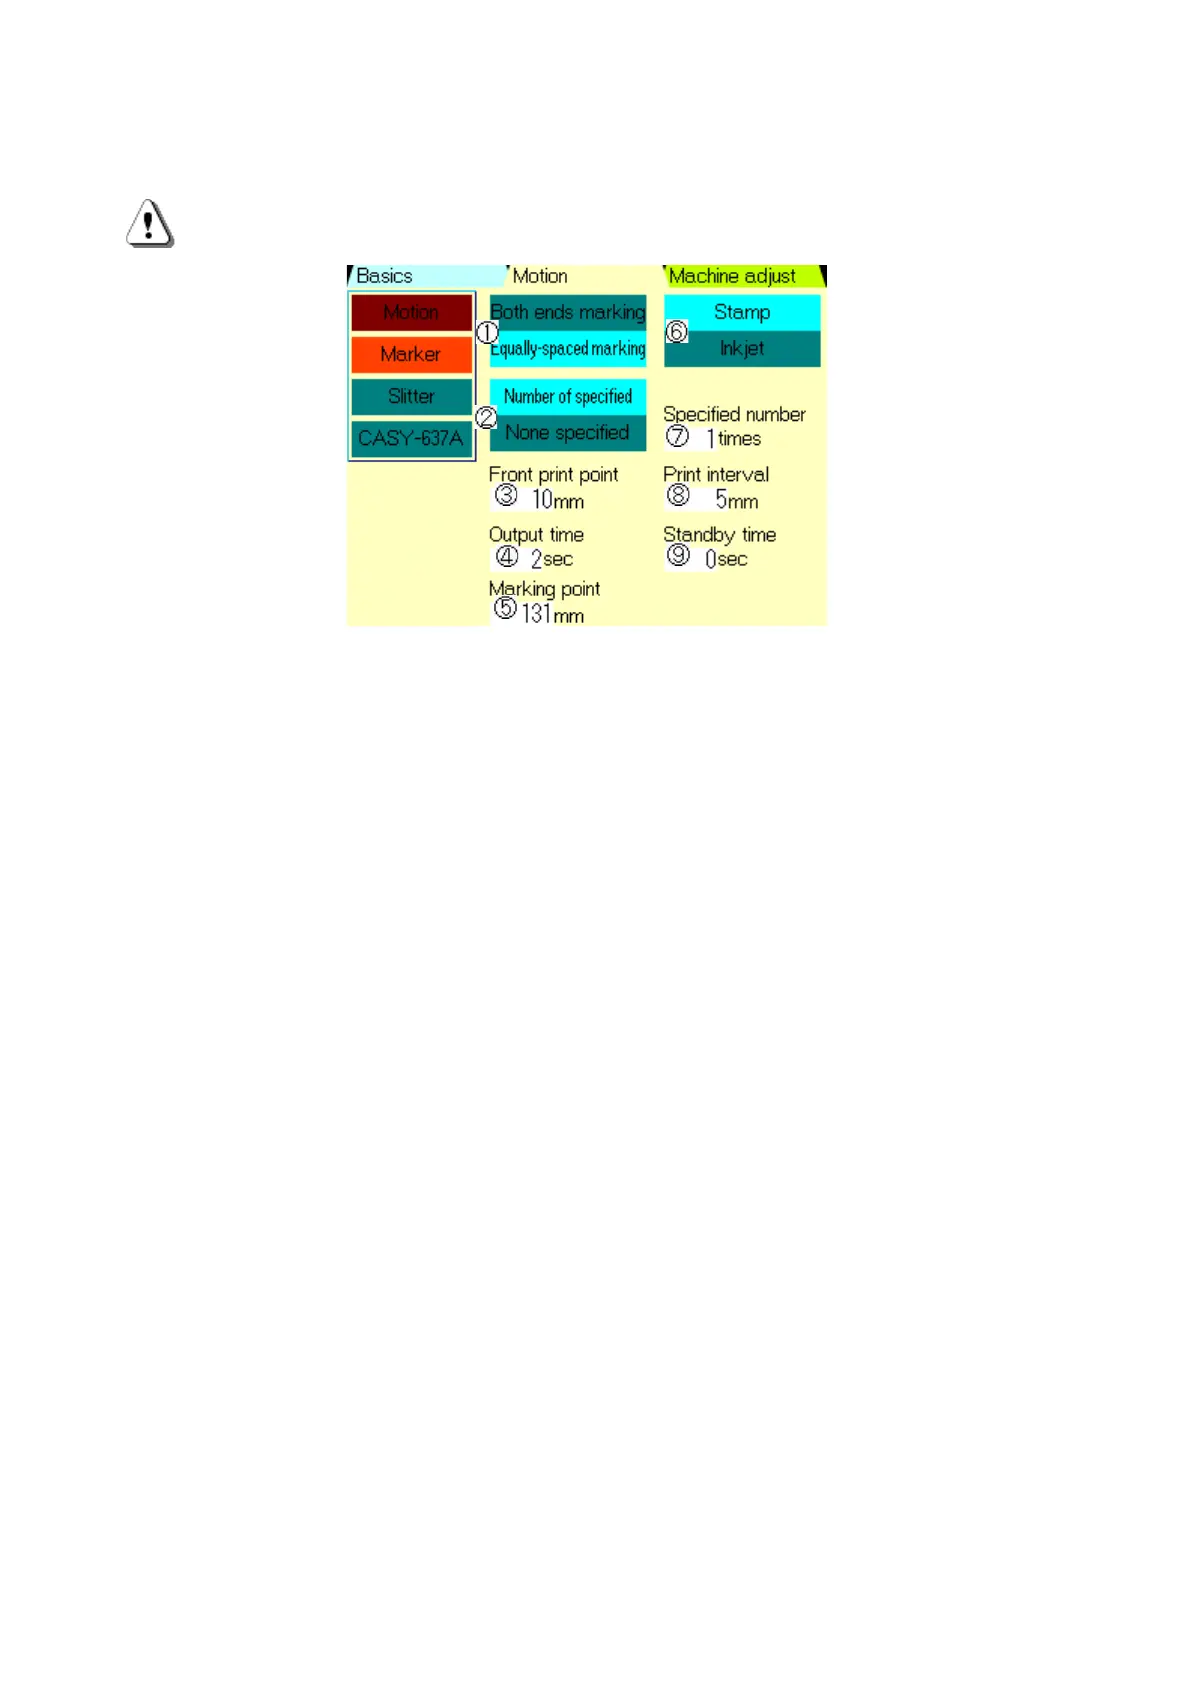
《Motion》 screen at 《Marker》 Select《Marker》on the 《Motion》screen (P.13-
2).
Connect to the marker device and enter the setting for interlocking use.
An additional harness is required for the C370G.
(Please contact your retailer for details.)
On the above screen, all of the items in marker are displayed to explain.
Depending on the setting, displayed items and non-displayed items will change.
①《Both Ends Marking/Equally-Spaced Marking》:Setting how to mark on the wire which is
finished.
《Both Ends Marking》:To mark both ends of a wire
《Equally-Spaced Marking》:To mark on a wire more than once at
even intervals.
None of them is select, it does not mark.
②《Number of Specified/None Specified》《Simultaneous Marking/Asynchronous Marking 》:
When 《Both Ends Marking》 has been selected, 《Simultaneous
Marking /Asynchronous Marking》 is displayed.
When 《Equally-Spaced Marking》 has been selected, display is
changed to 《Number of Specified/None Specified》.《Simultaneous
Marking》:Marking of the front and rear end is performed
simultaneously with a marking head.
《Asynchronous Marking》:Marking of the front and rear end is
performed
asynchronously with a marking head.
《Number of Specified》:It marks on a wire specified times at ⑦ at
even intervals.
《None Specified》:It marks on a wire by specified interval at ⑧.
③《Front Print Point》:Setting point to print at the front side.(distance from the terminal of
the front side of the wire)
④《Output Time》:Input the output time of the sign to the marker.
⑤《Marking Point》:Input the distance from “the V blade of the C370G” to “the center of the
marker head”.
⑥《Stamp/Inkjet》:Select the type of the marker to use.