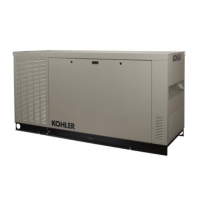
TP-6694 7/18 93Section 6 Accessories
accessories require separate leads connected directly
to the battery for the voltage supply. Attach
user-supplied 12/24-volt DC accessories to the battery
positive (+) connection at the starter solenoid and to the
battery negative (--) connection at the engine ground.
The 120 VAC accessories require a user-supplied
voltage source.
Note: A maximum of three inputs may be connected to
a single relay driver output. Inputs include dry
contacts, remote annunciator, common failure
alarm, A/V alarm, and shunt trip line circuit
breaker.
Note: Only one 15-relay dry contact kit can be
connected to the controller.
Electrical Connection Procedure
1. Press the generator set master control
OFF/RESET button.
2. Disconnect the power to the battery charger, if
equipped.
3. Disconnect the generator set engine starting
battery(ies), negative (--) lead first.
4. Remove the top panel of the controller connection
box. See Figure 6-6 for location of the relay board.
5. See Figure 6-8 for connections of analog inputs.
6. Select the normally open (NO) contacts of the
relay, Form A dry contact, depending upon the
application. Use a two-wire harness for the NO
connections.
7. Supply two lengths of stranded wire to make leads
long enough to connect the user- supplied device
to the dry contact terminals and power supply. Use
color-coded wire for easy identification. Make
leads long enough to allow for walls, ductwork, and
other obstructions. Use separate conduit for the
dry contact wiring.
8. 12/24-Volt DC Devices. Attach the user-supplied
12/24-volt DC accessories to the starting battery
positive (+) connection at the starter solenoid and
to the battery negative (--) connection at the engine
ground. Otherwise, use a separate 12/24-volt DC
supply. Do not use terminals 42A and 2 on the
controller connection kit terminal strip to supply the
voltage to the relay contacts. Supply separate
leads connected directly to the battery for the
supply voltage. The circuit must include fuse or
circuit breaker protection.
9. 120-Volt AC Devices. Connect the user- supplied
accessories to a separate 120-volt AC power
supply. The circuit must include fuse or circuit
breaker protection.
10. Connect the user-supplied device per the
Instructions and/or schematic supplied with the
device to a power source and to the dry contact
terminals. Cut the user-supplied leads to length,
strip lead ends, crimp on spade terminals (not
supplied), and connect the leads to the relay
contact screw terminals. Route the wiring for the
relay dry contacts away from the generator set
output leads.
11. Repeat Step 6 for the remaining dry contact relays.
TP-6694-6
+5
VPx
VNx
GND
P36
100 ohm min. or 50 mA max. current
+5
VPx
VNx
GND
P36
Analog
Device
GND
Output
Optional 5 V
power
(50 mA max.)
+5
VPx
VNx
GND
P36
Analog
Device
GND
Optional 5 V
power
(50 mA max.)
+
--
0--5 Volt Ratiometric Sensor 0--5 Volt Analog Device +/-- 3 Volt Analog Device
Figure 6-8 Dry Contact Kit Analog Input Connections P36
 Loading...