TP-6461 1/08 97Section 6, Component Replacement, Model KSS Switches
4. Remove the DC fast-on connections from the
rectifier terminals. See Figure 6-20.
Note: A red dot identifies one DC terminal. The
other DC terminal is at the opposite corner of
the rectifier.
5. Check the coil resistance.
Note: If reading is infinite or shorted, replace coil.
Figure 6-20 Rectifier Fast-On Connectors
(contactor shown on the bench)
Rectifier Check and Replacement
6. Remove the AC fast-on connections from the AC
terminals of the rectifier.
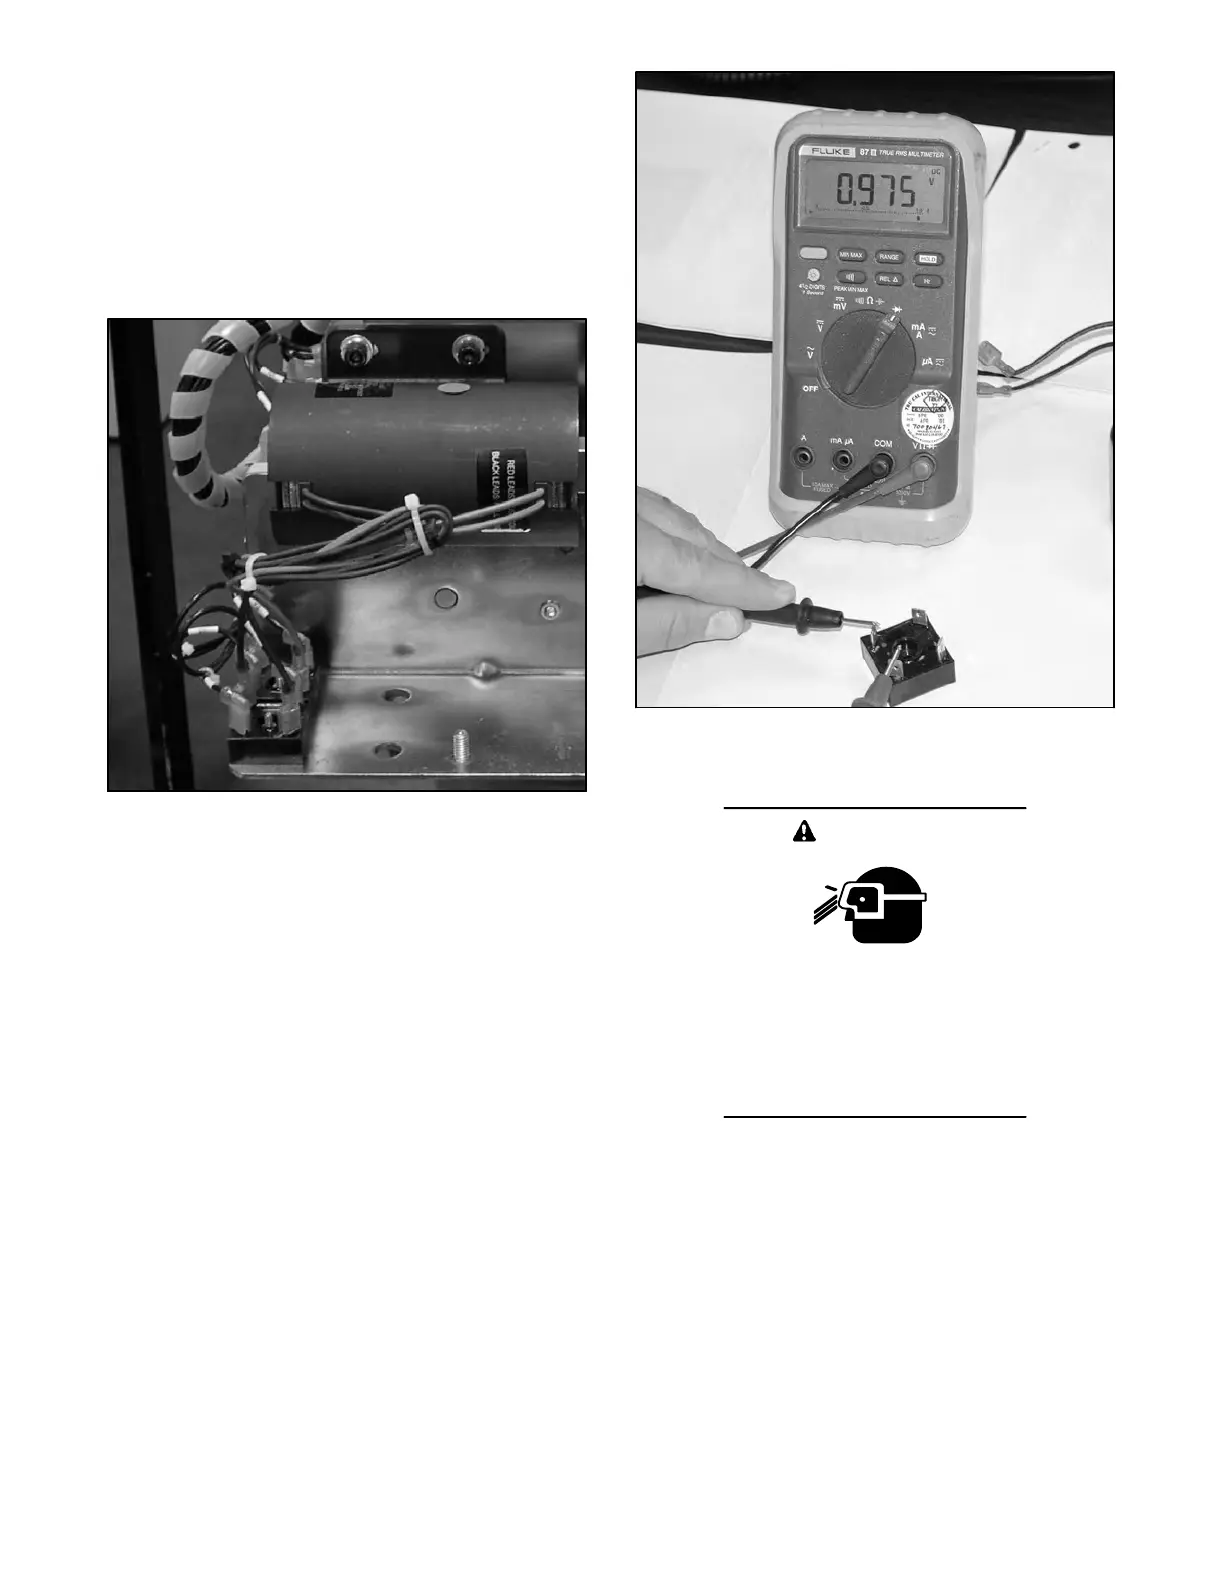
7. Check the diode operation of the rectifier. See
Figure 6-21 and Section 3.5 for rectifier test
instructions. If the rectifier is bad, replace it. If the
rectifier is good, proceed to step 9.
8. Replace the rectifier. Orient the new rectifier so
that the red dot is in the upper right corner when the
contactor is mounted in the enclosure.
9. Connect AC fast-on connections to AC terminals.
Figure 6-21 Checking Rectifier Diode Operation
Solenoid Replacement
Spring-loaded parts.
Can cause severe personal injury
or property damage.
Wear protective goggles when
servicing spring-loaded parts. Hold
parts securely during disassembly.
WARNING
Disassembling the solenoid. Spring-loaded parts can
cause severe personal injury or property damage. The
spring in the solenoid assembly exerts substantial force on the
coil. Hold the coil assembly securely when removing the
screws.

 Loading...


