TP-6461 1/0898 Section 6, Component Replacement, Model KSS Switches
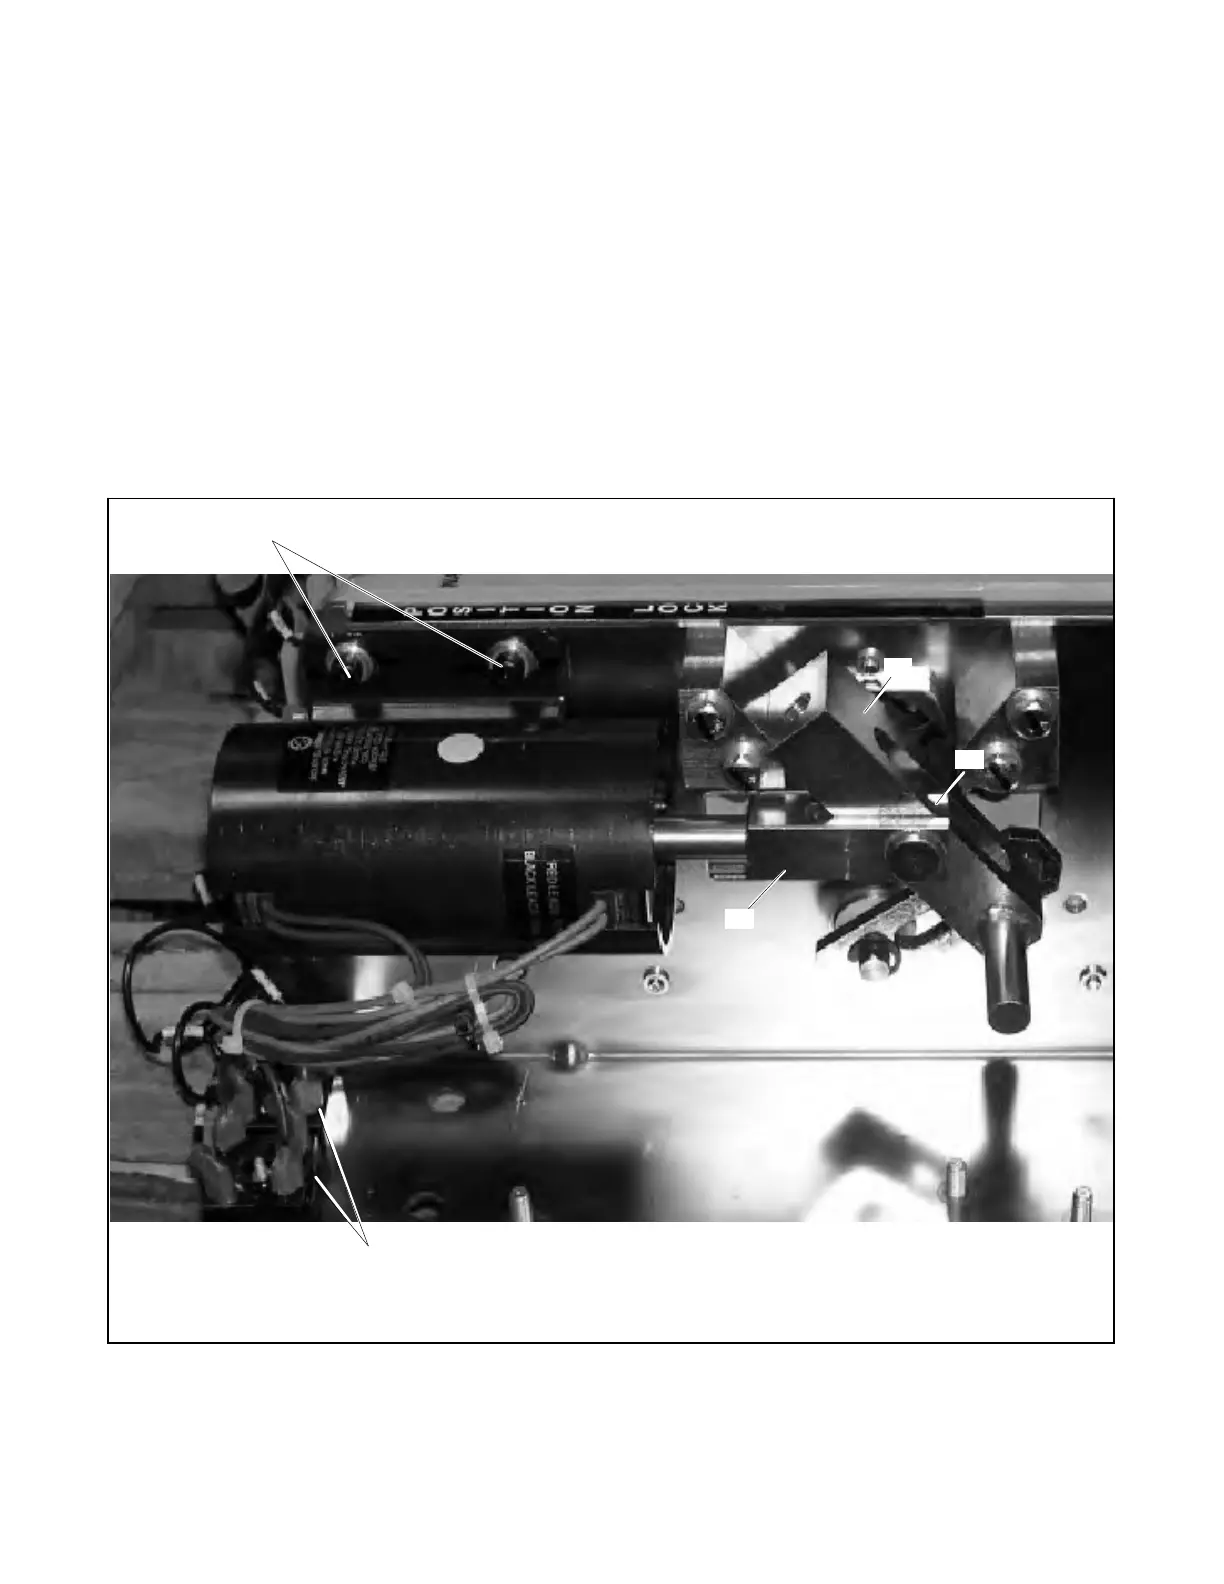
10. Note the rectifier connections and disconnect the
AC leads. See Figure 6-22.
11. Remove tie wraps as necessary.
Note: Be careful to avoid cutting the insulation on
the leads.
12. Place the switch in the Normal position.
13. Mark the location of the solenoid assembly
mounting bracket.
14. Hold the solenoid coil firmly and remove the four
screws and washers. See Figure 6-22.
15. Pull the solenoid assembly with the attached
linkage away from the contactor.
Note: The sealed solenoid coil assembly contains
the coil and the plunger. Do not attempt to
remove the plunger from the coil assembly.
16. Remove the clip that secures the plunger to the
linkage and remove the linkage from the coil
assembly.
17. Use the clip to attach the linkage to the new coil
assembly.
18. Place the new solenoid assembly into position,
aligning the linkage pins with the mechanism slots.
See Figure 6-22.
4
1. Mounting screws with washers (4 ea.)
2. Linkage
3. Clip location (not visible this view)
4. Plunger
5. Rectifier connections
2
3
1
5
Figure 6-22 Solenoid Assembly (shown on the bench)

 Loading...


