15
5 Game settings
5-2 Setting and adjustment of game mode
Manually check and change the settings for the screen displays and game contents
and change them as reguired.
Starting the test mode
1 Turn ON the power switch.
2 While the demonstration game is playing, press the test button on the service
panel. (Do not turn ON the power switch with the test button held down. The
current settings will be erased and the machine will have the factory settings.)
·The main menu is displayed on the screen.
Quit the manual test mode
1 Press the 1P select button (< >) to select “GAME MODE” on the main menu.
2 Press the 1P start button.
·The screen goes back to the game mode.
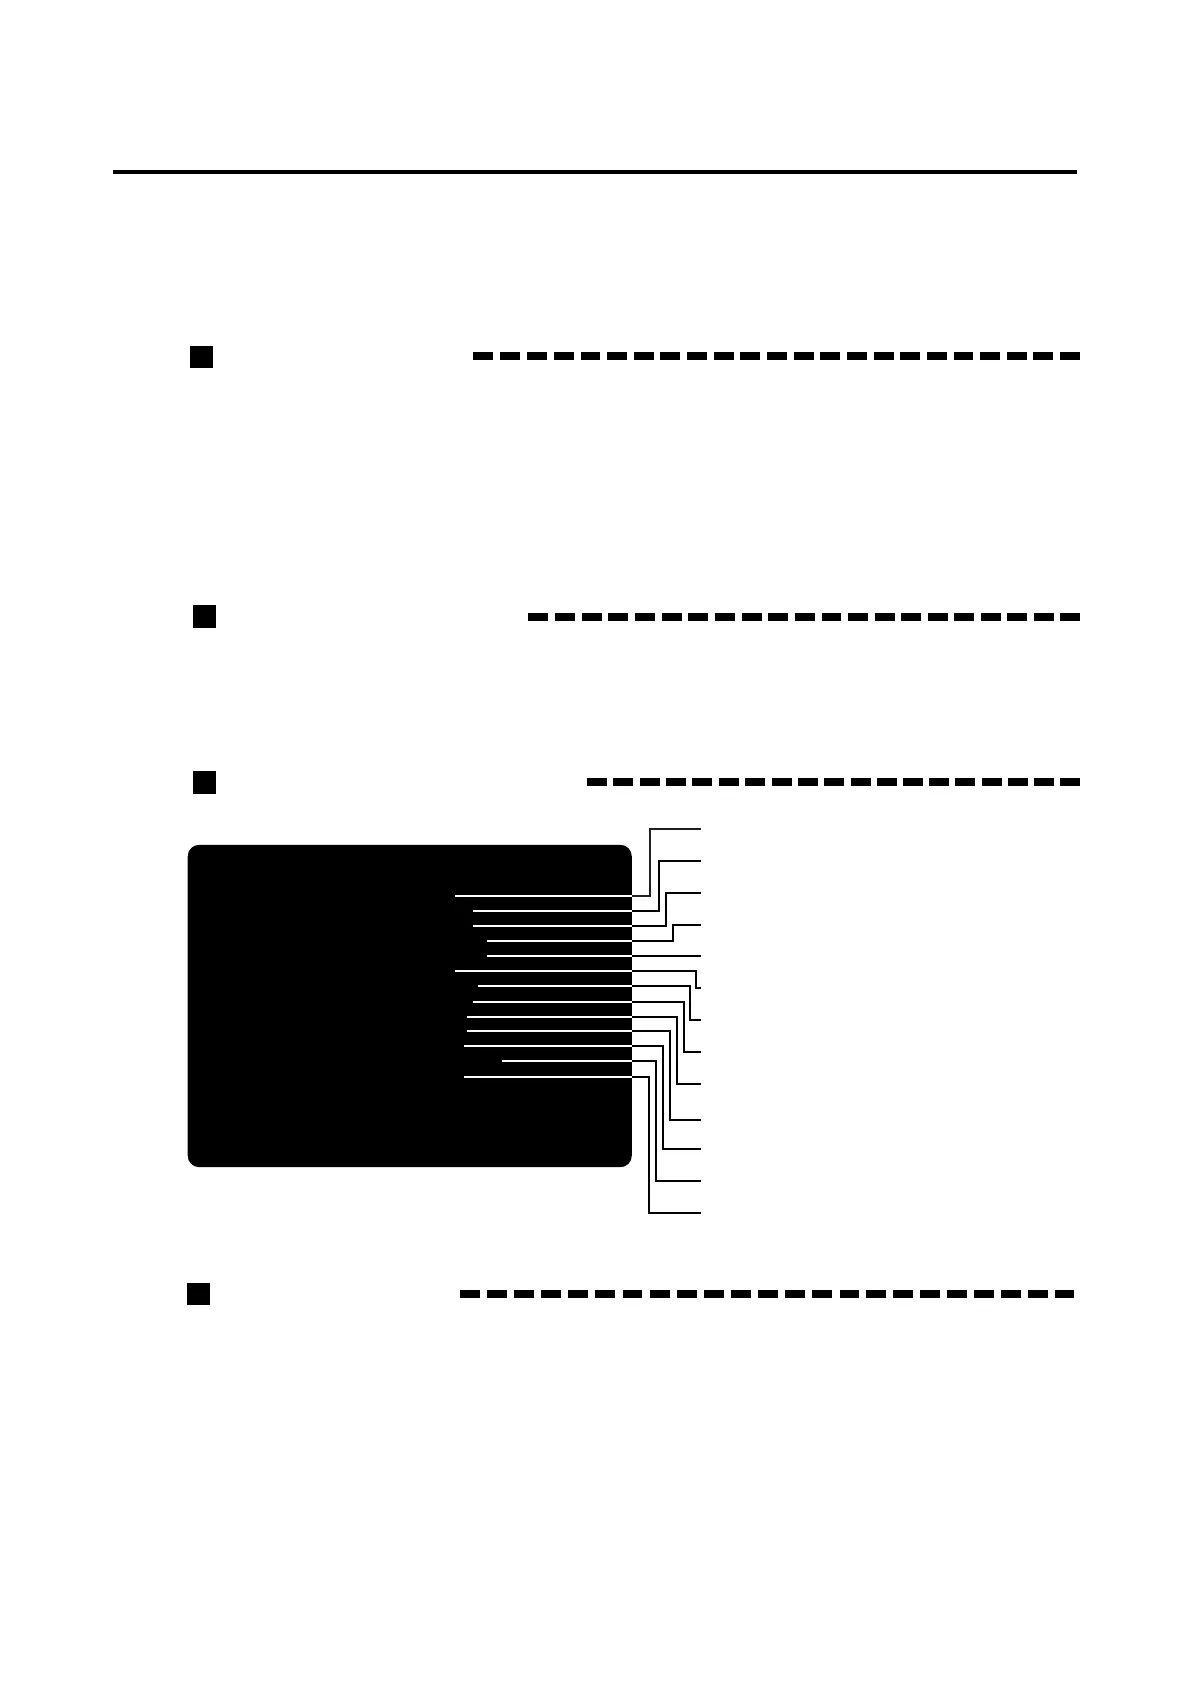
Main menu screen (basic items)
Selecting each mode
How to select each mode from the main menu
·SELECT --> Press the 1P select button (< >).
·SET --> Press the 1P start button.
After selecting a mode, refer to the page on which that mode is described in details.
I/O CHECK
SCREEN CHECK
COLOR CHECK
FLASH ROM CHECK
DIP SWITCH CHECK
CG CHECK
SOUND OPTIONS
GAME OPTIONS
COIN OPTIONS
BOOKKEEPING
LAMP CHECK
ALL FACTORY SETTINGS
GAME MODE
MAIN MENU
PRESS 1P LEFT/RIGHT = SELECT ITEM
PRESS 1P START BUTTON = DO CHECK
VER : UAA
•Checking the controls.
--> Page 24
•Adjusting the screen distortion.
--> Page 24
•Adjusting the display color.
--> Page 25
•Checking the content of the FLASH-ROM in PCB unit.
--> Page 25
•Indicationing the DIP switch settings.
--> Page 25
•Checking the CG board performance.
--> Page 26
•Setting various sound options.
--> Page 26
•Setting various game options.
--> Page 27
•Setting various coin options.
--> Page 27
•Displaying the bookkeeping information of coins.
--> Page 28
•Checking various lamps for lighting
--> Page 30
•Returning all the settings to factory ones.
--> Page 30
•Returning to game mode.