3-36
4
5
6
7
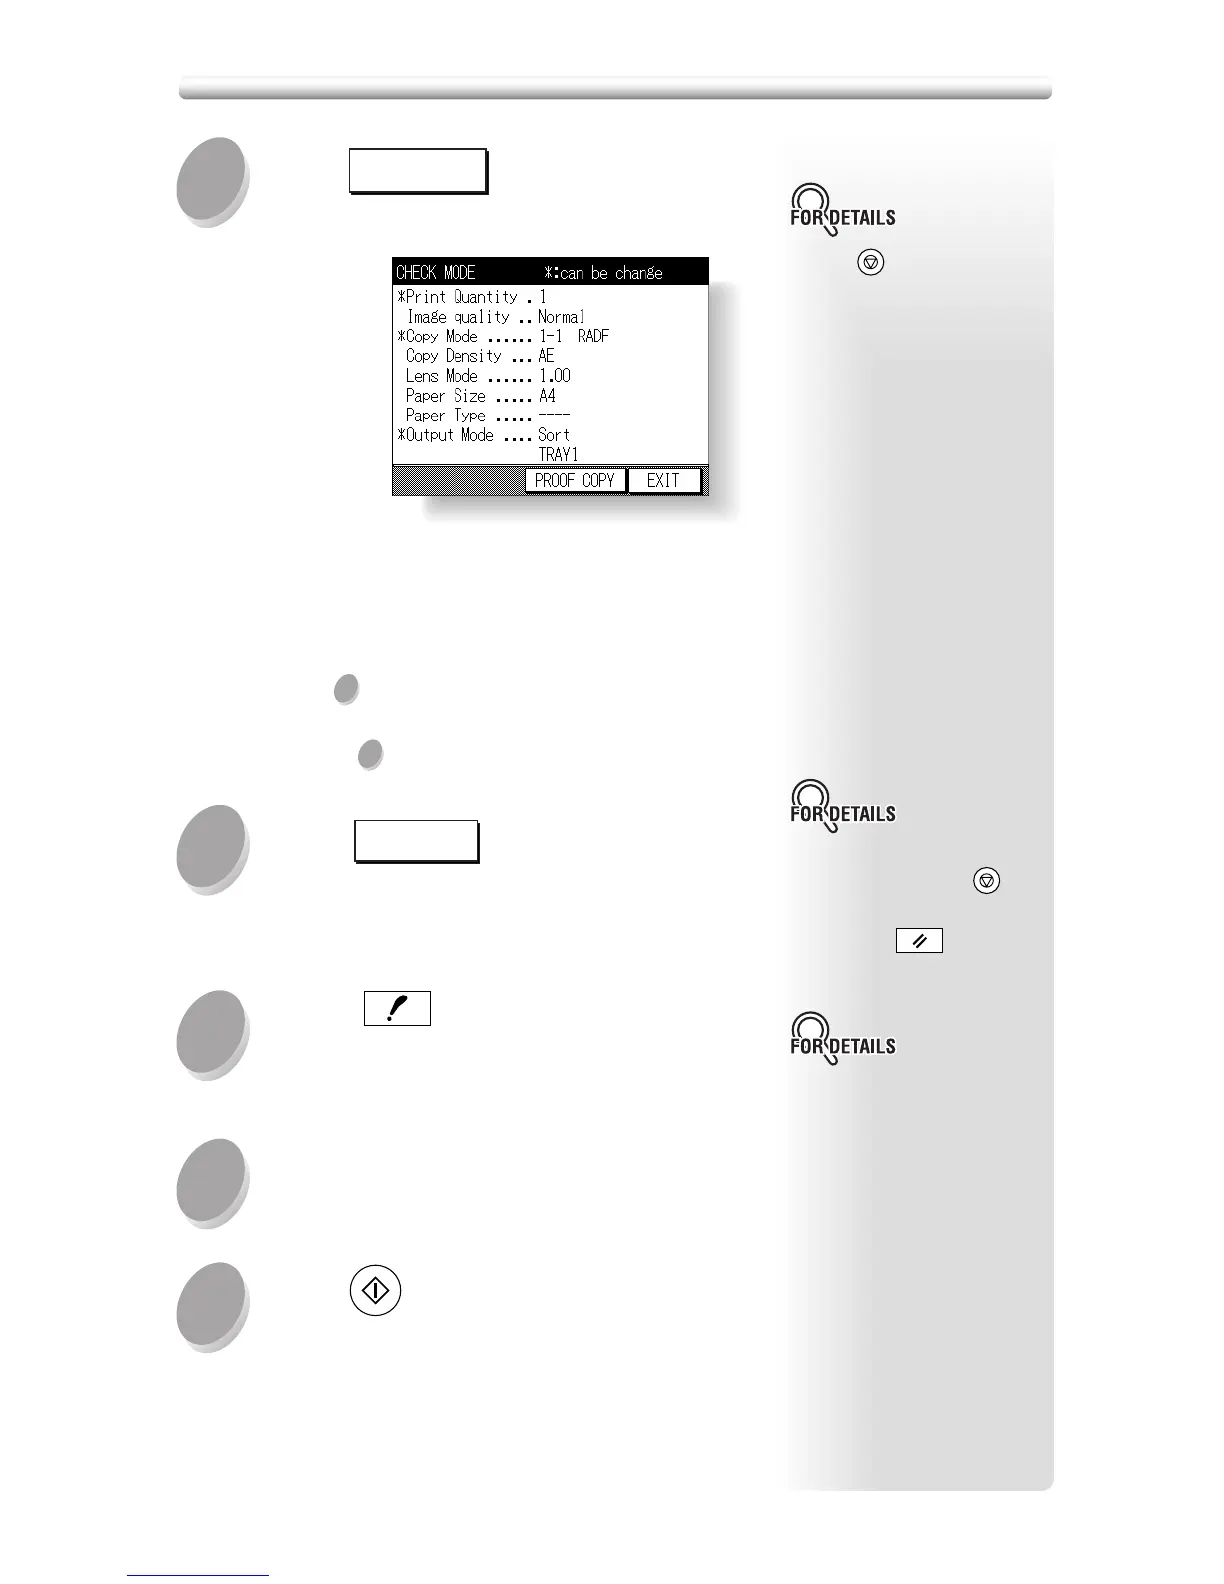
Touch
PROOF COPY
on the Check Screen.
A set of sample copy will be output.
After proof copying, the Check Screen displays “✽”
mark on the left of some settings that can be
changed.
• When the copy result is satisfactory, proceed to
step
7
.
• When any setting change is required, proceed
to step
5
.
Touch
EXIT
.
The Basic Screen will be restored.
Change settings that can be changed after proof
copying, as desired.
Press
CHECK
to display the Check
Screen, then repeat proof copying, as
required.
Change the print quantity, as required.
Press
START
.
If the print quantity is not changed, the copier will
output the rest except the sample sets.
8
Press
STOP/CLEAR
to suspend the
proof copying. In this case, the
scanned image data will not
be deleted from memory.
If the desired selection cannot
be changed, press
STOP/CLEAR
to
delete all the data in memory,
then press
AUTO RESET
to restart
the job setting.
Proof copy can be performed
as needed, until the print
quantity amount on the Basic
Screen reaches zero. (Note
that the print quantity amount
on the Check Screen does not
change.)
If required, change the print
quantity on the Basic Screen.
Checking Feature Selections and Proof Copying (continued)





 To Next Page