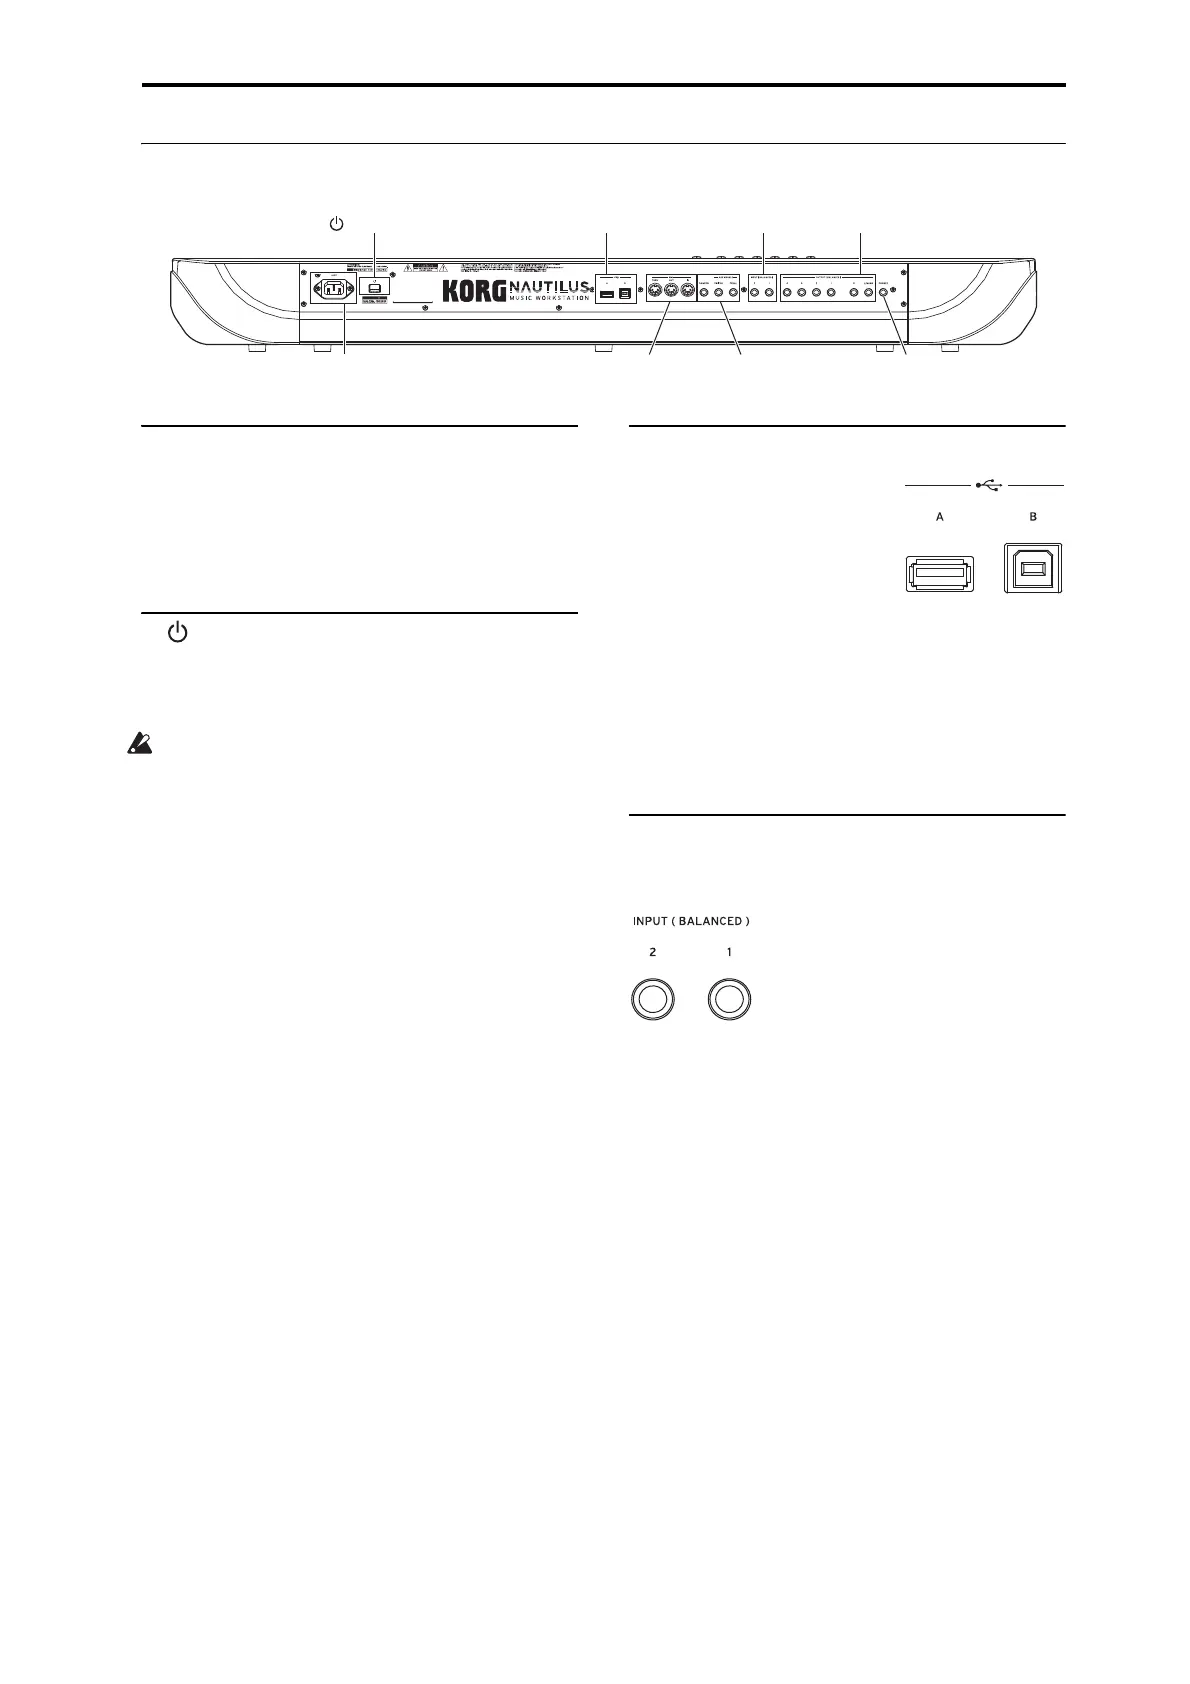
Front and rear panels Rear panel
5
Rear panel
1. AC Power connector
Connect the included power cable here.
We recommend that you first connect the power cable to the
NAUTILUS, and then connect the other end of the cable to
an AC outlet (see “1. Connecting the power cable” on
page 18).
2. (power button)
This button turns the power on and off. Before turning
NAUTILUS off, make sure that you’ve saved any edits to
your Programs, Combis, Songs, or other user data.
After turning the power off, please wait for at least ten
seconds before you turn the power on again.
Auto power-off
The NAUTILUS has an auto power-off function that
automatically turns off the power when the keyboard or front
panel buttons are not used for a certain length of time*.
* This does not include the MASTER VOLUME slider.
Note: Auto power-off will not operate when the display or
front panel controls are used, when you play the
NAUTILUS, when MIDI is transmitted or received, or when
the drive is accessed (including communication via FTP).
When the power turns off, the settings you had been editing
will be lost. If you want to keep the edited settings, you must
save them first.
You can change the time it takes for the NAUTILUS to turn
off automatically, or disable the auto power-off feature
entirely.
To do so:
1. Select “Auto Power-Off Setting…” in the page menu
commands on the GLOBAL > Basic Setup - Basic
page.
2. Set how long it will take for the power to turn off. Set
this to “Disabled” if you do not want to use this
function.
3. Press “Done” to finish making the settings.
Note: The factory default setting is four hours.
3. USB
USB A port
There is an external, high-speed
USB 2.0 port. You can use it to
connect storage media such as
hard disks, flash media, etc, as
well as class-compliant USB
MIDI controllers. For more
information, see “4. Connecting USB devices” on page 22.
USB B port
This high-speed USB 2.0 port lets you connect to a Mac or
Windows PC, for sending and receiving MIDI and audio.
For more information, see “6. Connecting to computers via
USB” on page 23.
4. Analog Audio Inputs
You can use the audio inputs for recording, sampling, and
real-time mixing through the built-in effects.
INPUT 1 & 2
Inputs 1 and 2 provide 1/4" TRS balanced connectors. You
can use these for either microphone-level or line-level
signals. You can toggle between mic and line level in the
GLOBAL settings.
To adjust the input gain (Gain) and other values, use the
AUDIO IN page of each mode. (see page 21)
For more information for how to make connections and
settings, see “2. Analog audio input connections” on
page 21.
5. Analog Audio Outputs4. Analog Audio Inputs
8. Pedals7. MIDI
3. USB
6. PHONES
2. (power button)
1. AC Power connector
 Loading...