MIDI recording Recording MIDI in real-time
81
Loop All Tracks
This method lets you continue recording as you add musical
data.
The specified region can be recorded repeatedly. This is
ideal when recording drum phrases, etc.
1. Use “Track Select” to select the track that you want to
record.
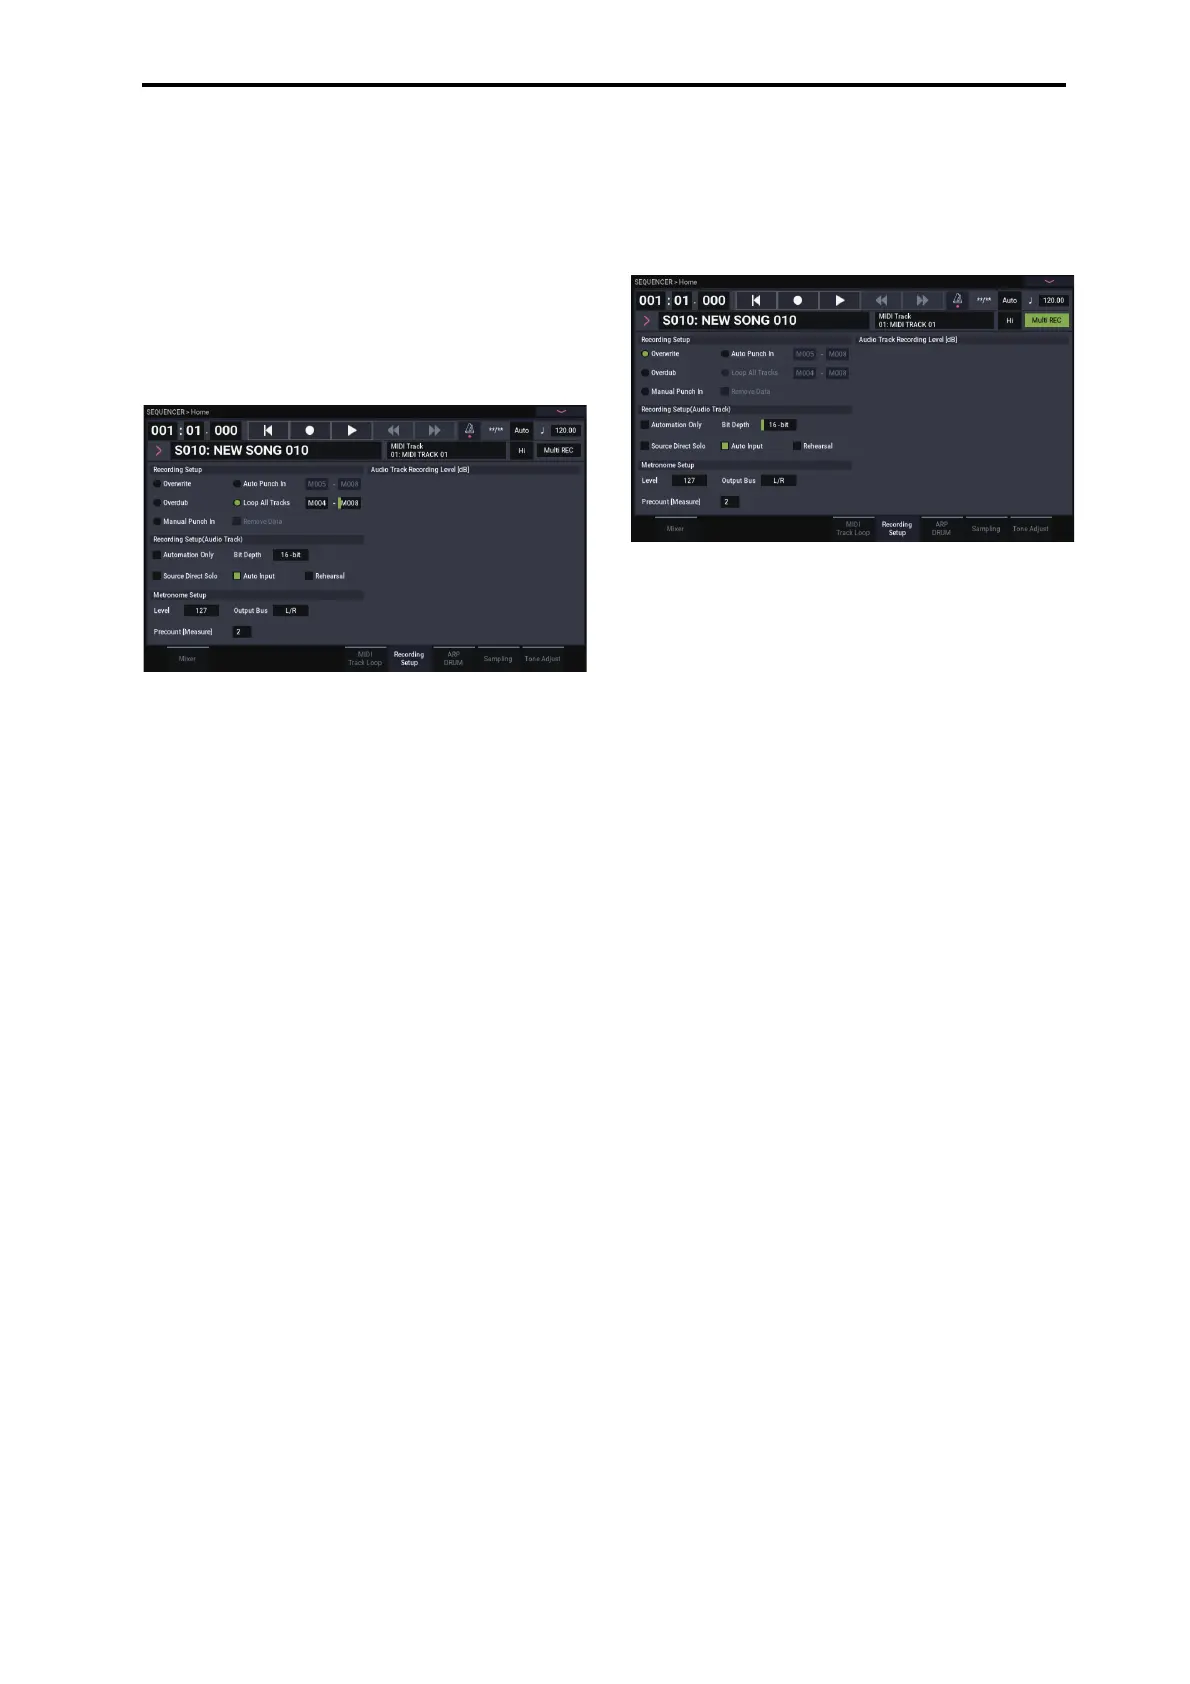
2. Set the Recording Setup to Loop All Tracks.
If Multi REC is checked, it will not be possible to select
Loop All Tracks.
3. In “M (Loop Start Measure), “M (Loop End
Measure)” specify the area that you wish to record.
For example if you specify M004–M008, recording will
occur repeatedly (as a loop) from measure 4 to measure 8.
4. In “Location,” specify a location several measures
earlier than the point at which you wish to begin
recording.
5. Press the SEQUENCER REC button, and then press
the SEQUENCER START/STOP button.
Playback will begin. When you reach the starting location
you specified in step 3, recording will begin. Play the
keyboard and operate controllers such as the joystick to
record your performance.
When you reach the ending location you specified in step
3, you will return to the starting location, and continue
recording.
The musical data that is loop-recorded will be added to
the previously-recorded data.
6. You can also erase specific data even while you
continue loop recording.
If you press the SEQUENCER REC button during loop
recording, all musical will be removed from the currently
selected track as long as you continue pressing the button.
By checking the “Remove Data” check box you can erase
only the specified data. During loop recording, press the
note that you wish to delete, and only the data of that note
number will be deleted from the keyboard as long as you
continue pressing that note.
Similarly, bender data will be deleted as long as you tilt
the joystick in the X (horizontal) direction.
When you are once again ready to record musical data,
uncheck the “Remove Data” check box.
7. Press the SEQUENCER START/STOP button.
Playback will end, and you will return to the recording
start location that you specified in step 4.
If Loop All Tracks is selected, normal playback will be
looped as well.
Multi (multitrack recording)
Multitrack recording allows you to simultaneously record
onto multiple tracks, each with a different channel.
1. In the upper right of the LCD screen, check “Multi
REC.”
2. Make the desired Recording Setup settings.
You can record using Overwrite, Overdub, Manual Punch
In, or Auto Punch In.
3. Use “Location” to specify the measure at which
recording will begin.
4. For the track you want to record, press Mute/REC to
make it indicate Rec.
5. Press the SEQUENCER REC button, and then press
the SEQUENCER START/STOP button.
With the default settings for Metronome Setup, the
metronome will sound for a two-measure pre-count, and
then recording will begin. Now you can perform on the
keyboard and controllers, and use the ARP or RPPR
functions if desired.
6. Press the SEQUENCER START/STOP button.
Playback will stop, and you will return to the location
specified in step 4.
 Loading...