Important Settings for Film Tying
28
Pos: 6.37.7 /Übersc hriften/Übersc hriften 3/A-E /E/Endposition prüfen und ei nstellen @ 399\ mod_14473109 24511_78.doc x @ 2830196 @ 3 @ 1
3.6.2 Checking and Setting End Position
Pos: 6.37.8 /Beipac ks/Rundballen pressen/Folie nbindung/Mod ulgruppen Brems e / Spiralwalz e/Endposition pr üfen und einstell en_Bild @ 3 99\mod_1447 255856289_78. docx @ 282 9179 @ @ 1
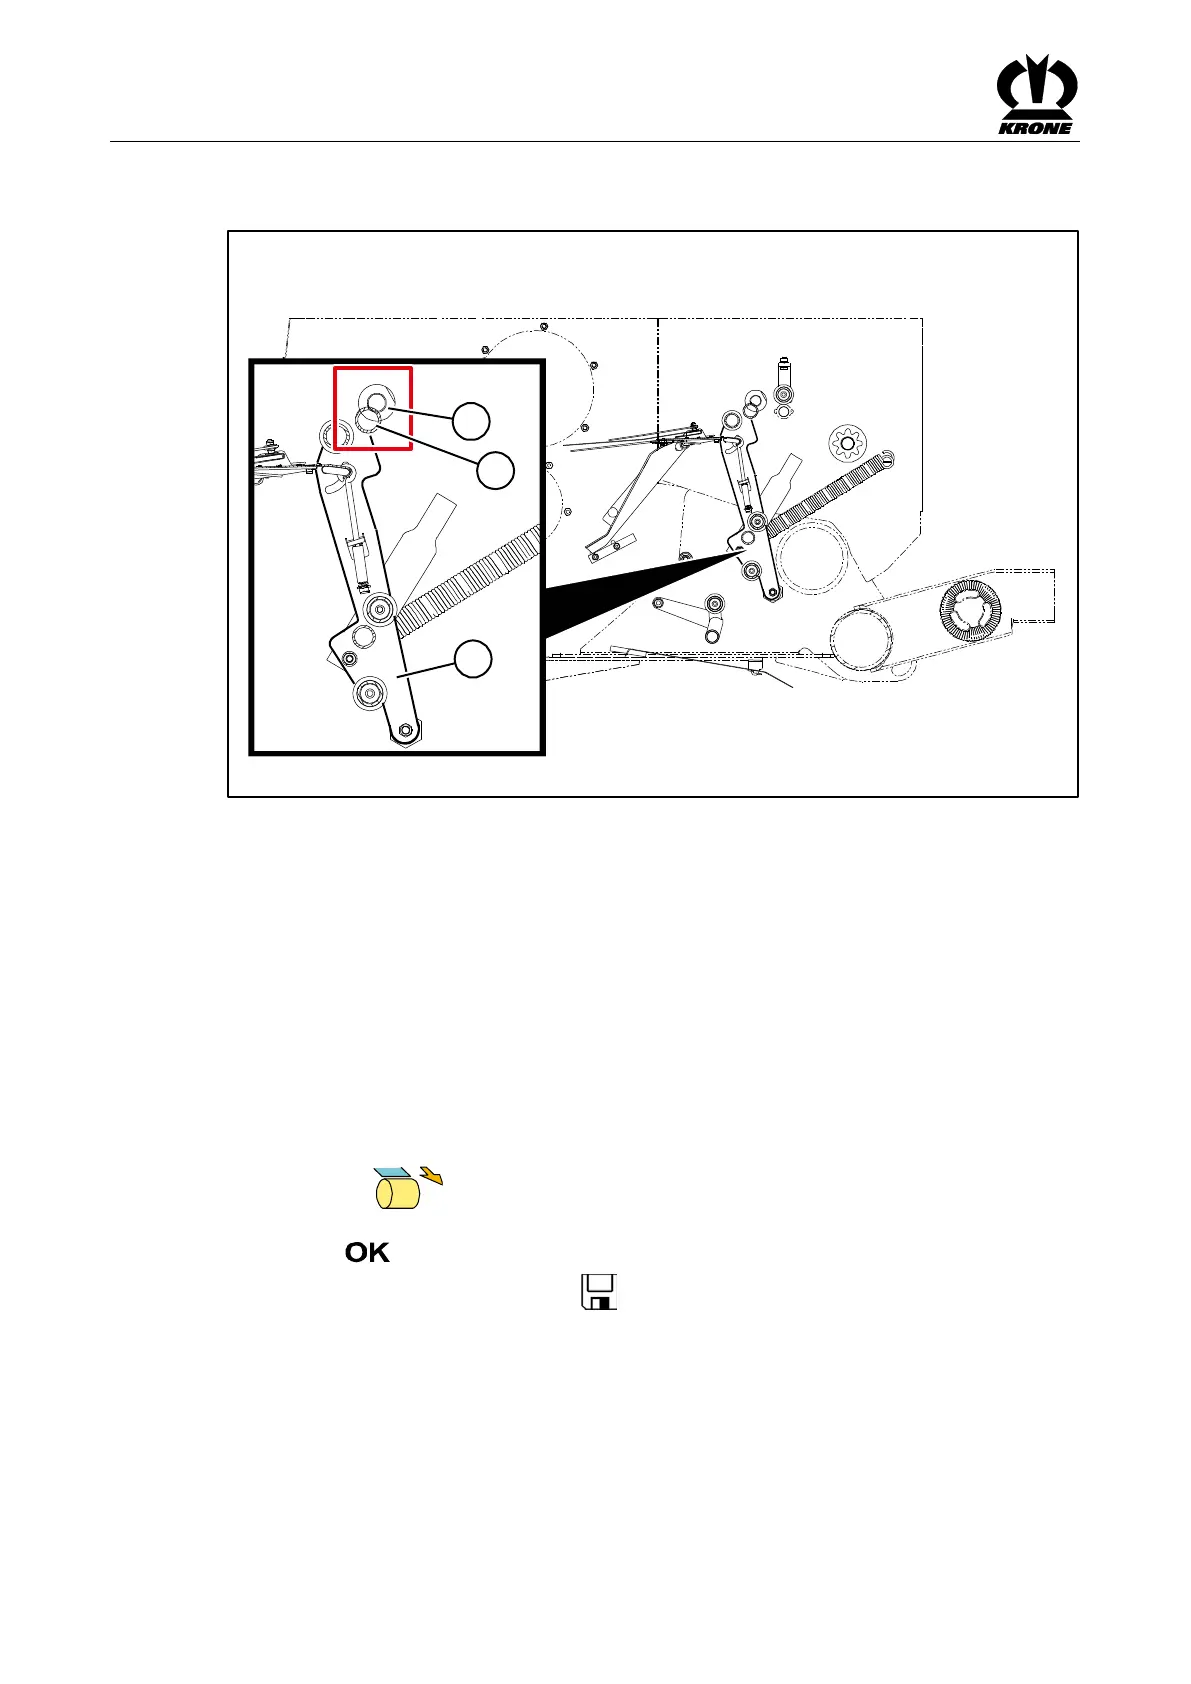
Fig.
Pos: 6.37.9 /Beipac ks/Rundballen pressen/Folie nbindung/Mod ulgruppen Brems e / Spiralwalz e/Endposition pr üfen und einstell en_Text_all e Comprima @ 353\mod_143 7734650819_7 8.docx @ 26 41838 @ @ 1
For the film tying version, the net rocker arm (1) must rest against the insulation of the pressing
shaft (2) in end position. For optimum film reception, check end position and set it, if necessary:
• Open menu 10 “Manual Operation” in the terminal.
• Move net rocker arm (1) to the saved end position using the terminal.
• Switch off tractor and remove the ignition key.
• Check whether the spreading bracket (3) rests against the insulation of pressing shaft (2)
and the film jams between insulation and pressing shaft.
If not:
• Start tractor.
• Open menu 15-1 “Sensor Test” in the terminal.
• Press the key until the spreading bracket (3) rests against the insulation of
pressing shaft (2) and the film jams between insulation and pressing shaft.
• Select key.
The set position will be saved. The icon appears in the upper line.
Pos: 6.38 /Layo ut Module /---------------Seitenumbruch---------------- @ 0\mod_119617 5311226_0.docx @ 4165 @ @ 1