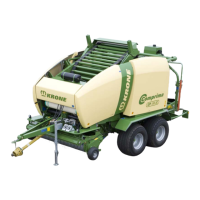
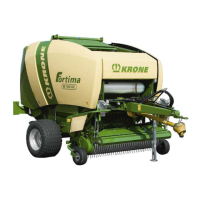
Do you have a question about the Krone Comprima F 155 XC and is the answer not in the manual?
Specifies the applicable round baler types for these instructions.
Instructions on how to obtain replacement documents.
Lists other relevant documents for safe machine operation.
Identifies the intended audience of the manual.
Explains navigation aids like table of contents and index.
Describes the round baler's function and standard equipment.
Specifies the machine is built for customary agricultural use only.
Discusses factors affecting service life and maintenance checks.
Covers fundamental safety rules and warnings for machine operation.
Stresses the critical role of operating instructions for safe use.
Outlines minimum requirements for machine operators.
Lists essential qualifications for personnel performing work on the machine.
Warns about risks to children and how to prevent them.
Details procedures and risks associated with connecting the machine to a tractor.
Prohibits structural changes that may impair safety or functionality.
Advises using only original or manufacturer-approved parts.
Covers safety for machine operators and passengers.
Emphasizes the need for the machine to be in perfect technical condition.
Defines safety clearances and danger zones around the machine and PTO shaft.
Stresses the importance of functional safety devices.
Lists examples of PPE and guidelines for its use.
Explains the role of safety stickers and their maintenance.
Covers dangers and preparations for road travel.
Provides instructions for safe parking and unattended parking.
Discusses using correct operating materials and environmental protection.
Outlines risks from fire, electric shock, and environmental factors.
Details hazards from noise, high-pressure liquids, hot surfaces, etc.
Provides safety instructions for climbing on and off the machine.
Covers safety precautions for maintenance and repair work.
Warns about risks when fitting or dismounting wheels and tyres.
Guides on how to act in emergencies and accidents.
Outlines essential safety procedures for machine operation.
Provides an overview of the machine's main components and their locations.
Details the location and importance of the machine's identification plate.
Provides an overview of the machine's main components and their locations.
Details the location and importance of the machine's identification plate.
Lists detailed technical data including dimensions, weights, and capacities.
Specifies required hydraulic connections for different tractor configurations.
Lists recommended oils and greases, and environmental disposal guidelines.
States the operational temperature range for the machine.
Lists essential checks and preparations before the first operation.
Provides instructions for safely removing the transport tensioning device.
Details the steps for installing the bale ejector assembly.
Explains how to adjust the drawbar for proper hitching and operation.
Covers procedures for mounting the PTO shaft and universal shaft.
Instructs on installing the protective cap for the PTO shaft.
Details the process of connecting the universal shaft to the machine.
Explains how to adjust the universal shaft length for proper operation.
Guides on attaching the hose and cable support to the drawbar.
Describes how to prepare the wrapping material brake before operation.
Outlines the procedure for checking and adjusting tyre pressure.
Explains how to vent the friction clutch on the universal shaft.
Provides a general overview of the electronic equipment and job computer.
Describes the job computer and its functions.
Details the installation of the control unit.
Explains the overview of the control unit's buttons and indicators.
Describes the sequence of events when switching the terminal ON.
Explains how to operate machine functions in manual and automatic modes.
Guides on performing tying operations manually.
Explains how to initiate and manage automatic tying processes.
Covers various settings and diagnostic procedures for the terminal.
Explains how to adjust the number of net layers for baling.
Details how to set the automatic blocking time for the knotter.
Describes how to set the engine position for net tying.
Guides on adjusting the feed position for optimal crop intake.
Explains how to set the cut-off position for the blades.
Describes how to move the motor to the tying position.
Explains how to test machine sensors for digital condition.
Describes how to check the function of the rotary potentiometer.
Explains the meaning of various displays and signals on the terminal.
Details how to set baling pressure or bale diameter via the terminal.
Explains how to view the terminal's version number.
Lists acoustic and visual signals and their corresponding meanings.
Provides critical instructions for safely hitching the machine to the tractor.
Details special safety instructions for handling hydraulic systems.
Outlines critical safety measures for hydraulic line connections.
Explains how to correctly connect hydraulic lines based on control unit types.
Describes the hydraulic brake system for export versions.
Explains the installation and function of a hydraulic auxiliary brake.
Provides essential safety instructions for installing the PTO shaft.
Details the connection procedure for the compressed air brake system.
Guides on connecting the road lighting system to the tractor.
Explains the correct usage and importance of the safety chain.
Lists essential tasks to be performed before road travel.
Details how to lift and secure the pick-up for transport.
Explains how to check if the parking support is in the transport position.
Guides on checking the functionality of the road lighting system.
Outlines procedures for safely switching off the machine.
Details the placement of wheel chocks for secure parking.
Explains how to move the parking support into the support position.
Describes the process of disconnecting the PTO shaft.
Guides on safely disconnecting hydraulic and electrical lines.
Covers securing machine parts for safe transport.
Provides instructions for safely lifting the machine for transport.
Details how to secure the side hoods for transport.
Explains how to secure the twine box flap.
Guides on mounting the transport tensioning device for height reduction.
Lists essential settings and checks to perform before starting work.
Discusses factors influencing travelling speed and recommended values.
Explains how to achieve consistent bale density by filling the chamber evenly.
Provides methods to reduce pressure on bale chamber side walls for critical crops.
Describes how to mount additional guide rails for improved bale safety.
Details the installation of deflector sheets to improve bale ejection.
Covers the process of tying and depositing bales.
Provides specific instructions for driving the machine with the bale ejector engaged.
Outlines checks and adjustments to make before starting the baling process.
Explains how to tension the floor conveyor for proper operation.
Describes steps to take after baling is complete.
Explains the function of the cam-type clutch for overload protection.
Details the drive chain and cam-type clutch on the pick-up.
Covers adjustments and maintenance for the pick-up unit.
Guides on setting the correct working height of the pick-up.
Explains how to fine-tune the pick-up height using chains.
Details how to adjust the spring setting for better unevenness passage.
Explains how to set the height of the crop press roller unit.
Guides on adjusting the baffle plate height for optimal crop flow.
Covers maintenance, adjustment, and general aspects of the cutting system.
Describes the cutting system's components and functionality.
Explains how cutting length is determined and adjusted.
Details how to adjust the bale diameter.
Guides on preselecting bale diameter using the terminal.
Explains how to set the bale diameter display.
Provides instructions for setting the baling pressure using handwheels or the terminal.
Guides on adjusting the baling pressure indicator display.
Details how to set the tailgate catch mechanism.
Covers the overview and function of the twine tying system.
Provides an overview of the twine tying components.
Explains the process of guiding and tying twine.
Guides on preparing and inserting the tying twine correctly.
Explains how to set the number of twine layers based on crop length.
Lists additional settings related to twine tying.
Covers the functionality and procedures for net wrapping.
Explains how the net wrapping system operates.
Provides detailed steps for inserting a net roll into the machine.
Guides on safely inserting the net into the tying unit.
Directs users to terminal settings for feed, cut-off, and tying positions.
Explains how to set the number of net layers via the terminal.
Covers the functionality of net and chamber film wrapping.
Explains the operational process of net and film wrapping.
Details the procedure for inserting net or film rolls.
Guides on safely inserting the net into the wrapping unit.
Explains how to insert film sheets, noting differences for net vs. film.
Directs users to terminal menus for setting net or film layers.
Provides important operational notes and recommendations for film wrapping.
Explains how to check the film stretch level for proper bale wrapping.
Guides on adjusting floor conveyor tension and spring pretensioning.
Outlines how to check the tension springs for the density display.
Explains methods to adjust bale core density based on crop type.
Provides instructions for clearing crop blockages in various areas.
Details procedures for removing crop blockages at the pick-up.
Outlines steps to clear blockages under the cutting rotor.
Provides instructions for clearing blockages within the baling element.
Covers safety precautions and procedures for using the reversing device.
Explains how to adjust brake force release for optimal film feeding.
Guides on adjusting the wrapping material brake for net or film tying.
Details adjusting the wrapping material brake using cones and eyelet bolts.
Explains how to lock and release the clamping lever for net/film tying.
Guides on checking the retaining comb for net tying.
Guides on checking the retaining comb for film tying.
Explains how to adjust the retaining comb for film tying.
Details how to check and adjust the feed rocker arm position.
Explains how to adjust the twine limiter based on crop type.
Guides on adjusting the wire rope for the twine brake.
Details how to set the distance between net rollers.
Explains how to adjust the twine brake for proper tension and cutting.
Guides on adjusting the pressure roller for correct twine feeding.
Explains how to adjust the magnetic transmission for correct functionality.
Covers adjusting the blade angle and height on the tying unit.
Details the operation and maintenance of the central chain lubrication system.
Advises on using only authentic KRONE spare parts to maintain safety and warranty.
Provides a schedule for routine maintenance tasks and intervals.
Lists tightening torques for various metric thread screws.
Provides tightening torques for metric screws with control threads.
Lists tightening torques for metric screws with fine threads.
Provides tightening torques for countersunk screws with hexagonal sockets.
Lists specific tightening torques for gearbox components.
Guides on adjusting the scraper for proper contact with the spiral roller.
Explains how to set scrapers on deflection rolls and without deflection shafts.
Details how to set the stone deflector parallel to the bale formation conveyor.
Guides on adjusting the spring pretensioning for the tailgate lock.
Shows the location of various sensors on the machine.
Directs users to terminal menus for setting specific sensors.
Explains how to check and adjust the axial play of the brake disc.
Advises on removing residues before film wrapping commissioning.
Outlines steps to vent the friction clutch after periods of inactivity.
Covers checking and adjusting the brake system.
Explains the need for frequent readjustment of wheel brakes.
Details the procedure for adjusting the cam brake for compressed air and hydraulic systems.
Describes how to adjust brakes using a manual linkage setter.
Guides on adjusting the brake linkage for tandem axles.
Provides warnings and information about tyre fitting and pressure.
Outlines procedures for checking and maintaining tyres, including tightening torques and pressure.
Covers maintenance related to the drawbar and hitches.
Details maintenance for towing rings and hitches.
Explains procedures for checking and changing oil in gearboxes.
Provides recommended intervals for oil checks and changes.
Guides on checking oil level and changing oil in the main drive.
Advises on checking and maintaining Novo Grip belts.
Explains how to check and lubricate safety rollers.
Outlines checks for the rear floor conveyor to prevent damage.
Guides on adjusting the deflection roller for proper belt tension.
Covers tensioning drive chains for various components.
Details checking and correcting chain tension for the floor conveyor drive.
Explains how to check and set chain tension for the pick-up drive.
Guides on checking and correcting chain tension for the conveyor auger drive.
Details checking and correcting chain tension for the roller drive.
Provides safety instructions and procedures for changing the cutting blades.
Covers safety precautions and methods for grinding blades.
Explains how to move the blade retaining shaft to account for wear.
Covers maintenance procedures for the brake system, including warnings.
Details the installation and maintenance of coupling heads.
Explains the function and maintenance of the air filter.
Covers the function and regular emptying of the compressed-air reservoir.
Outlines critical safety measures for all maintenance tasks involving lubrication.
Lists recommended lubricants and guidelines for their use.
Details the lubrication points and intervals for the universal shaft.
Provides a chart showing lubrication points, quantities, and intervals for different machine sides.
Refers to safety chapter for tailgate stop cock operation.
Outlines essential steps to take before performing work on the hydraulic system.
Describes the location and function of solenoid valves for emergency operation.
Guides on the procedure for replacing the hydraulic oil filter.
States that hydraulic diagrams are found in the appendix.
Lists common malfunctions, their possible causes, and remedies.
Details malfunctions related to the chain lubrication system and their solutions.
Covers troubleshooting steps for issues encountered during twine tying.
Explains how error messages are displayed and where to find detailed descriptions.
Outlines steps for preparing the machine for storage at the end of the harvest season.
Details maintenance work required before the new operating season.
Lists specific maintenance tasks to perform before the new season begins.
Details how to dispose of metal parts, lubricants, synthetic materials, rubber, and electronic scrap.
Refers to the appendix for hydraulic circuit diagrams.
Details the connection process for the KRONE Beta II terminal.
Explains how to connect the KRONE ISOBUS terminal (CCI 200, DELTA).
Guides on connecting the KRONE ISOBUS terminal (CCI 1200).
Provides instructions for connecting external ISOBUS terminals.
Explains the function and safe usage of the ISOBUS Shortcut Button.
Describes the terminal's touch-capable display and navigation.
Details the procedure for switching the terminal on and off.
Explains the different areas of the terminal display.
Explains the layout of the KRONE machine application on the terminal.
Describes the terminal's touch-capable display and navigation.
Details the procedure for switching the terminal on and off.
Explains the different areas of the terminal display.
Explains the layout of the KRONE machine application on the terminal.
Notes the absence of an ISOBUS shortcut button on certain terminals.
Compares varying functions between external ISOBUS terminals and KRONE's.
Explains the icons and information displayed in the status line.
Details the designation and function of various icons and keys on the terminal.
Explains the icons and displays shown on the working screen.
Guides on navigating from the road travel screen to the working screen.
Explains when the terminal automatically switches to the road travel screen.
Details how to adjust bale diameter using the scroll wheel or touch display.
Guides on adjusting baling pressure via scroll wheel or touch display.
Explains how to operate the hydraulic blade group control system.
Outlines the division of the menu structure based on machine configuration.
Explains common icons used for menu navigation.
Guides on navigating through different menu levels.
Explains how to call up menus based on terminal type.
Details how to enter or change values in the menus.
Explains how to select different modes within menus.
Covers specific menu items related to tying functions.
Explains how to set the number of net layers for net wrapping.
Guides on setting the number of film layers for chamber film wrapping.
Details how to set the number of twine layers for twine tying.
Explains the advance signalling function for bale chamber fullness.
Guides on setting the tying start delay for net wrapping.
Explains how to set the tying start delay for twine tying.
Details setting the tying start delay for chamber film wrapping.
Details how to adjust the bale diameter.
Explains how to set the sensitivity of the direction display.
Guides on selecting the tying type for net and twine.
Explains how to select the tying type for net and chamber film wrapping.
Guides on correcting bale diameter based on filling levels.
Explains manual operation procedures for net wrapping.
Details manual operation procedures for net wrapping and twine tying.
Covers manual operation for net and chamber film wrapping.
Explains the counter functions for tracking bales and operating hours.
Guides on managing customer counters for tracking bales.
Explains how to view and reset total counters.
Covers ISOBUS terminal functions and switching between terminals.
Details the process of switching between connected ISOBUS terminals.
Provides access to various machine settings and diagnostic tools.
Guides on performing sensor tests for machine diagnostics.
Explains how to adjust the sensor for the top blade cassette.
Details how to adjust sensors for filling display calibration.
Details how to adjust sensors for filling display calibration.
Guides on adjusting the twine guide slide position.
Explains how to set the tying position using sensor B61.
Outlines safety procedures for performing actuator tests.
Covers common error messages related to electrical and electronic faults.
Provides warnings about ignoring error messages and how to remedy malfunctions.
Lists different types of errors (FMI codes) with their meanings.
Guides on troubleshooting and replacing faulty sensors or actuators.
Provides general aspects on error causes and troubleshooting steps.
Refers to the appendix for hydraulic circuit diagrams.
| Type | Round Baler |
|---|---|
| Weight | 2, 800 kg |
| Number of Knives | 26 |
| Cutting Length | 42 mm |
| Bale Width | 1.20 m |
| Required Tractor Power | 60-80 hp |
