25INTELLIPANEL(TM) CONTROL
(2) Carry out the "Minute" setting in the same way as
the "Hour" setting.
(3) With the "Minute" setting made, select "Set" with
the "Select" switch and then press the "ENT"
switch. The clock is now completely set and the
setting mode screen appears again.
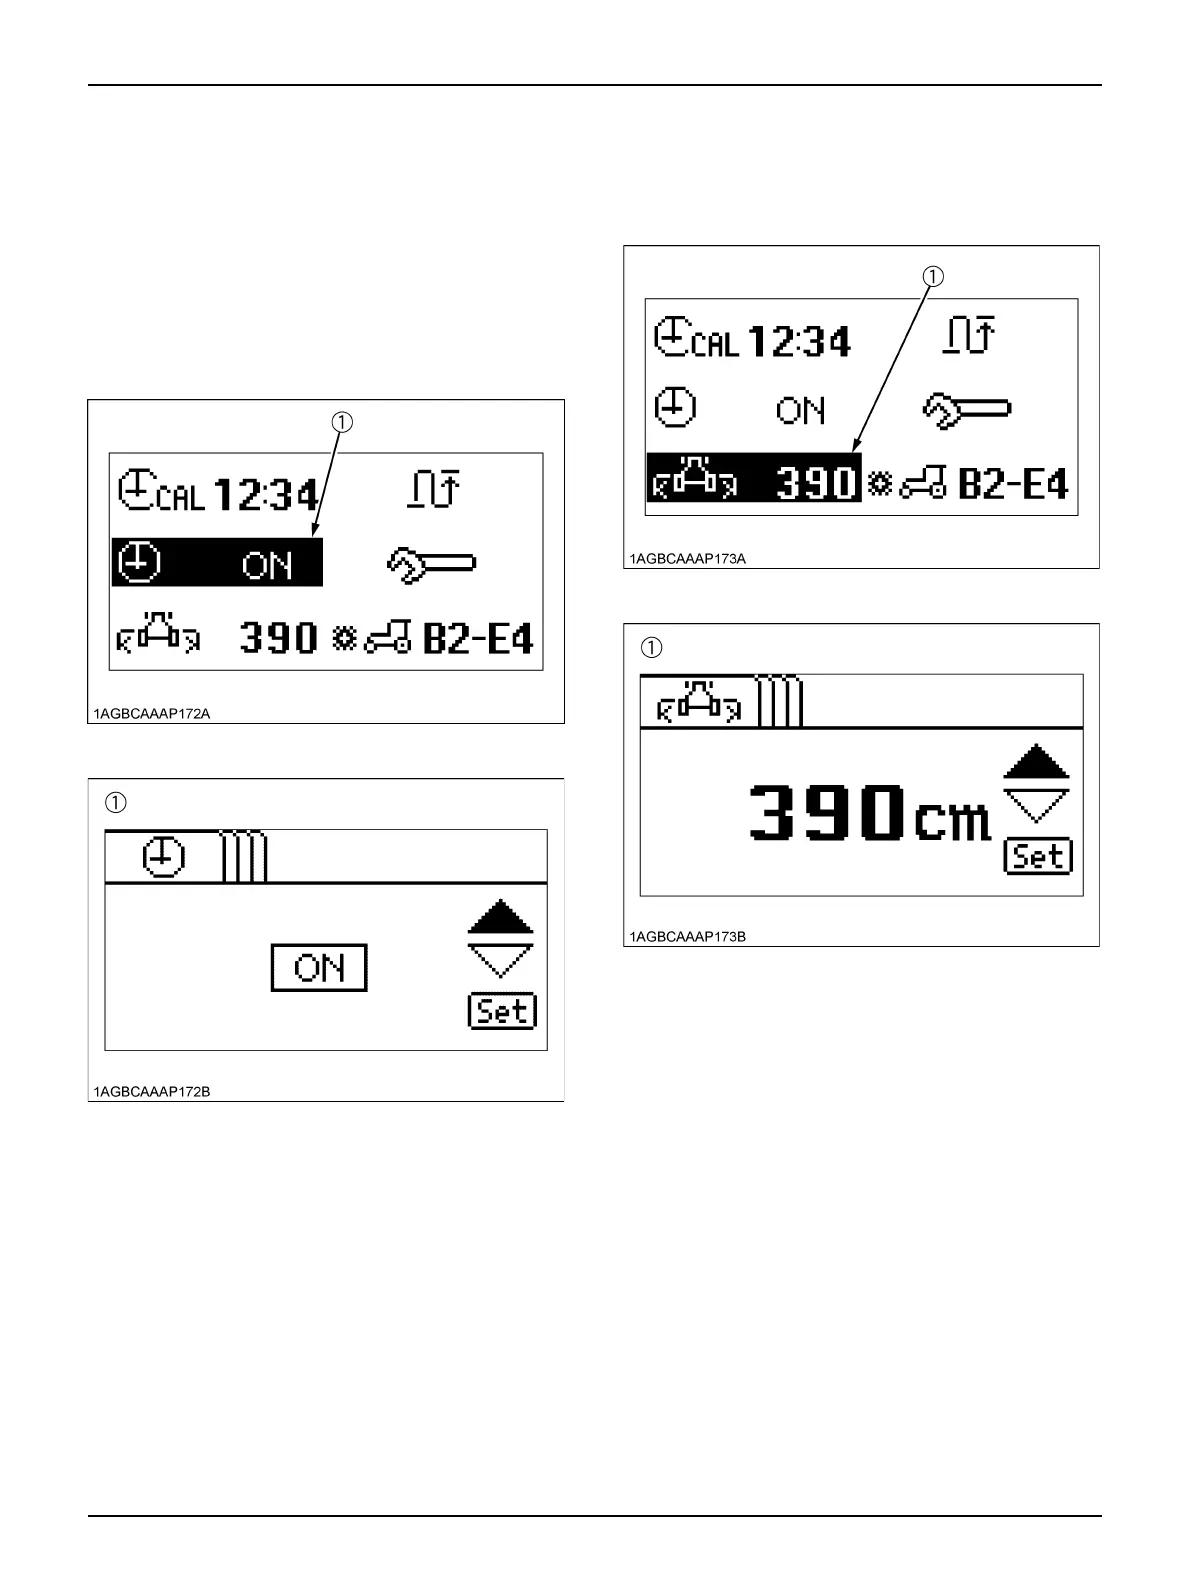
C Setting the clock display ON/OFF
1. Press the "Select" switch to choose "Clock ON/OFF
setting". Then press the "ENT" switch, and the clock
ON/OFF setting screen appears.
2. Press the "Select" switch and select "▼" or "▲". Then
press the "ENT" switch to select clock display ON or
OFF.
3. Select "Set" with the "Select" switch and then press
the "ENT" switch. The ON/OFF setting has been made
and the setting mode screen appears again.
C Setting the working range of implement
1. Press the "Select" switch to choose "Working range of
implement". Then press the "ENT" switch, and the
implement working range setting screen appears.
2. Press the "Select" switch and select "▼" or "▲". Then
press the "ENT" switch, and enter "working range of
implement".
3. Select "Set" with the "Select" switch and then press
the "ENT" switch. The setting is made and the setting
mode screen appears again.
4. Press the "ESC" switch, and the normal screen
reappears.
(1) Clock ON/OFF setting
(1) Clock ON/OFF setting screen
(1) Working range of implement
(1) Implement working range setting screen



 To Next Page