8–30
Triggers and When to Use Them
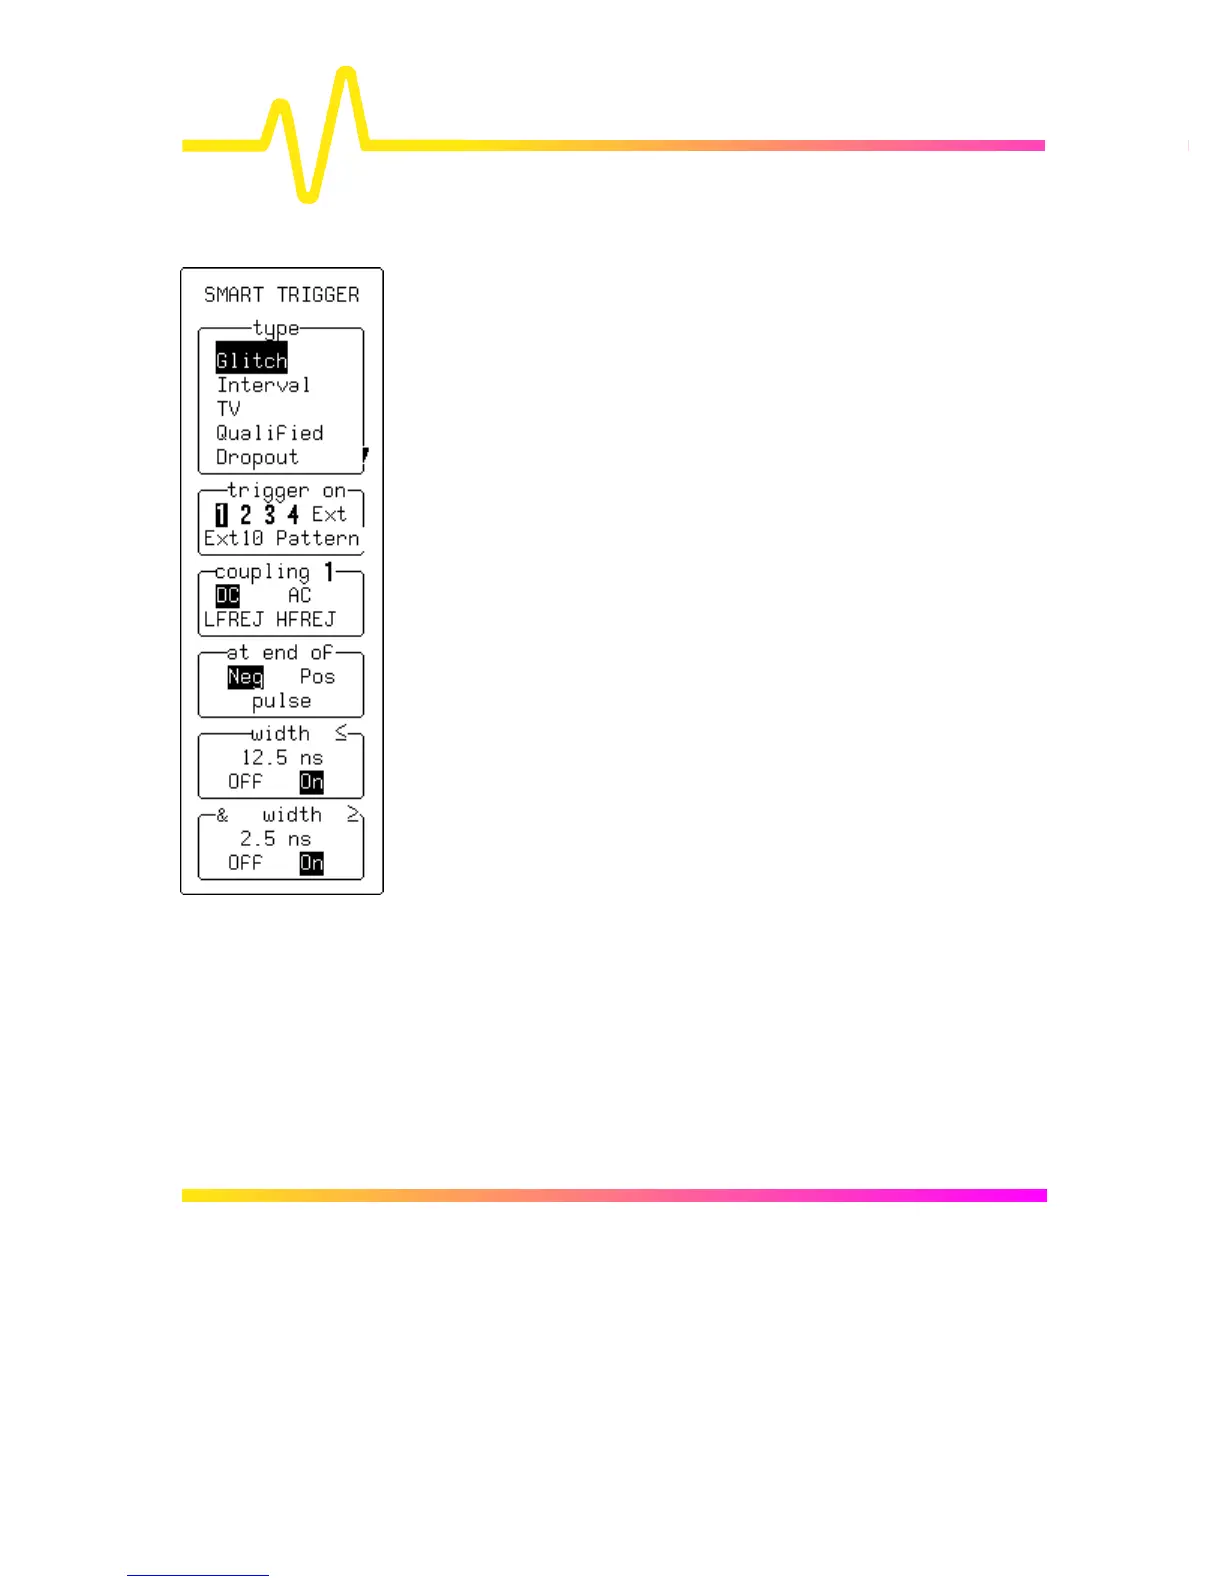
SMART TRIGGER — Glitch
type
To select “Glitch”.
trigger on
For selecting the trigger source (four-channel menu shown).
coupling
To select the trigger coupling.
at end of
To define the test on either “Pos”-itive or “Neg”-ative pulses.
width ≤
When “On” instructs the instrument to trigger if the pulse is smaller
than the value defined in this field. The value can be adjusted with
the associated menu knob, while the test can be turned on or off by
pressing the menu button, and used in combination with the
“width ≥” test. Width values in the range 2.5 ns to 20 s can be
entered.
& width ≥
“On” instructs the instrument to trigger if the pulse is greater than
the value defined in that field. The value can be adjusted using the
associated menu knob, and the test turned on or off with the menu
button in combination with the “width ≤” test menu selection. The
two width limits are combined to select glitches within (“&”) a certain
range if the “width ≤” value is greater than the “width ≥” value.
Otherwise, they are combined to select glitches outside this range.
 Loading...