iComfort Wi-Fi
®
7-Day Programmable Communicating Thermostat
Page 29
Accessing Installer Screens and Changing
Equipment Parameters
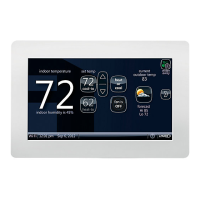
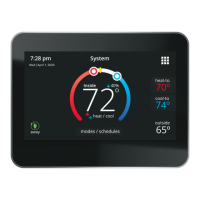
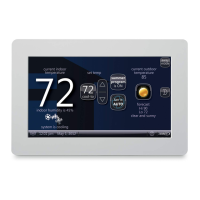
To access the installer screens after the unit has been placed
in operation and the user home screen is displayed, press the
“Lennox” logo and hold for 5 seconds (see figure 34). The
system will access the installer screens.
indoor temperature
indoor humidity is 41%
fan is
OFF
9:39 am Aug 15, 2012
fan is
AUTO
cool-to
set temp
75
Heat-to
72
heat
or
cool
fan is
AUTO
enter
away
outdoor
temperature
80
system is cooling
Wi-Fi
Zone 1
?
Figure 34. Enter Installation Setup Mode
A message screen stating “Qualified Lennox equipment
installer warning” screen appears (Figure 35). Press yes to
proceed (no returns to the home screen).
WARNING!
The following screens are intended for use by qualified Lennox
equipment installers only.
Do you want to proceed?
yes
no
reset
Figure 35. Qualified Lennox Equipment Installer
Warning
1. When pressing yes, the thermostat's will search for
communicating devices in the system.
2. When pressing no, the thermostat's returns to the main
screen.
3. When pressing reset, the thermostat's resets all
parameters to factory default, searches for
communicating equipment and erases all information
concerning non-communicating equipment previously
stored in the thermostat.
4. After initial installation, if an alert is present when you are
making changes to settings, no action on the alert is
mandatory.
Press equipment if you need to set up equipment
parameters and edit details of devices in the system.
Press diagnostics if you need to run to analyze the
system (see page 24).
RECONFIGURING SYSTEM
If any component of the HVAC system has been changed, e.g. replacing an outdoor sensor, reconfiguring the system
will be required.
1. To begin reconfiguring a system (after you have accessed the program from the Lennox logo [previous page]),
press the setup button (1, figure 36A). The “Start system configuration” screen (fig. 36B) will appear.
2. Press start (2, figure 36B) to proceed. The “Re-configure confirmation” screen (fig. 36C) will appear. This reminder
notes that system configuration may affect some existing device settings and prompts to confirm or cancel the
configuration process.
3. Press confirm (3, figure 36C) to continue system configuration; the screen will change to the system discovery
screen. At this point, the program goes through the same setup as the initial setup process which begins on
Page 3.
NOTE - “Compatible device found” screen (shown below) appears only when a device has been removed and replaced
with a compatible device.
Select Devices
equipment
diagnosticstests
alerts
setup
System
Furnace
Thermostat
system and device alerts
9:39 am Aug 15, 2012
EXIT
view active
deselect all
select all
view cleared
press start button only if you wish to setup a new system,
or to re-setup an existing system
equipment diagnostics
tests
alerts
setup
9:39 am Aug 15, 2012
EXIT
back
start
configuring the system may effect some devices.
confirm to continue or press cancel
equipment diagnosticstests alertssetup
9:39 am Aug 15, 2012
EXIT
confirm cancel
2
1
3
Figure 36. Re-Configuration Process
 Loading...