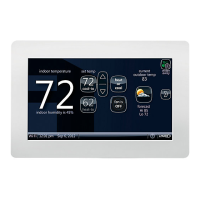
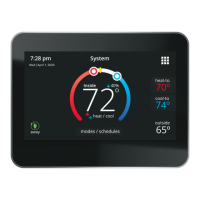
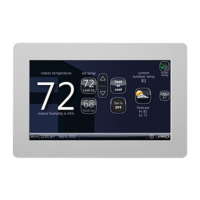
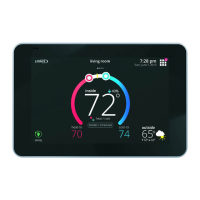
iComfort Wi-Fi
®
7-Day Programmable Communicating Thermostat
Page 69
Table 11. Troubleshooting Tips
Bold text indicates a button, or text display on the thermostat.
No. Corrective Action / CommentsPossible CauseIssue / Problem
7
High Balance Point and Low Bal
ance Point are not listed as a
menu item to adjust the set point
on the thermostat of the heat
pump system.
Balance Point Control must be
enabled to display as the High
Balance Point and Low Balance
Point in the menu and provide
the ability for the installer to ad
just the set point.
- In the installer program select the equipment button, then scroll
down to system device to System and press edit. Scroll down the
menu item choices to Balance Point Control and press edit.
Select enable and press save. High Balance Point and Low
Balance Point are now listed; adjust the balance point settings
and press save.
- If Balance Point Control is not shown as a menu item choice, the
system does not have/recognize an outdoor sensor or the system
is not a heat pump.
8
iComfort
®
thermostat does not
show a choice for Dew Point
Control Humidification mode
(only Basic and Precision
choices).
Dew Point Control will only be
displayed if the system has an
outdoor sensor.
- Add an outdoor sensor to the system and connect to the outdoor
sensor terminals on the indoor unit.
- iComfort
®
system is not able to read the outdoor temperature
sensor in the iComfort
®
outdoor unit, check outdoor sensor.
9
The iComfort® does not display
an alert code message, but the
furnace or unit control displays a
diagnostic code.
The red Critical Alert icon and
homeowner alert button do not
display non-critical alerts.
Go to the installer program alert button to view all alerts and details
about those alerts.
10
The iComfort® thermostat does
not display the Model # and or
Serial # indoor or outdoor unit.
The iComfort
®
control was re
placed with a replacement con
trol before the iComfort
®
sys
tem was initially setup or con
figured.
- Replacement iComfort® controls do not have the Model # or Serial
# loaded in the control.
- The Model # and Serial # cannot be added to the control.
- System will still operate normally.
11
A non-communicating 2-stage
outdoor unit was added to the
system but the unit only runs in
2nd stage.
The “W915 2 Stage Compr”
clippable option link on the fur
nace or air handler control must
be cut when used with a non-
communicating 2-stage outdoor
unit.
Cut the “W915 2 Stage Compr” option link on the furnace or air
handler control.
12
Transfer the model and serial
numbers and system settings to
a replacement control.
The iComfort
®
system is cap
able of copying settings from
the previous configuration to the
new compatible device (control)
found.
Reconfigure the system using the installer program and select the
setup button. The system will go through the system discovery pro
cess. The thermostat will display missing devices (old control) and
found compatible devices (new control). Press the next button to
accept the new device and copy the settings. Thermostat will dis
play Settings were copied after successfully copying the information
to the new control. See section title “Reconfiguring a system” in this
manual.
13
Determine the actual Software
version of the thermostat or one
of the iComfort
®
unit controls.
iComfort
®
software is stored in
the control and can be re
trieved.
From the home screen click the right arrow
then click service info button; then click the thermostat info button;
(display shows model & serial numbers and hardware, software,
Wi-Fi revision information).
14
The iComfort
®
thermostat shows
an error code related to the out
door sensor and or the DAS
even after removing these op
tional accessories.
The outdoor sensor and dis
charge sensor are options,
however if the system was
setup with the sensor in place,
the iComfort
®
system will see
an open sensor reading if it is
disconnected.
- Disconnect the outdoor sensor or discharge sensor.
- Using the installer program, reset the system by selecting setup
button and follow the screen prompts as the thermostat goes
through a new system discovery.
15
The iComfort
®
thermostat will not
provide me a choice to add a
non-communicating heat pump to
a gas furnace.
The iComfort
®
system does not
have the ability to control a non-
communicating heat pump on a
dual fuel system.
Replace the iComfort® thermostat with a conventional thermostat
that has a dual fuel control mode (e.g. Lennox ComfortSense
7000).
16
During system discovery, the
thermostat displays a message
Thermostat is unable to commu
nicate to system components.
The thermostat was not suc
cessful in communicating to the
indoor unit.
- Verify the indoor unit has a iComfort
®
communicating control.
- Check wiring connections at R, i+, i- and C at the indoor unit and
thermostats.
- Check R, i+. I- , C wires for open/shorts.
17
Temperature or humidity calibra
tion does not respond to calibra
tion changes.
Temperature/Humidity calibra
tion changes will change dis
play 1ºF or 1% RH every 3
minutes.
Allow the system to stabilize and complete the calibration mode due
to the time delay. A 5ºF calibration change will take 15 minutes to
calibrate the display.
18
The installer adjustable settings
used to configure the system are
not listed in the equipment button
under the Thermostat (only Temp
Reading Calibration and Humidity
Reading Calibration are listed as
menu items).
The adjustable system configur
ation settings are listed in the
equipment button under Sys
tem.
- In the installer program select the equipment button and choose
System from system device and press edit.
- Over 25 installer adjustable settings are provided including bal
ance point, humidification control, Dehumidification modes, stage
differentials and delays.
table continued on next page
 Loading...
