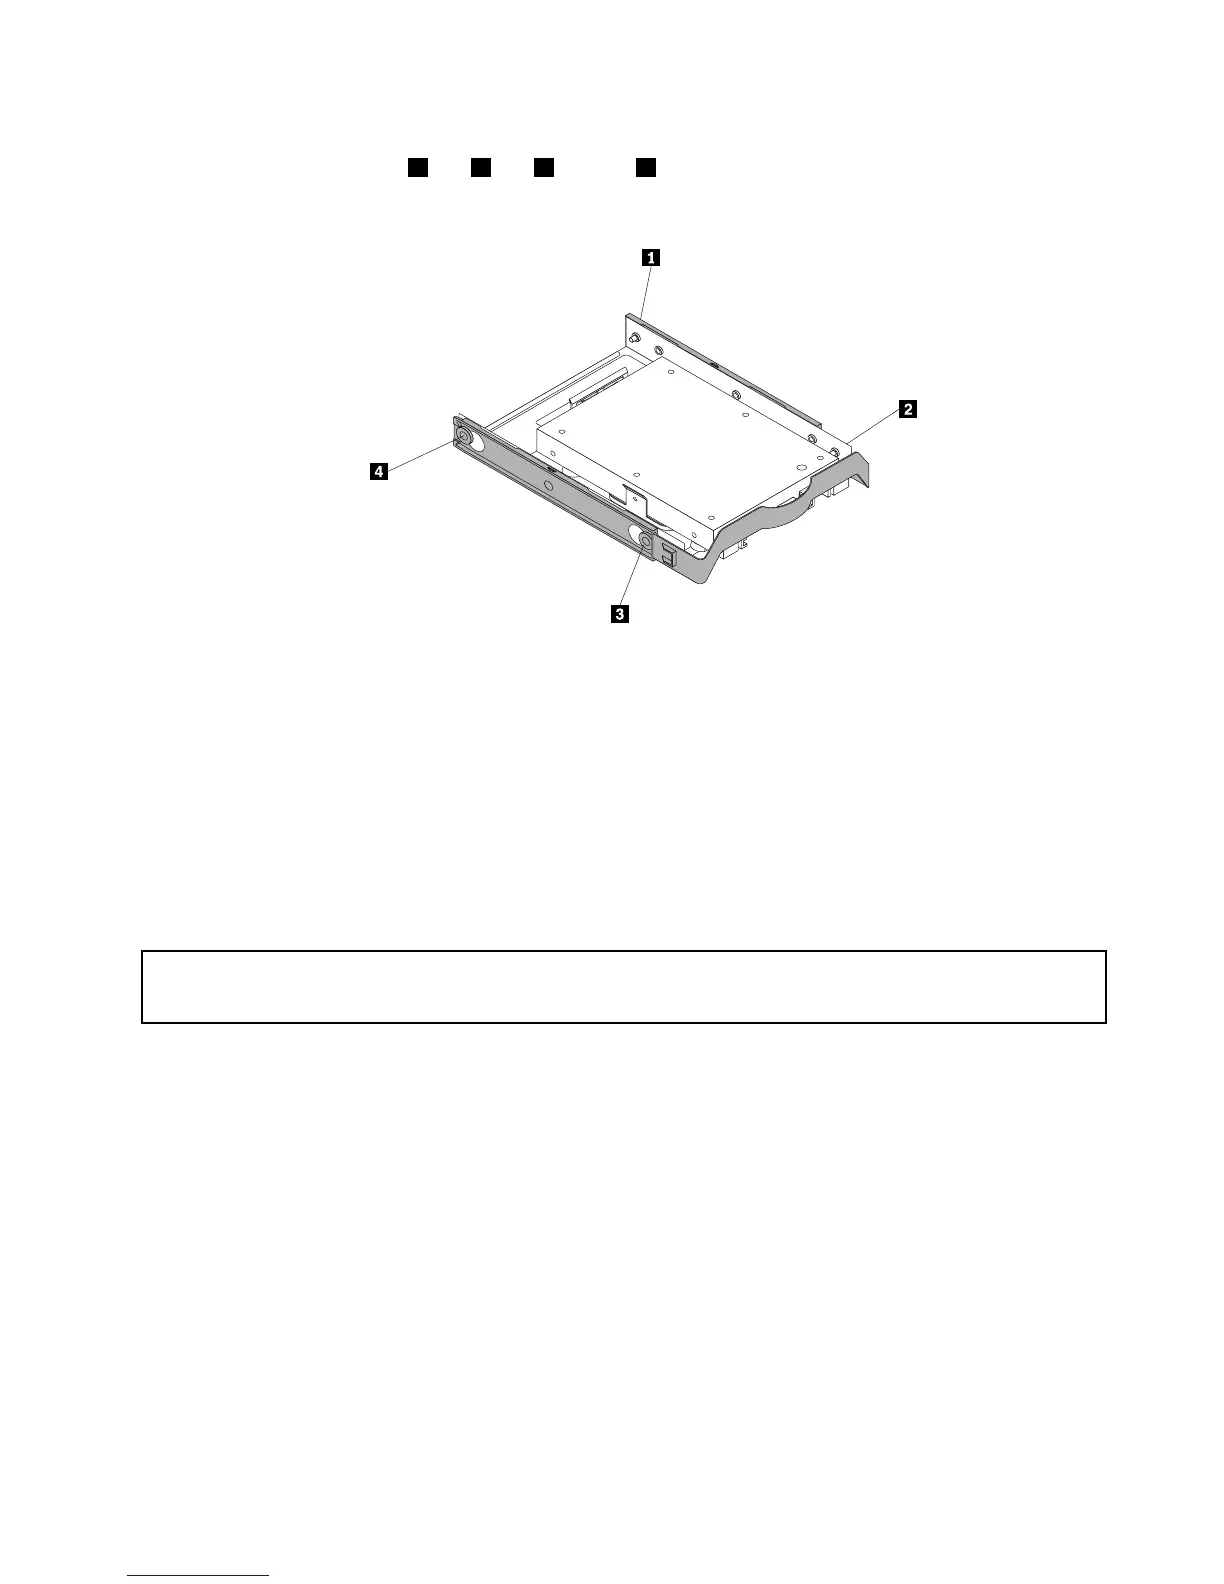
2.Toinstallthesolid-statedrivewiththestorageconverterintothe3.5-inchharddiskdrivebracket,ex
thebracketandalignpin1,pin2,pin3,andpin4onthebracketwiththecorrespondingholesin
thestorageconverter.
Figure29.Installingthesolid-statedrivewiththestorageconverterintotheharddiskdrivebracket
3.Connectthesignalcableandthepowercabletothesolid-statedrive.
4.Installthesolid-statedriveintothedesiredharddiskdrivebay.See“Replacingtheharddiskdrive”
onpage51.
Whattodonext:
•Toworkwithanotherpieceofhardware,gototheappropriatesection.
•Tocompletetheinstallationorreplacement,goto“Completingthepartsreplacement”onpage93.
InstallingorreplacingthemSATAsolid-statedrive
Attention:
Donotopenyourcomputerorattemptanyrepairbeforereadingandunderstandingthe“Importantsafetyinformation”
onpagev.
ThissectionprovidesinstructionsonhowtoinstallorreplacethemSATAsolid-statedrive.
Note:ThemSATAsolid-statedriveisonlyavailableinsomemodels.Fornewinstallation,see“Installing
themSATAsolid-statedrive”onpage45
.Forreplacement,see“ReplacingthemSATAsolid-statedrive”
onpage47.
InstallingthemSATAsolid-statedrive
ToinstallthemSATAsolid-statedrive,dothefollowing:
1.Removeallmediafromthedrivesandturnoffallattacheddevicesandthecomputer.Then,disconnect
allpowercordsfromelectricaloutletsanddisconnectallcablesthatareconnectedtothecomputer.
2.Removethecomputercover.See“Removingthecomputercover”onpage32.
3.Removethefrontbezel.See“Removingandreinstallingthefrontbezel”onpage32.
4.Locatethecardreaderdrivebay.See“Locatinginternaldrives”onpage13.
Note:Youmighthavetoremovethemetalcoverofthecardreaderdrivebay.
Chapter5.Installingorreplacinghardware45