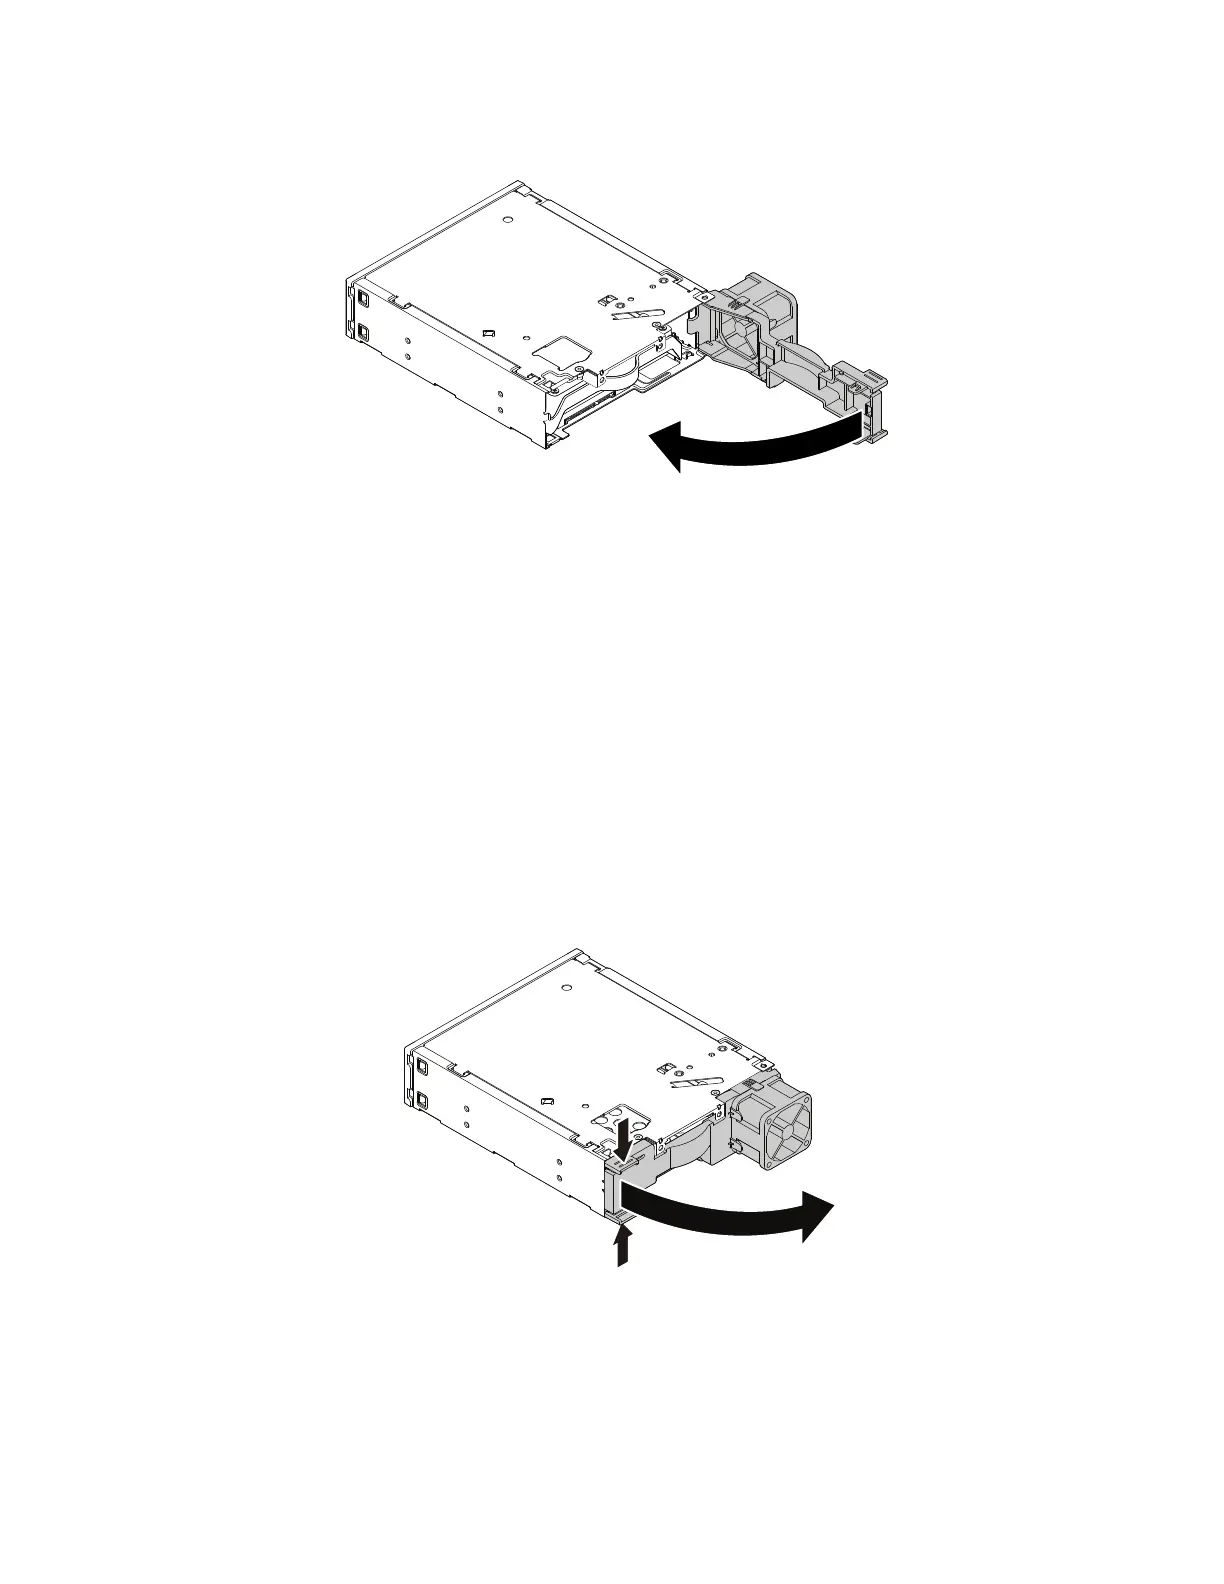
7. Pivot the rear cover of the enclosure inward until you hear a click. The rear cover is secured in place.
Figure 73. Pivoting the rear cover inward
8. Connect the signal cable and the power cable to the storage drive.
What to do next:
• To work with another piece of hardware, go to the appropriate section.
• To complete the installation or replacement, go to “Completing the parts replacement” on page 187.
2.5-inch storage drive
To remove or install a 2.5-inch storage drive with a 2.5-inch to 3.5-inch storage-drive converter (hereafter
referred to as storage-drive converter), do the following:
1. Prepare your computer. See “Preparing your computer” on page 98.
2. Locate the flex bay. See “Internal storage drives” on page 40.
3. Slide the enclosure out of the chassis. See “Device in the flex bay” on page 117.
4. Pinch the two clips toward each other as shown to open the rear cover of the enclosure.
Figure 74. Opening the enclosure from the rear
5. To remove a 2.5-inch storage drive, do the following:
a. Slide the 2.5-inch storage drive out of the rear of the enclosure.
128
P330 Hardware Maintenance Manual