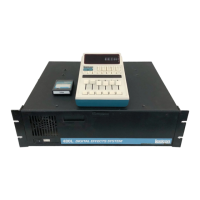
960L Multi-Channel Digital Effects System Service Manual
6-4
Script 2: Executes the MIDI Test and Serial Port 2 Test
Script 3: Executes the 56310 and Z80 to the DPRAM, (Dual Port RAM), Tests.
Script 4: Executes the Lexichip3 Tests.
Script 5: Executes the Z80 to SRAM and Z80 Wait Tests.
Script 6: Executes the TMIX Memory Tests
Script 7: Executes the Serial Audio Tests, the Octal data lines.
Script 8: Executes the I/O Card Cage Tests.
Script 9: Executes the MIDI Test
A full list of each script is included later in this chapter: A LISTING of RESIDENT SCRIPTS.
Custom Scripts:
Using a text editor, custom scripts can be made and run from the floppy drive. In order to perform this use a
computer and type the diagnostic tests to be executed using a text editor following the syntax as outlined in
the test description sections. Save the custom script with a file name. Prior to powering on the 906L
connect a PS/2 compatible keyboard into the PS/2 keyboard connection on the rear of the LARC2. Power
on the 960L and enter the diagnostic mode. This is performed by pressing together and holding for 2
seconds the PROGRAM and MACHINE buttons on the LARC2 immediately after powering on the 960L.
The LARC2 will display Requesting Menu Mode from 960L. See the previous section 960L Diagnostic User
Interface for more information. The floppy containing the custom script can be inserted into the floppy drive
of the 960L at any time. After the diagnostics have been entered using the keyboard connected to the
LARC2 type the command
Script [space] a:\filename
Where filename is the name of the custom script that has been created. The a:\ show the 960L the path to
the custom script, where the script is located so it can find the script. This assumes the custom is in the root
drive on the floppy. Don’t forget to put a space between the command script and the filename.
960L Setup for Functional Diagnostic Tests
MIDI Test:
To pass the MIDI test connect a 5 Pin DIN to 5 Pin DIN cable, (MIDI cable), from the MIDI In connector to
the MIDI Out connector on the I/O Clock card. In addition there are two methods to verify that the MIDI
THRU connector is functioning. The first method is to connect a 5 Pin DIN to BNC cable from the MIDI
THRU connector on the I/O Clock card to the input of a dual channel oscilloscope and observe the MIDI
data when executing the test. Second connect the MIDI THRU port to a MIDI reader such as a PC running
a MIDI terminal program, and observe the MIDI data C0 00. C0 00 is the MIDI data that is sent in the MIDI
diagnostic test.
Serial Port 2 Test:
To pass the serial port 2 test connect a D9 male connector that is wired as specified later in this chapter to
the REMOTE 2 connector on the I/O Clock Card. The REMOTE 1 connector is tested by communicating
with a LARC2.
960L Power On Diagnostic Descriptions:
The 960L power on diagnostics are executed every time the 960L chassis is powered on. The reverb card
is minimally checked for correct operation by the 960L application and the cards in the I/O cage are
identified. The minimal checking of the reverb card is for time purposes. To fully verify the reverb card
diagnostically the time required is approximately 20 minutes. This is unacceptably long each and every time
the 960L is powered on. The results of the power on diagnostics are not displayed on the LARC2. The only
method to verify that the minimal operation of the reverb card is to observe the Reverb card LEDs for
 Loading...