Installing the photodevelopers
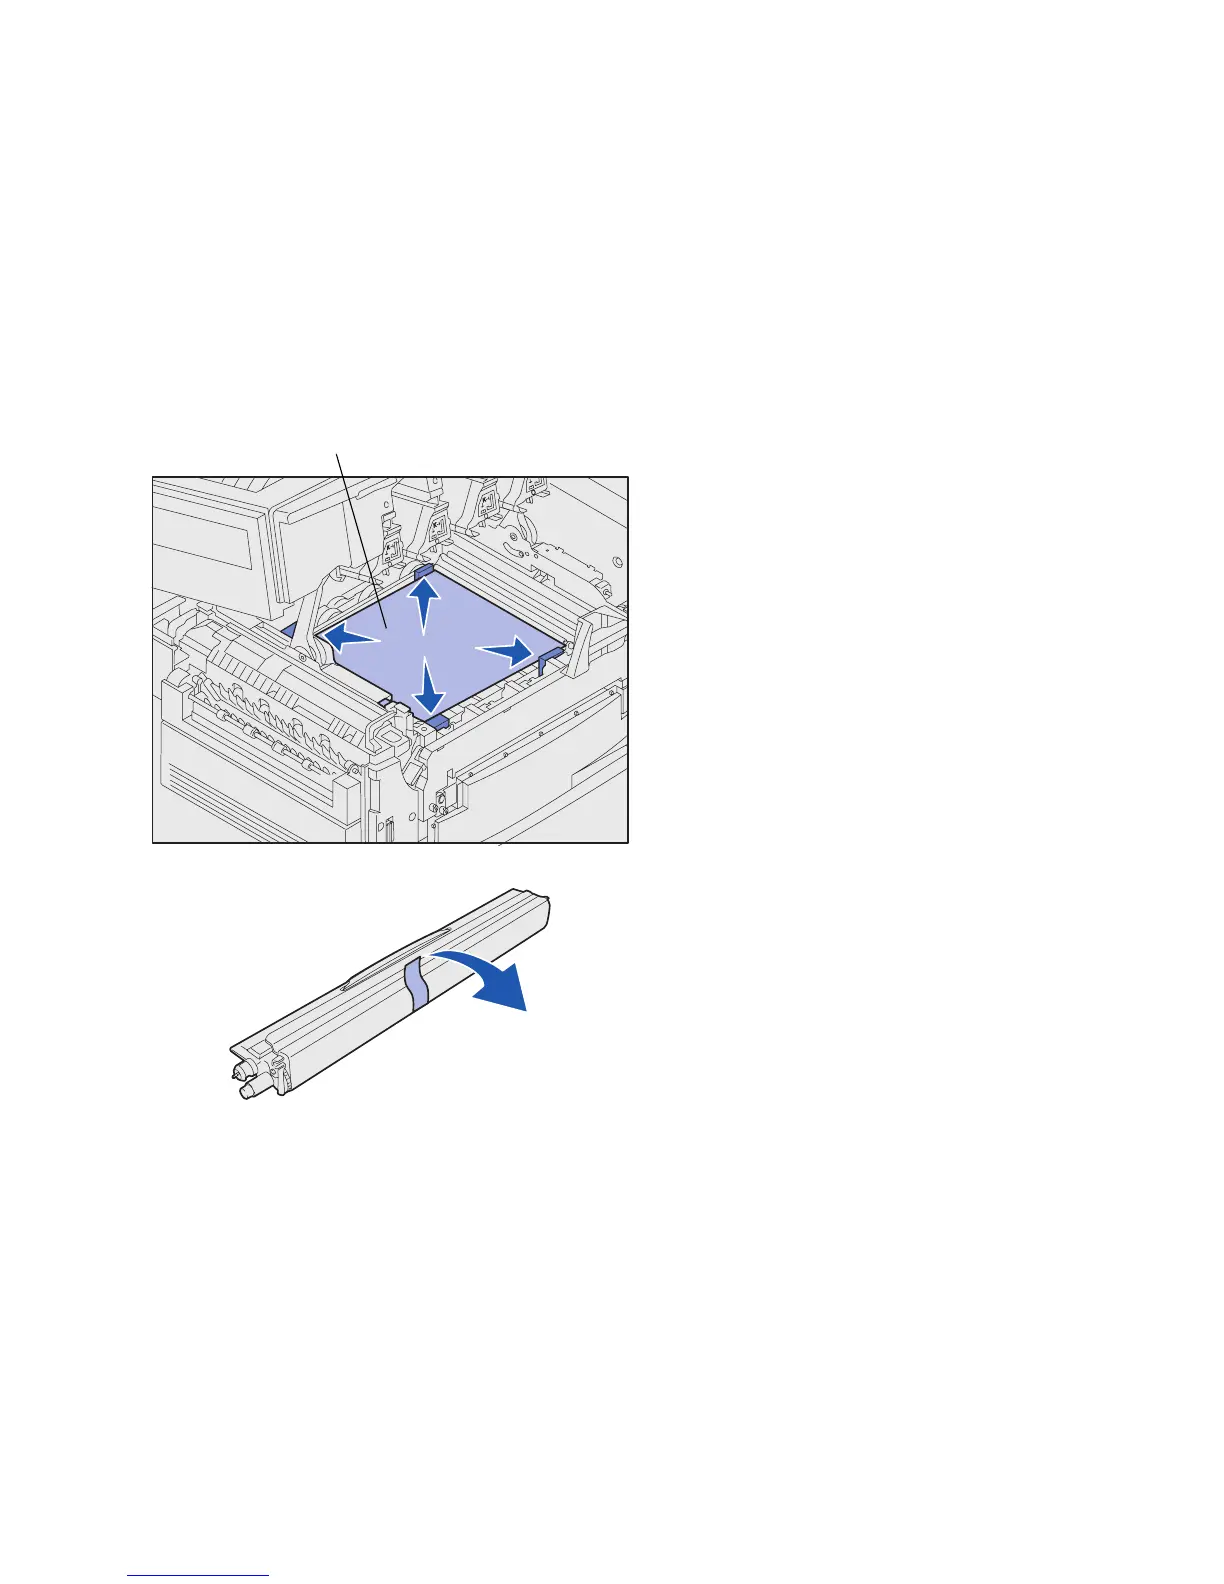
Warning: Do not touch, drop, or place anything on the
transfer belt. Touching the surface of the transfer belt or
placing items on it may damage it.
Transfer belt
Warning: The photodeveloper has a cover over the
green glass tube. Do not touch the glass. Touching the
glass may damage it and reduce print quality. Do not
remove the cover until you begin installing the
photodeveloper.
Your printer ships with four color-coded
photodevelopers which you must place
inside the top cover. Each
photodeveloper has its own color-coded
position.
1 Lift and remove the four shipping
spacers from the transfer belt.
2 Remove any shipping tape and
packing material.
3 Remove one of the
photodevelopers from its packing
material.
You can install the
photodevelopers in any order.
However, it may be easier to install
them from left to right: black,
yellow, cyan, and magenta.
4 Remove the tape from the
photodeveloper.
Install printer supplies
22
 Loading...


