16
Ground Control® 3.0
Aftermarket Manual
lci1.com (574) 537-8900 Rev: 04.19.18
CCD-0001307
Hitch Recognition
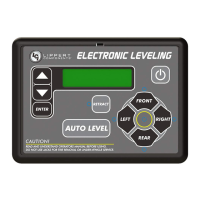
1. Turn on the touch pad.
2. Push the “UP” arrow (Fig. 26A) to scroll to “Auto Reconnect”
option on LCD screen.
3. Push “ENTER” (Fig. 26B). The rear jacks and middle jacks (if
equipped) will retract rst, then the front jacks will extend to
raise the trailer to the height where the auto level sequence
was started.
Note: If the auto level sequence was started with the front of the
trailer in a below-level condition, the Hitch Recognition will not
function and the LCD will display “Feature Disabled.” In order
for the Hitch Recognition feature to function, the auto level
sequence MUST be started with the front of the trailer above
level.
A
B
Troubleshooting
Ensure the trailer is supported at both the front
and rear with jack stands before performing any
troubleshooting or service to the trailer. Failure to
do so may result in death or personal injury.
A
A
Fig.26
Fig.27
Fig.28
Fig.29
Manual Override
Note: For ease of manual override it is recommended to unplug
the power harness to the motor prior to performing the manual
override procedure.
Note: Use of a 12-18 volt cordless screw gun or pneumatic
screw gun is acceptable to manually override the jacks. Do
not use an impact screw gun to perform any of the override
procedures, as this may damage the motor. If manual override
is necessary there are two options.
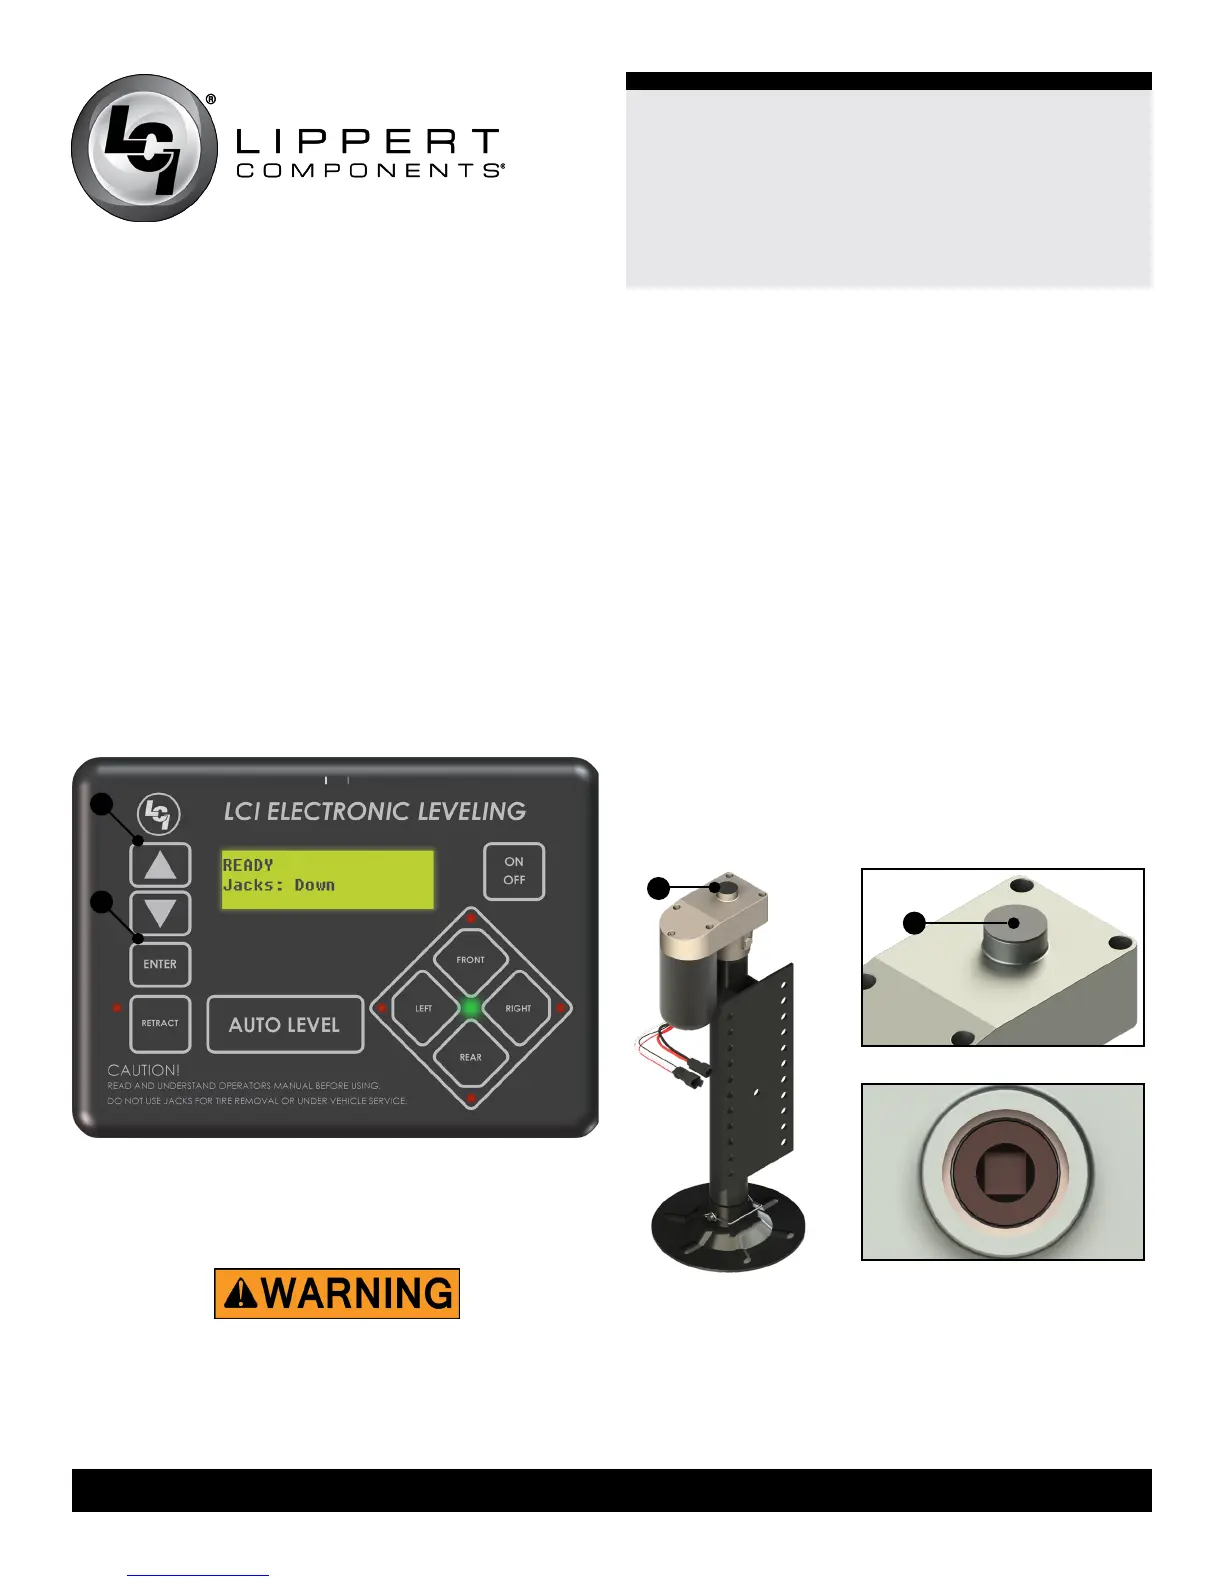
Top of Jack Motor Override
Resources Required: 3/8” drive ratchet and extension (no
socket)
1. Find the port on the top of the jack motor (Fig. 27A).
2. Remove the rubber plug (Fig. 28A).
3. Insert the 3/8” drive into the port (Fig. 29).
4. Turn override until the jack extends or retracts to desired
position.

 Loading...