SCP System • Replacing components
CP_SEM_60-00-00.002 43
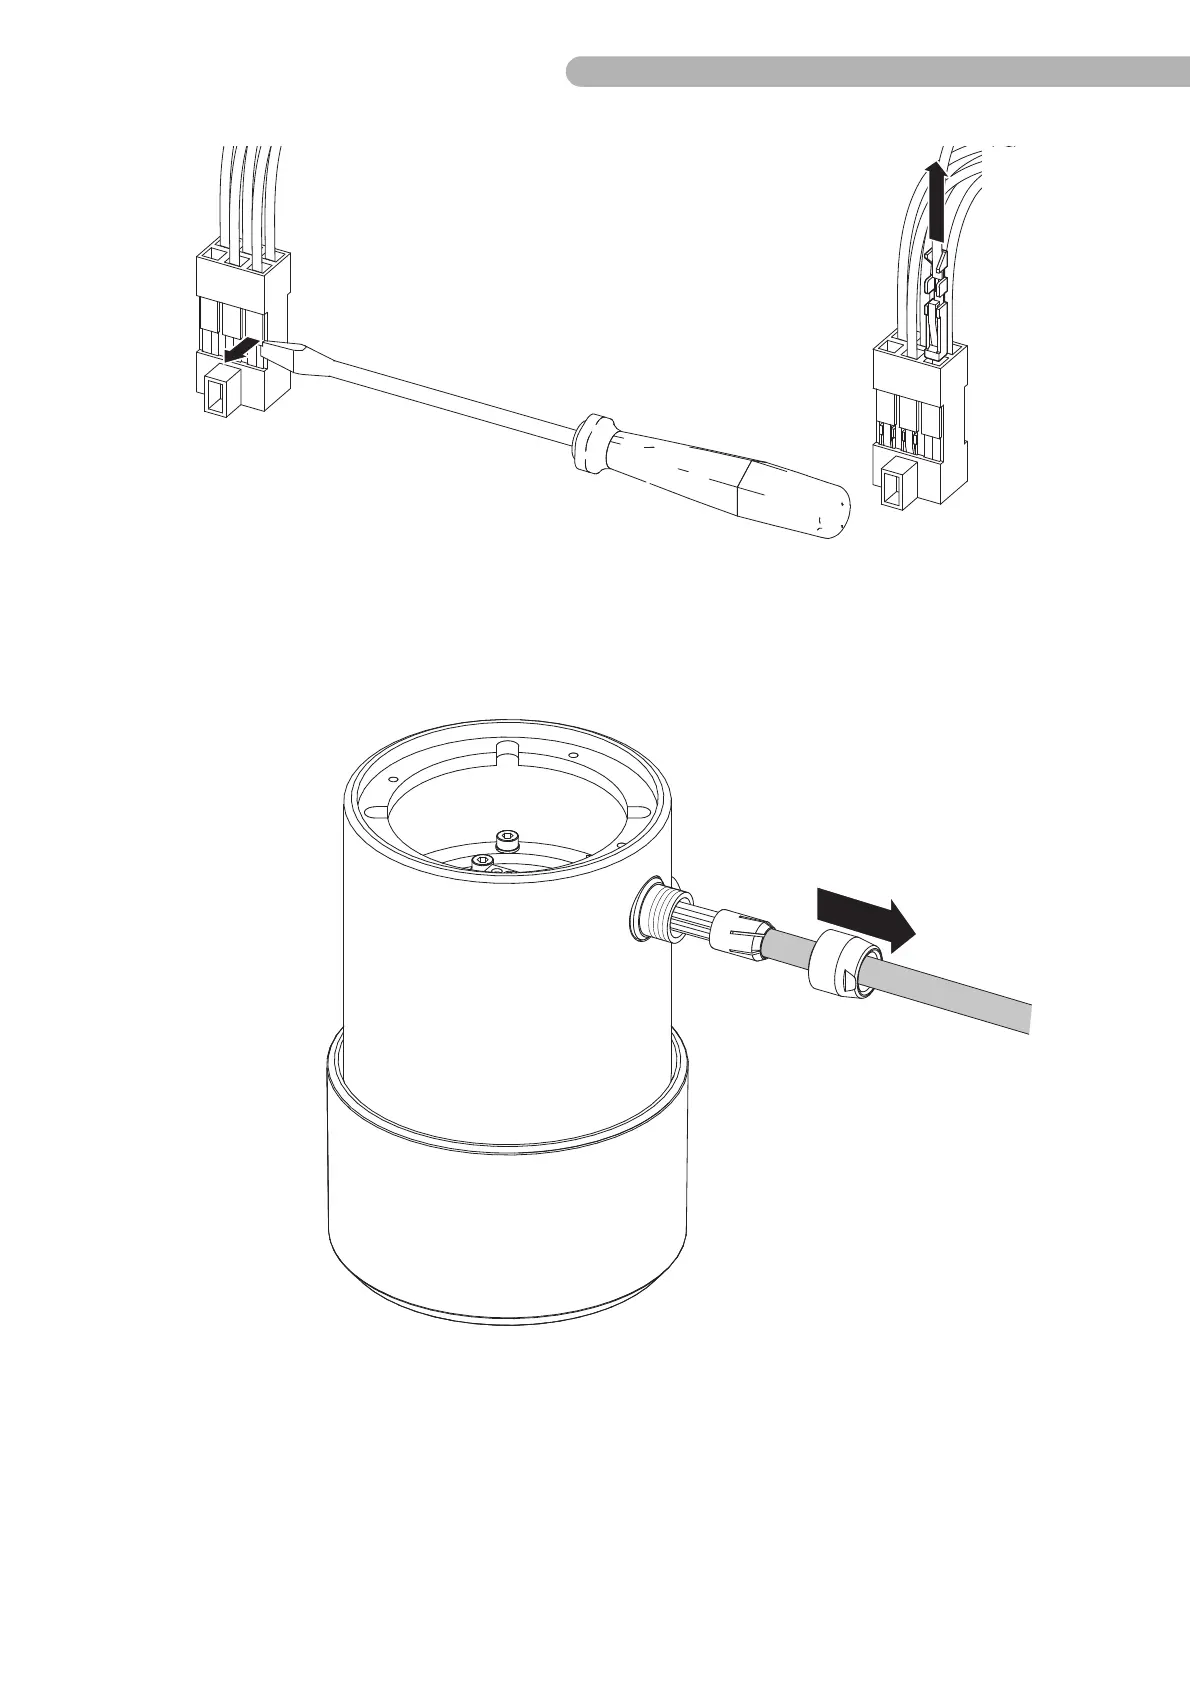
Fig. 28: Dismantling the connecting cable (2)
◗ Release the screw clamps on the current supply B 8 connection (CON1) and pull the cable out.
◗ Bend the holding clips on pump control panel connection B 9 e.g. with a suitable small screwdriver
gently forwards and pull the cable with the crimp contacts out of the casing. Ensure that the
holding clips are not damaged.
Fig. 29: Dismantling the connecting cable (3)
◗ Open the strain relief clamp on the rear of the casing and pull the cable out.
◗ Remove the two sheaths from the old cable. You will need these to re-attach the new cable.
When inserting the new cable (in the reverse order) ensure that the connections are correctly assigned: